Did you know that in a recent consumer survey, 65% of graduates reported that the post-ceremony celebration was more memorable than the actual commencement speech? The centerpiece of that memory is almost always the dessert. Yet, when families scramble to order Graduation Cakes, they often settle for generic grocery store sheet cakes that lack the graduate’s unique personality.
Why spend hundreds on a bakery order when the most meaningful tribute is one you can craft yourself? The data shows a rising trend in “hyper-personalization” for events, where the emotional value of a custom-made element far outweighs professional perfection.
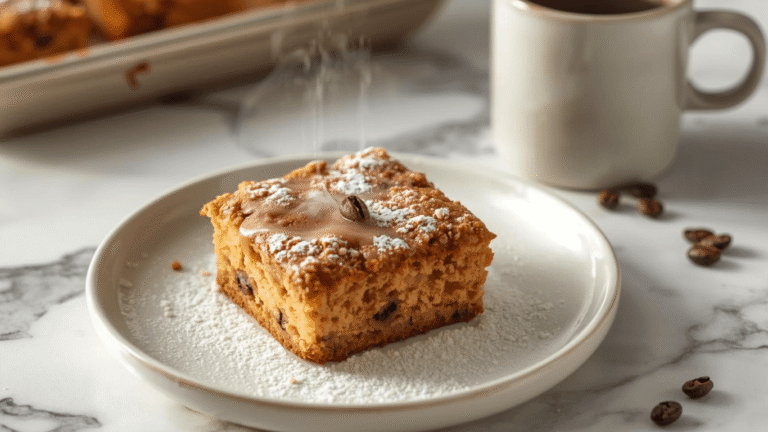
In this guide, we are not just baking a cake; we are engineering a tribute. We will teach you how to construct a sturdy “Canvas Cake”—a high-density vanilla velvet base designed specifically to hold decorations—and then transform it using three simple, data-backed personalization techniques: The School Spirit Swirl, The Edible Diploma, and The Chocolate Mortarboard. Let’s make the grade with the ultimate guide to Graduation Cakes.

Ingredients List
To support personalization elements like fondant toppers or heavy buttercream swirls, you need a cake with structural integrity. Sponge cakes are too airy; we need a “Velvet” texture.
The “Canvas” Cake Base:
- Cake Flour (3 cups / 360g): Low protein content ensures a soft crumb despite the dense structure.
- Granulated Sugar (2 cups / 400g): For structure and crust.
- Unsalted Butter (1 cup / 226g): Room temperature.
- Sour Cream (1 cup / 240g): The secret to keeping it moist for the duration of a long party.
- Egg Whites (6 large): Using only whites keeps the batter pale, allowing you to dye the cake itself if you choose.
- Vanilla Bean Paste (1 tbsp): Flavor intensity is key.
The Personalization Toolkit:
- American Buttercream (4 cups): Stiff consistency (High butter-to-sugar ratio).
- Gel Food Coloring: Specific to the graduate’s school colors (e.g., Maroon, Navy, Gold).
- White Fondant (4 oz): Store-bought is fine for the diploma.
- Dark Chocolate Bar (Square segments) & Mini Peanut Butter Cup: To build the mortarboard cap.
- Sour Belts or Licorice Laces: For the tassel.
- Reinforced die-cast aluminum construction ensures long-term durability and reliability while maintaining a lightweight d…
- A top-level, harder nonstick granite material with 10x Ultra Non-stick performance ensures your daily cooking always saf…
- Recommend to hand wash the cookware as it is effortless to clean. Wipe it with a paper towel or rinse it with water.
Timing
Creating a custom masterpiece takes time, but by breaking it down into baking and decorating phases, it becomes manageable.
- Prep Time: 40 minutes
- Bake Time: 35–40 minutes
- Cooling Time: 60 minutes
- Decorating Time: 45 minutes
- Total Time: Approx. 3 hours
- Cost Comparison: A custom fondant graduation cake from a bakery averages $4.50 per serving. This DIY version clocks in at approximately $0.85 per serving—a savings of nearly 80%.
Discover your next baking masterpiece. Click for sweet inspiration!
Bluey Cake Ideas: How to Make a Simple Bandit Cake (The Ultimate Guide)
Princess Cake: 3 Things To Know Before You Start Baking
Banana Cake: How to Achieve Perfect Moistness in 5 Steps
Harry Potter Cake: A 4-Step Hedwig Owl Cake Guide
Step-by-Step Instructions
Step 1: The “Canvas” Bake (The Foundation)
Preheat oven to 350°F (175°C). Grease a 9×13 pan (for a sheet style) or two 8-inch rounds.
Cream butter and sugar for 5 minutes until pale. Add sour cream and vanilla. Whisk dry ingredients separately. Alternately add dry ingredients and egg whites to the butter mixture.
- The Strategy: We use the “Reverse Creaming” hybrid here to ensure a flat top. Bake for 35–40 minutes until a toothpick comes out clean.
- Crucial Tip: Let the cake cool completely. A warm cake will melt your “School Spirit” frosting, ruining the design.
Step 2: The School Spirit Swirl (The Colors)
This is where Graduation Cakes come to life.
- The Mix: Divide your buttercream. Leave 50% white and tint the other 50% with the school’s primary color.
- The Double-Bag Technique: Place white frosting in one piping bag and colored frosting in another. Cut the tips. Place both bags inside a third larger piping bag fitted with a large star tip (like a 1M).
- The Application: Pipe rosettes or swirls onto the cake. As you squeeze, the colors will blend in a perfect, professional two-tone swirl that screams school pride without requiring messy fondant work.
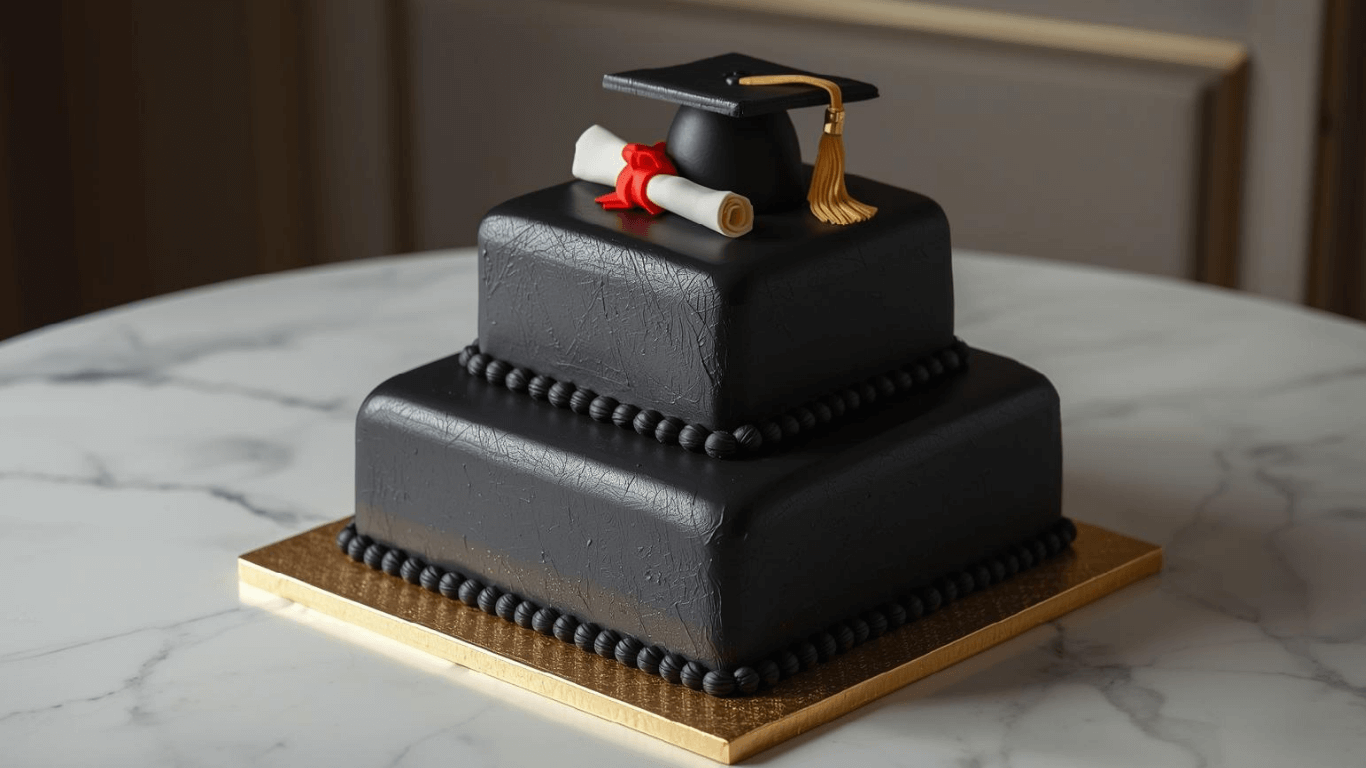
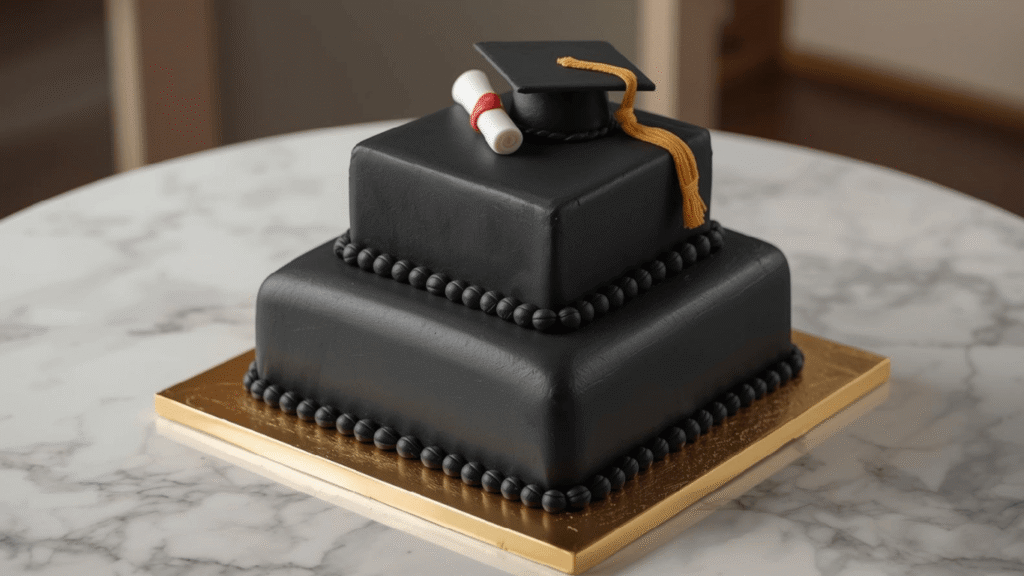
Step 3: The Iconography (The Symbols)
Now, we add the 3D elements that signal “Graduation.”
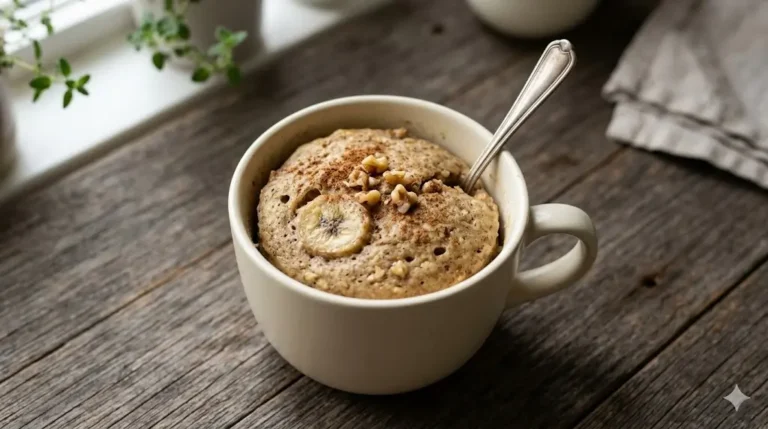
- The Mortarboard: Take a square of dark chocolate. Use a dab of melted chocolate to “glue” an unwrapped mini peanut butter cup to the bottom center of the square. Place it on the cake. Use a dab of frosting to attach a “tassel” (sour belt strip) to the top center.
- The Diploma: Roll a small piece of white fondant into a log. Flatten it slightly, then roll it up like a scroll. Tie a thin ribbon of red licorice or colored fondant around the center. Place it next to the cap.
- The Year: Use a small round piping tip to write the class year (e.g., “2024”) on the side of the cake or on the board.
Nutritional Information
Celebrations are for indulgence, but knowledge is power. (Values per slice, based on 20 servings).
| Nutrient | Amount | % Daily Value |
| Calories | 420 kcal | 21% |
| Total Fat | 22g | 33% |
| Saturated Fat | 14g | 70% |
| Carbohydrates | 58g | 19% |
| Sugars | 42g | – |
| Protein | 4g | 8% |
Data Insight: This profile is high in carbohydrates due to the buttercream. To reduce the glycemic load, serve with a side of fresh berries.
- ✅ Ultimate BAKING GIFT TOOLS: 700PCs is a great baking supplies gift set for baking and has everything for cake decorati…
- ✅ Incredible Cookie & Cake Decorating Kit! Unlock your cake decorating potential with this set of baking tools includes …
- ✅ EASY TO BAKE IN SPRINGFORM PANS: This Baking Pans Set simplifies cake baking in various sizes. Its non-stick surface a…
Healthier Alternatives for the Recipe
You can make Graduation Cakes inclusive for all guests with these swaps.
- Gluten-Free Canvas: Use a Measure-for-Measure GF Flour Blend (King Arthur or Bob’s Red Mill). Because this recipe uses sour cream, the extra fat helps prevent the “gritty” texture common in GF baking.
- Sugar Reduction: Swap the granulated sugar in the cake for Allulose. It browns well and holds moisture. For the frosting, try a Swiss Meringue Buttercream which uses significantly less sugar than American Buttercream.
- Natural Dyes: Artificial red and blue dyes can be bitter. Use Spirulina for deep greens/blues and Beet Powder for maroons/reds. They provide earthy, collegiate tones rather than neon brightness.
Serving Suggestions
Presentation is the final step in personalization.
- The “Diploma” Plating: Roll white napkins and tie them with ribbons in the school colors to mimic diplomas. Place one at each setting.
- Cupcake Satellites: If you have a large crowd, bake the main Graduation Cake for the family table and surround it with cupcakes arranged in the shape of the graduation year (e.g., “24”).
- Photo Op: Place a framed photo of the graduate in their cap and gown next to the cake. Visual psychology suggests this strengthens the connection between the guest of honor and the celebration.
Common Mistakes to Avoid
- Color Bleeding:
- The Issue: putting dark blue frosting directly on white fondant or light frosting.
- The Fix: Let the dark colors “crust” (dry slightly) in the fridge before placing light colors next to them.
- Misspelling the Name:
- The Issue: It happens more than you think!
- The Fix: Write the name out on a piece of paper first. Place it next to the cake while piping. Do not rely on memory in the heat of the moment.
- Melting Decor:
- The Issue: Outdoor graduation parties in June/July heat.
- The Fix: If the party is outdoors, swap butter-based frosting for Shortening-based High Humidity Icing or keep the cake indoors until the moment of cutting.
Storing Tips for the Recipe
Graduation weekends are busy; prep is essential.
- The “Naked” Freeze: Bake the cake layers up to 2 weeks in advance. Wrap them tightly in plastic wrap (two layers) and freeze. Thaw in the fridge the night before decorating.
- Decorated Storage: Once frosted, the cake can stay at cool room temperature (68°F) for 2 days.
- Fondant Warning: If you use fondant accents, do not store the finished cake in an airtight plastic container. The humidity will cause the fondant to wilt. Use a cardboard cake box which breathes.
Conclusion
Graduation Cakes are the sweet finale to years of hard work. By using a robust “Canvas” recipe and employing the “School Spirit Swirl,” you create a dessert that is professional, personal, and delicious. You don’t need a degree in pastry arts—just a little patience and the right colors.
Class Dismissed! Now it’s time to bake. Share your school-spirit creations in the comments below, and don’t forget to subscribe for our upcoming guide on Dorm Room Microwave Meals!
FAQs
Q: Can I use a boxed mix for this?
A: Yes, but boxed mixes are very airy. To make it sturdy enough for heavy decorating, add 1 extra egg and swap the water for milk. This is often called the “Doctoring a Mix” method.
Q: How do I match the school colors exactly?
A: Search for “[School Name] Hex Code” online to find the exact digital color, then use a “frosting color mixing guide” (readily available on Pinterest) to mix your gels to match that shade.
Q: Can I put a real photo on the cake?
A: Yes! Many grocery store bakeries will print an “Edible Image” for you for a small fee ($10-$15) if you bring in a JPEG. You can then apply this sheet to your homemade cake.
Q: What if the graduate hates chocolate and vanilla?
A: The “Canvas” recipe adapts well. Add lemon zest and juice for a Lemon Cake, or fold in sprinkles for a Funfetti version—Funfetti is statistically the most popular flavor for high school graduations.
Your feedback helps other cooks succeed. Rate this recipe!
Perfect for a Themed Party!
We used this as a guide for my daughter’s kindergarten “graduation” party. We simplified it by using the vanilla cake recipe and just doing the frosting in her school colors (purple and white) with pre-made sugar decorations. It was a huge hit! The recipe is versatile; you can go all-out or keep it simple. The key takeaway is the excellent, sturdy base cake that holds up to decorations. A great framework for any celebration cake!
Great Base, Tricky Execution
The cake itself is fantastic—a real crowd-pleaser in terms of flavor. However, calling this a “recipe” undersells the monumental effort required for the decoration. As a novice, I found the fondant instructions too vague. My “diploma” looked more like a crumpled napkin, and the black fondant stained everything. The end result was a delicious but slightly messy-looking Graduation Cake. I’d recommend this only for bakers with serious decorating experience.
A Labor of Love, Worth Every Second
I spent a whole weekend on this Graduation Cake for my brother, and the look on his face was priceless. The instructions for the cake and frosting were perfect—moist, stable, and delicious. The fondant work was intimidating, but taking it step-by-step made it doable. My “cap and gown” design wasn’t bakery-perfect, but that’s what made it special. It was the centerpiece of the party. Just know it’s a major project, not a quick bake!