Why is it that the most touching element of a baptism reception often isn’t the caterer’s menu, but the handwritten note or the homemade dessert? In a world of mass production, a handcrafted element speaks a language of care that money simply cannot buy. Yet, when it comes to baptism cake decorating, many home bakers feel paralyzed by the fear of imperfection, assuming they need years of pastry school to create something worthy of the occasion.
The reality is quite different. The current trend in event styling favors organic textures, fresh florals, and minimalist designs—styles that are surprisingly forgiving and achievable in a home kitchen. By mastering just a few core skills, you can skip the $400 bakery price tag and create a centerpiece that is both visually stunning and deeply sentimental. In this guide, we will bypass the complicated fondant sculpting and focus on five sophisticated, high-impact techniques that transform a simple cake into a symbol of purity and celebration.
Ingredients and Decorating Essentials
To create a “luxury for less” look, the secret isn’t more equipment; it’s better quality ingredients. Here is the streamlined list of essentials for a modern, clean design.
Edible Materials:
- Swiss Meringue Buttercream (SMBC): You will need about 5 cups. We prefer SMBC because it is naturally whiter and silkier than American buttercream, providing that premium “wedding cake” look.
- Modeling Chocolate or Fondant: Just 1 lb is needed for structural accents. Modeling chocolate tastes better, but fondant is easier to find.
- Edible Gold Leaf (24 Karat): A little goes a long way. One booklet is enough to elevate the entire design.
- Gel Food Colors: Think “muted” rather than “bright.” A drop of Navy Blue or Sage Green mixed with a lot of white creates sophisticated pastels.
- Sugar Pearls & Dragees: Opt for a mix of matte white and metallic silver sizes (4mm and 6mm) to create a “bubble” effect.
- Fresh Botanicals: Olive leaves (symbolizing peace) or white Spray Roses are perfect. Ensure they are organic and pesticide-free.
Tools:
- Heavy Turntable: Stability is key for straight lines.
- Acrylic Disk & Stainless Steel Scraper: The combination for razor-sharp edges.
- Piping Tips:
- Tip 1M (Open Star): For lush, cloud-like borders.
- Tip #2 (Small Round): For delicate detailing.
- Cookie Cutters: A “Cross” or “Dove” cutter for uniform shapes.
- Food-Grade Tweezers: For precise placement of gold leaf.
Timing
A stress-free baker is a better artist. Break the work down into phases to keep the process enjoyable.
- Phase 1: Structure (Crumb Coat): 45 Minutes.
- Phase 2: Artistry (Decorating): 75 Minutes.
- Phase 3: Stabilization (Chilling): 30 Minutes.
- Total Project Time: Approximately 2.5 Hours.
Data Insight: While 2.5 hours might seem like an investment, consider the alternative: The average custom cake order requires a 2-week lead time and costs approx. $6.50 per slice. By doing it yourself, you save roughly $250 on a 40-serving cake—money that can be set aside for the child’s future.
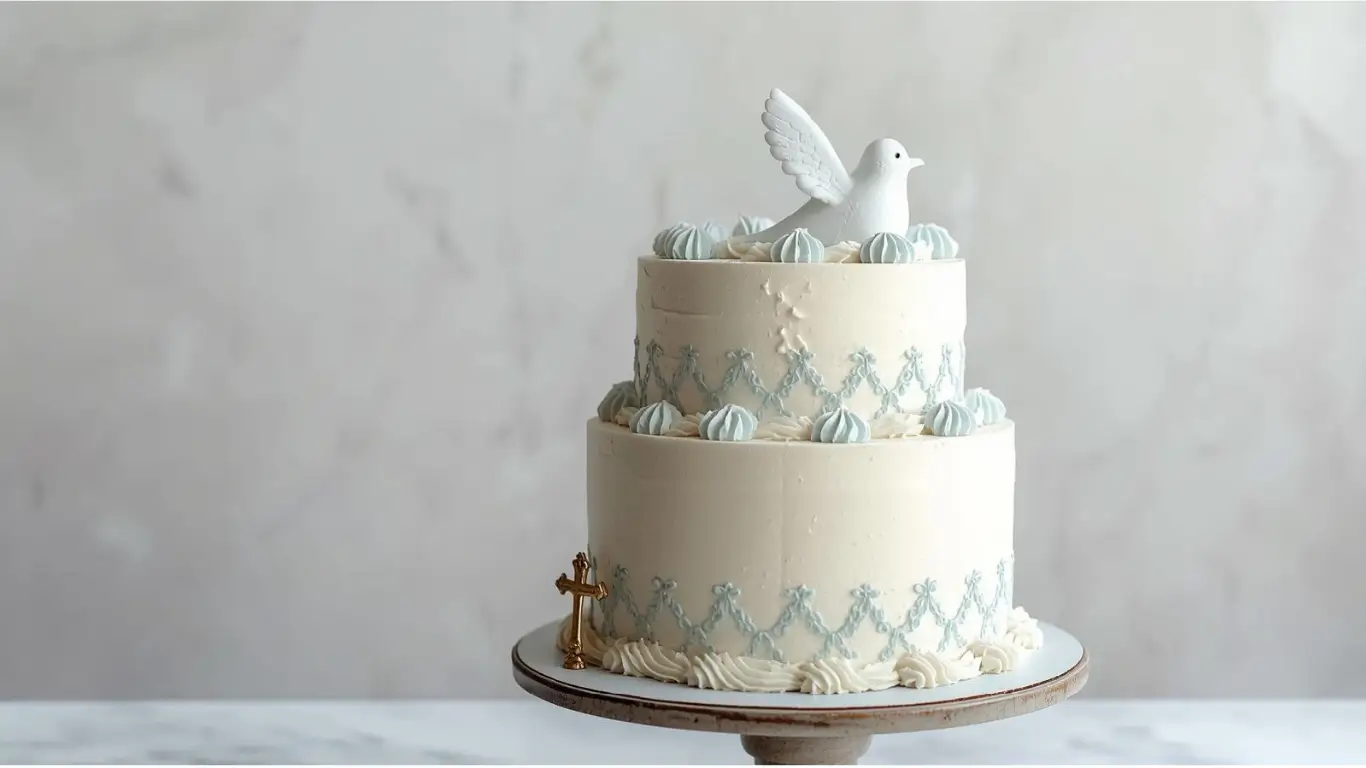
Step-by-Step Instructions: The “Modern Heirloom” Look
We will utilize five specific techniques to build a design that feels timeless yet current.
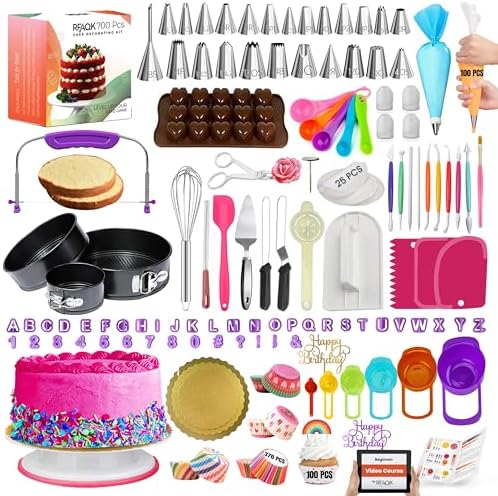
- ✅ Ultimate BAKING GIFT TOOLS: 700PCs is a great baking supplies gift set for baking and has everything for cake decorati…
- ✅ Incredible Cookie & Cake Decorating Kit! Unlock your cake decorating potential with this set of baking tools includes …
- ✅ EASY TO BAKE IN SPRINGFORM PANS: This Baking Pans Set simplifies cake baking in various sizes. Its non-stick surface a…
Step 1: The “Concrete” Smooth (Base Coat)
The most modern baptism cake decorating style relies on sharp, clean edges.
- The Seal: Apply a thin crumb coat to lock in the cake crumbs. Freeze for 15 minutes.
- The Application: Pipe your final layer of buttercream onto the cake using a large piping bag (this ensures even distribution).
- The Heat Hack: Run your metal bench scraper under hot water, dry it, and then glide it around the cake. The heat melts the butter fat just enough to remove air bubbles and create a porcelain-smooth finish.
- The Edge: Pull the excess frosting on the top edge inward toward the center to create sharp corners.
Step 2: The “Imperfect” Texture (Spatula Stucco)
If smooth perfection stresses you out, embrace texture. It is incredibly trendy and hides flaws.
- The Tool: Use a small offset spatula.
- The Motion: Start at the bottom. Press the tip gently into the frosting and swoop upward and to the right in a “C” motion.
- The Pattern: Repeat this randomly all over the cake. The result is an organic, plaster-like effect that looks artistic and intentional, perfect for a rustic-chic baptism.
Step 3: The Braided Border (Piping)
A border grounds the cake visually.
- The Setup: Fit a bag with a 1M tip.
- The Technique: Instead of shells, pipe a continuous “rope.” Pipe a tight spiral that overlaps itself as you move around the cake.
- The Meaning: This continuous line symbolizes the circle of family and faith that has no end.
Step 4: The Metallic Focus (Gold Leaf & Fondant)
This step adds the “wow” factor.
- The Cut: Roll fondant to 3mm thick and cut out a cross shape. Let it dry for an hour to harden.
- The Application: Use a water brush to slightly dampen the fondant surface.
- The Transfer: Use tweezers to lift sheets of gold leaf and gently press them onto the cross. Don’t try to be perfect; the crinkles and cracks in the gold add antique character.
- Placement: Mount this gold cross on the “front” face of the cake.
Step 5: The Living Crown (Floral Arrangement)
Fresh flowers breathe life into the design.
- Prep: Cut stems short (2 inches) and wrap tightly in floral tape.
- Design Rule: Use the “Rule of Three.” Place three main blooms in a cluster (top left or bottom right).
- Filler: Tuck small sprigs of olive leaves or baby’s breath behind the blooms to hide the stems and add volume.
Nutritional Information
It helps to know what you are serving your guests. (Per standard slice with buttercream).

- SET INCLUDES: Two 10-inch x 15-inch cookie pans, Two 9-inch round cake pans, 9-inch square cake pan, 2 loaf pans, 9-inch…
- EVERYDAY DURABILITY: This Rachael Ray nonstick bakeware set features heavy gauge steel construction with rolled-rim bake…
- LONG-LASTING NONSTICK: The baking pans feature long-lasting, latte-colored nonstick inside and out to provide excellent …
- Calories: 460 kcal
- Total Fat: 23g
- Saturated Fat: 11g
- Cholesterol: 75mg
- Sodium: 315mg
- Total Carbs: 58g
- Sugars: 40g
- Protein: 4g
Healthier Alternatives for the Recipe
You can modify the base recipe to be more inclusive without losing the celebratory feel.
- Lighter Frosting: Try a whipped ganache (white chocolate + heavy cream) instead of buttercream. It uses less sugar and has a lighter mouthfeel suitable for daytime events.
- Natural Coloring: Skip the chemical dyes. Blue Spirulina creates a stunning baby blue, while Beetroot Powder yields a soft pink.
- The Semi-Naked Look: Scrape off 80% of the frosting. This “naked cake” style is huge in the wedding and baptism industry right now and significantly cuts the sugar content per serving.
Serving Suggestions
Presentation is the final step of the recipe.
- The Stand: Use a cake stand that contrasts with the cake. A wooden stand warms up a white cake; a glass stand makes it look ethereal.
- The Drink: Pair with a sparkling mocktail—perhaps pear juice with sparkling water and a rosemary sprig. The herbal notes complement the vanilla cake.
- The Ritual: When cutting, have a tall vessel of hot water nearby. Dip your knife, wipe it dry, and cut. This ensures every slice looks as clean as the outside.
Common Mistakes to Avoid
Here are the pitfalls that often trip up first-time decorators:
- The “Warm Cake” Slide: Decorating a cake that hasn’t fully cooled is the #1 recipe for disaster.
- The Fix: Bake your layers the day before and chill them. Cold cake is sturdier and easier to frost.
- Color Overload: Using colors that are too saturated can look cartoonish.
- The Fix: Baptism cakes shine in pastels. Always use less color than you think you need; the color deepens as it sits.
- Flower Safety: Sticking flower stems directly into the cake.
- The Fix: Always use a barrier—floral tape, plastic posy picks, or a straw inserted into the cake to hold the stem.
Storing Tips for the Recipe
Baptisms are busy days; do not leave the cake for the morning of.
- Make Ahead: A fully frosted cake is sealed. It can sit in the fridge for 48 hours and taste perfectly fresh.
- Transport: Place the cake box on the floor of the car, not the seat. The floor is flat; seats are slanted. Blast the AC to keep the buttercream firm.
- Room Temp is Best: Take the cake out of the fridge 3 hours before serving. Cold buttercream has a waxy texture; room-temperature buttercream creates that melt-in-your-mouth experience.
Conclusion
Baptism cake decorating is less about technical perfection and more about intention. By simplifying your design to these five elements—clean lines, intentional texture, symbolic borders, metallic accents, and fresh life—you create something that feels expensive but costs very little. You are not just baking a cake; you are crafting a memory for your family that honors the sacredness of the day.
Feeling inspired? We would love to see your version of the “Modern Heirloom” cake. Tag us on Instagram, share your photos in the comments, or subscribe to our newsletter for more elegant DIY hosting tips and recipes.

- Reinforced die-cast aluminum construction ensures long-term durability and reliability while maintaining a lightweight d…
- A top-level, harder nonstick granite material with 10x Ultra Non-stick performance ensures your daily cooking always saf…
- Recommend to hand wash the cookware as it is effortless to clean. Wipe it with a paper towel or rinse it with water.
FAQs
Q: Can I use American Buttercream instead of Swiss Meringue?
A: Yes, absolutely. American Buttercream (butter + powdered sugar) is sweeter and crusts over, which can be helpful for stability in hot weather. Just be sure to whip it for 5+ minutes to get it white.
Q: How do I fix a bulge in the side of my cake?
A: A bulge usually happens if the filling is too soft. Scrap away the bulge, chill the cake for 20 minutes to firm up the filling, and then re-smooth the area with fresh buttercream.
Q: Is gold leaf safe to eat?
A: Yes, provided you buy “Edible Gold Leaf” (usually 23k or 24k). Do not use “craft” gold leaf, which contains copper and is toxic.
Q: Can I freeze the leftovers?
A: Definitely. Slice the cake, wrap individual slices in plastic wrap, then foil. They will keep in the freezer for up to 3 months—perfect for a sweet reminder later on.
Your feedback helps other cooks succeed. Rate this recipe!
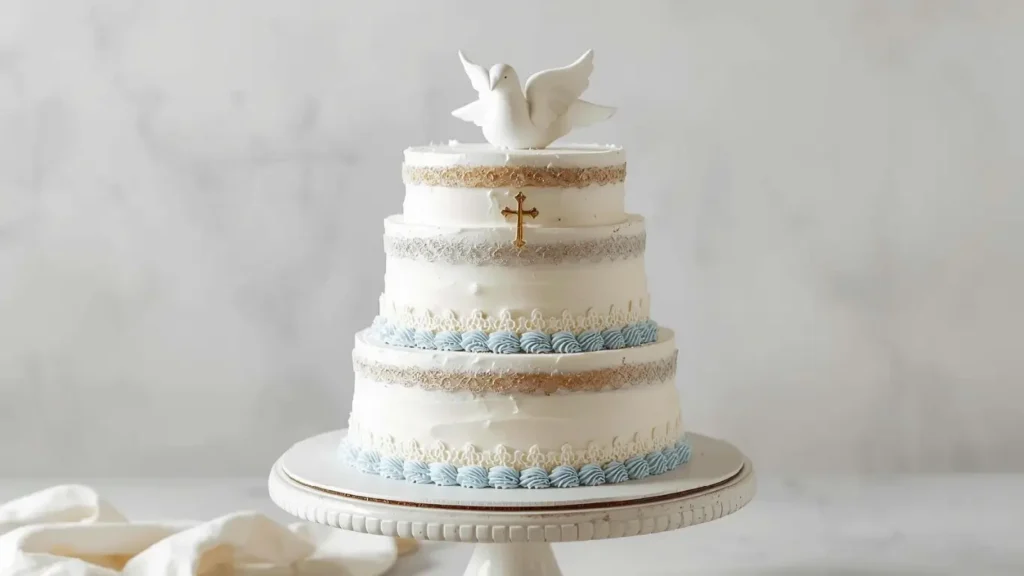
Elegant & Personal—Perfect for Our Twin’s Blessing
Anna, we used your article to create the baptism cake for our sons. The “Ombre Effect” technique (Technique 4) in soft blue was stunning, and we used two fondant doves. Your note about personalization inspired us to add their initials. The step-by-step photos in the full blog post (which we found through this article) were indispensable. This wasn’t just a recipe; it was a guide to creating a heartfelt centerpiece for our celebration. We are so grateful
Clear Instructions, But a Note on Timing
Overall, this is a very helpful guide, Anna. The instructions for achieving smooth buttercream sides (Technique 3) are excellent. However, as a home baker, I found the total active prep and decorating time was closer to 2 hours for me, not 1, especially when working with fondant for the first time. Maybe adding a “beginner buffer” time note would help set more realistic expectations. Still, the results were beautiful and worth the effort!