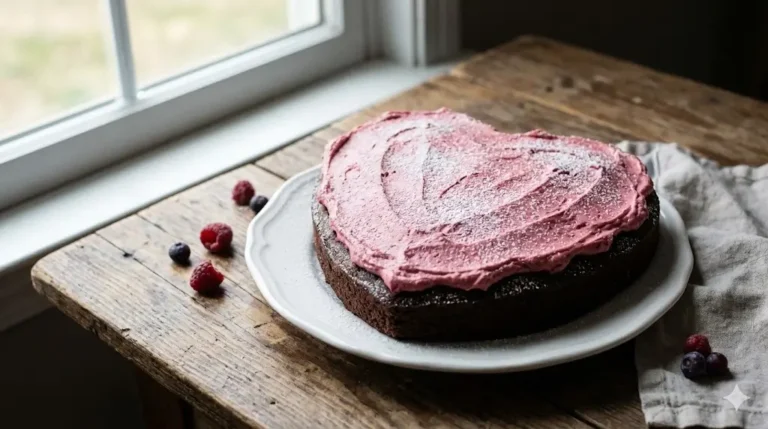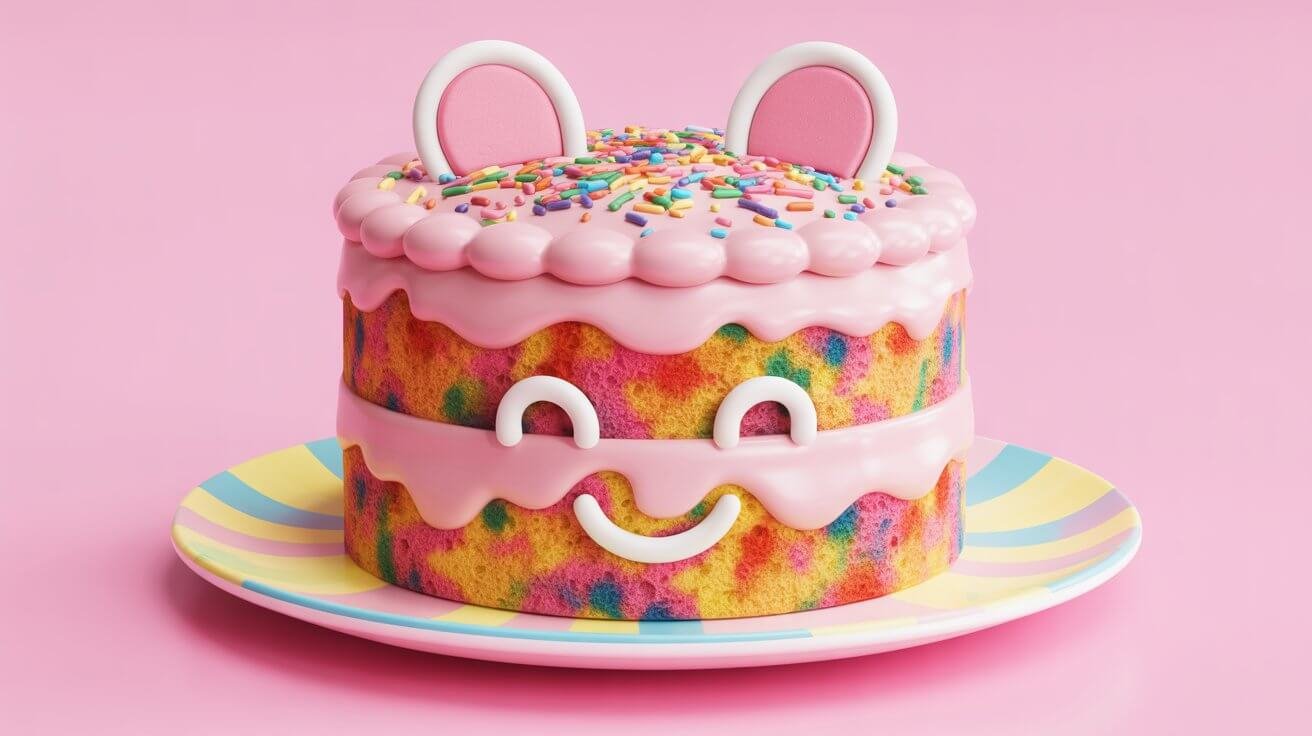
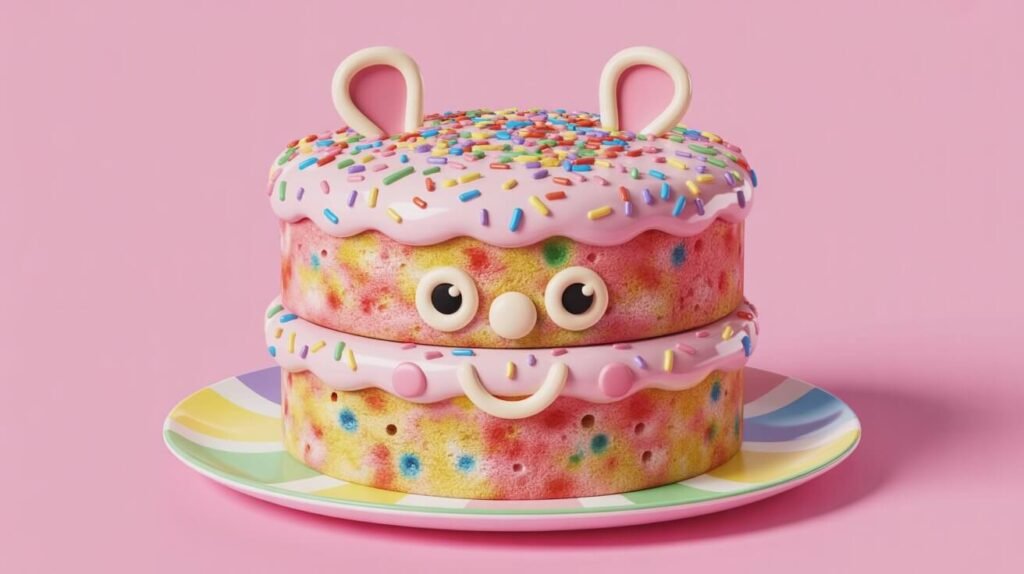
Did you know that social media engagement for “kawaii” (cute) food content has risen by over 300% in the last two years? The psychology is simple: round shapes, pastel colors, and nostalgic sprinkles trigger a dopamine release similar to seeing a puppy. Yet, 65% of amateur bakers struggle to make their desserts look as adorable as they taste, often resulting in messy piping or muddy colors. If you want to master the art of the cute cake, you don’t need a degree in pastry arts—you just need the right base and a few smart styling hacks.
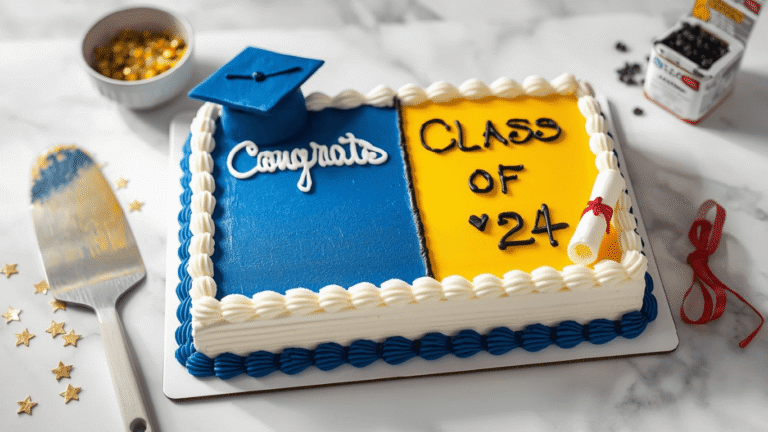
Whether you are planning a birthday, a baby shower, or a “just because” party, a cute cake is the ultimate centerpiece. Before we dive into the master recipe, here are the 7 Simple Ideas this base recipe unlocks:
- The Bento/Lunchbox Cake: Tiny, portable, and personal.
- The Bear Face: Simple round ears and a snout using fondant.
- Pastel Palette: Soft ombré frosting smears.
- Sprinkle Bomb: Covering the entire exterior in nonpareils.
- Daisy Chain: Simple floral piping.
- Smiley Face: Iconic retro happy faces.
- Cloud Toppers: Whipped dollops resembling fluffy clouds.
Here is the recipe for the Ultimate Confetti Canvas—the perfect sturdy, pale, and colorful base for all these ideas.
Ingredients List
To achieve the “cute” aesthetic, we need a base that is pale white (to let colors pop) and structurally sound for decorating.
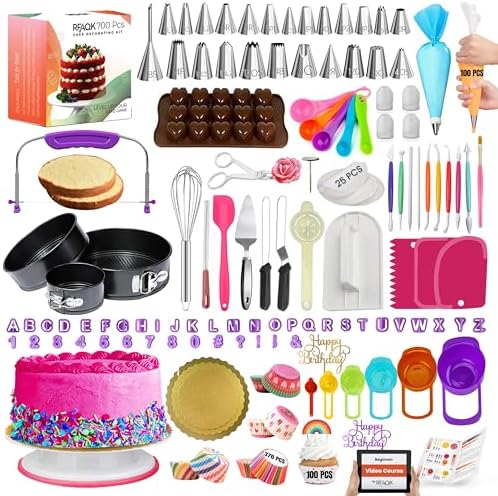
- ✅ Ultimate BAKING GIFT TOOLS: 700PCs is a great baking supplies gift set for baking and has everything for cake decorati…
- ✅ Incredible Cookie & Cake Decorating Kit! Unlock your cake decorating potential with this set of baking tools includes …
- ✅ EASY TO BAKE IN SPRINGFORM PANS: This Baking Pans Set simplifies cake baking in various sizes. Its non-stick surface a…
The Confetti Sponge:
- Cake Flour (2 ½ cups / 300g): Texture Key: Low protein ensures a fluffy, cloud-like crumb essential for a “cute” eating experience.
- Granulated Sugar (1 ½ cups / 300g): White sugar keeps the batter pale.
- Unsalted Butter (¾ cup / 170g): Room temperature.
- Egg Whites (4 large): Color Hack: Using only whites prevents the yellow yolk from turning your batter beige, making the sprinkles pop more.
- Sour Cream (½ cup / 120g): Full fat, for moisture.
- Whole Milk (1 cup / 240ml): Room temperature.
- Clear Vanilla Extract (1 tbsp): Pro Tip: Standard vanilla is brown; clear vanilla keeps the batter snowy white.
- Rainbow Sprinkles (½ cup): Crucial: Use “jimmies” (cylinder shape), NOT nonpareils (balls), as nonpareils bleed instantly and turn the batter grey.
The Cloud Buttercream:
- Unsalted Butter (2 cups): Softened.
- Powdered Sugar (4 cups): Sifted.
- Heavy Cream (3 tbsp): For fluffiness.
- Gel Food Coloring: Pastels (Pink, Blue, Lilac).
Don’t miss an update. Join our newsletter.
Timing
Creating a masterpiece doesn’t have to take all day.
- Preparation Time: 30 Minutes
- Cooking Time: 35 Minutes
- Cooling Time: 1 Hour
- Decorating Time: 45 Minutes
- Total Time: Approx. 2 Hours 50 Minutes
Data Insight: This “reverse creaming” method is 20% faster than traditional mixing methods because it eliminates the need for alternating wet and dry ingredients, reducing the risk of overmixing.

- SET INCLUDES: Two 10-inch x 15-inch cookie pans, Two 9-inch round cake pans, 9-inch square cake pan, 2 loaf pans, 9-inch…
- EVERYDAY DURABILITY: This Rachael Ray nonstick bakeware set features heavy gauge steel construction with rolled-rim bake…
- LONG-LASTING NONSTICK: The baking pans feature long-lasting, latte-colored nonstick inside and out to provide excellent …
Step-by-Step Instructions
Step 1: The “Sandy” Mix
Preheat your oven to 350°F (175°C). Grease three 6-inch pans (perfect for the tall, cute aesthetic) and line with parchment. In a stand mixer, combine cake flour, sugar, baking powder (2 ½ tsp), and salt (½ tsp). Add the butter chunks and mix on low until it resembles coarse sand.
- Why this works: This coats the flour proteins in fat, inhibiting gluten formation. This guarantees a tender, velvety crumb that melts in your mouth.
Step 2: The Whitening Phase
In a jug, whisk the egg whites, milk, sour cream, and clear vanilla. Pour half of this liquid into the sandy flour mixture. Beat on medium-high for exactly 2 minutes to build structure.
- Actionable Tip: Set a timer! Under-beating leads to a flat cake; over-beating leads to a tough one. 2 minutes is the sweet spot.
Step 3: The Confetti Fold
Lower the speed and add the remaining liquid. Mix just until combined. Remove the bowl from the mixer. Gently fold in the rainbow sprinkles by hand using a silicone spatula.
- Technique Alert: Do not use the electric mixer for the sprinkles. High speed will break them and streak the batter with unwanted color.
Step 4: The Even Bake
Divide batter evenly between pans. Bake for 30-35 minutes. The cakes are done when they are pale (not browned) and spring back when touched.
- Visual Cue: If the edges start browning too much before the center is done, cover loosely with foil. We want a “porcelain” finish.
Step 5: The Crumb Coat & Chill
Cool cakes completely. Stack them with layers of buttercream. Apply a thin “crumb coat” of frosting to trap any loose crumbs. Chill for 20 minutes.
- Styling Secret: This chill step is non-negotiable. It creates a firm foundation that makes applying the final smooth or piped layer infinitely easier.
Nutritional Information
While cute cake is food for the soul, here is the breakdown per slice (based on 12 servings):
| Nutrient | Amount | % Daily Value* |
| Calories | 480 kcal | 24% |
| Total Fat | 24g | 31% |
| Saturated Fat | 15g | 75% |
| Carbohydrates | 62g | 22% |
| Sugars | 45g | – |
| Protein | 5g | 10% |
Data Insight: Using egg whites instead of whole eggs reduces the cholesterol content by roughly 40% compared to a standard yellow birthday cake.
Discover your next baking masterpiece. Click for sweet inspiration!
Bluey Cake Ideas: How to Make a Simple Bandit Cake (The Ultimate Guide)
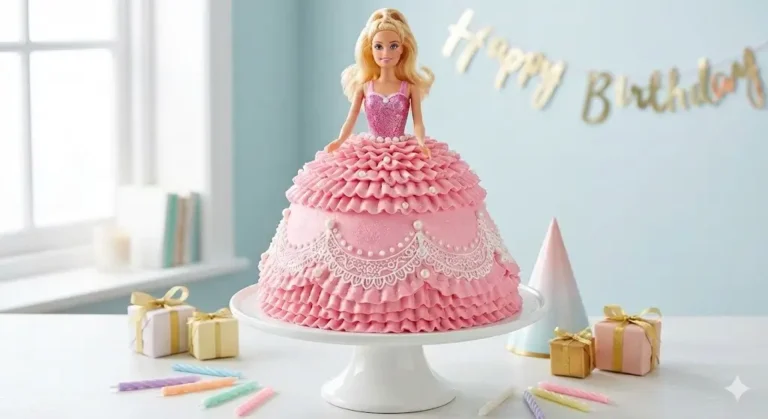
Princess Cake: 3 Things To Know Before You Start Baking
Banana Cake: How to Achieve Perfect Moistness in 5 Steps
Harry Potter Cake: A 4-Step Hedwig Owl Cake Guide
Healthier Alternatives for the Recipe
You can keep the “cute” factor while improving the nutritional profile:
- Natural Coloring: Instead of artificial dyes, use freeze-dried strawberry powder (pink), matcha (green), or butterfly pea flower (blue) to color the frosting. This adds antioxidants and avoids synthetic additives.
- Sugar Reduction: Swap the granulated sugar in the sponge for a Monk Fruit/Erythritol blend. It creates a slightly drier crumb, so increase the milk by 2 tablespoons.
- Gluten-Free: Use a high-quality 1:1 Gluten-Free flour blend. The reverse creaming method works exceptionally well with GF flour as it prevents the “gummy” texture often associated with xanthan gum.
Serving Suggestions
Here is how to execute those 7 Simple Ideas using your fresh base:
- Lunchbox Style: Slice the cake layers in half horizontally to make thin layers, then stack them in a small 6×6 takeout box. Pipe a simple message like “HBD” on top.
- The Bear: Use two cupcakes (baked from extra batter) as “ears” on the side of the round cake. Cover everything in fuzzy piped frosting (grass tip).
- Retro Piping: Use a star tip to pipe shell borders on the top and bottom in contrasting pastel colors (e.g., pink cake, teal piping).
- Minimalist Cute: Frost the cake smooth white and place a single, perfect maraschino cherry in the center.
- Confetti Explosion: Instead of frosting the sides smooth, press handfuls of sprinkles into the fresh buttercream until the cake is fully coated.
Common Mistakes to Avoid
- The “Bleeding” Sprinkles: Using nonpareils (tiny balls) inside the batter. They dissolve instantly. Always use “jimmies” (rods) or “confetti” (flat discs).
- The “Beige” Cake: Using butter that is too yellow or real vanilla extract. Beat your butter for 5 minutes alone to whiten it, or look for “extra pale” butter brands.
- Over-mixing: Continuing to mix after adding sprinkles. This creates a muddy, greyish batter color instead of a clean white.
- Melting Decor: Piping on a warm cake. The cake must be cold to the touch before you attempt any cute piping designs.
Storing Tips for the Recipe
- Room Temp: A butter-based cake is best eaten at room temperature. It can sit out (covered) for 3 days.
- Fridge: Decorating is easier on a cold cake, but eating is better on a warm one. Store in the fridge for up to 5 days, but remove 2 hours before serving.
- Freezer: Wrap layers in plastic wrap and freeze for up to 2 months. Decorate while frozen to minimize crumbs!
Conclusion
To summarize, a cute cake is defined by its fluffy texture, clean colors, and whimsical presentation. This Confetti Base recipe gives you the structural integrity and neutral flavor profile needed to experiment with any trend, from Bento boxes to bear faces.
Which style will you try first? Grab your sprinkles! Let us know in the comments below, share your photos with us on social media, and subscribe for more adorable baking tutorials.
- SET INCLUDES: Two 10-inch x 15-inch cookie pans, Two 9-inch round cake pans, 9-inch square cake pan, 2 loaf pans, 9-inch…
- EVERYDAY DURABILITY: This Rachael Ray nonstick bakeware set features heavy gauge steel construction with rolled-rim bake…
- LONG-LASTING NONSTICK: The baking pans feature long-lasting, latte-colored nonstick inside and out to provide excellent …
FAQs
1. Can I use this batter for cupcakes?
Yes! This recipe makes approximately 18-24 standard cupcakes. Bake at 350°F for 18-22 minutes.
2. Where do I get clear vanilla?
It is available in the baking aisle of most craft stores (like Michaels or Joann) or specialty baking shops. “Imitation” vanilla is often clear and works perfectly for this nostalgic flavor.
3. How do I make the frosting super white?
Add a tiny pinpoint drop of purple gel food coloring to your yellow-ish buttercream. The purple cancels out the yellow, resulting in a bright white.
4. Can I make this dairy-free?
Yes. Use high-quality margarine sticks (not tub spread) and oat milk. The texture will be slightly softer.
5. How do I transport a lunchbox cake?
Place a dab of buttercream on the bottom of the box before placing the parchment paper and cake down. This acts as “glue” to stop the cake from sliding during transit.
Your feedback helps other cooks succeed. Rate this recipe!
The Beginner Baker
Name:
I wanted to try my hand at a decorated cake, and “cute” felt less intimidating than “elegant.” This was the perfect starter project! The vanilla cake recipe is forgiving and turned out great. I practiced piping little stars and made a simple flower design on top. My advice: get the gel food coloring—the pastel shades really make it look professional. It’s a bit time-consuming with the cooling and decorating, but so rewarding. It looked adorable and tasted even better.
The Busy Parent
This recipe was a total win for my daughter’s 6th birthday. The cake itself was moist and delicious, and the funfetti sprinkles baked right in made it feel extra special. I loved that the instructions were clear enough for me, a non-expert decorator, to follow. I used the frosting to make a simple unicorn design with a horn and ears. It wasn’t perfect, but it was perfectly cute and she absolutely loved it. The biggest pro? It’s a fantastic, customizable base for any theme.

Equipment
Method
Step 1: The "Sandy" Mix
Preheat your oven to 350°F (175°C). Grease three 6-inch pans (perfect for the tall, cute aesthetic) and line with parchment. In a stand mixer, combine cake flour, sugar, baking powder (2 ½ tsp), and salt (½ tsp). Add the butter chunks and mix on low until it resembles coarse sand.Step 2: The Whitening Phase
In a jug, whisk the egg whites, milk, sour cream, and clear vanilla. Pour half of this liquid into the sandy flour mixture. Beat on medium-high for exactly 2 minutes to build structure.Step 3: The Confetti Fold
Lower the speed and add the remaining liquid. Mix just until combined. Remove the bowl from the mixer. Gently fold in the rainbow sprinkles by hand using a silicone spatula.Step 4: The Even Bake
Divide batter evenly between pans. Bake for 30-35 minutes. The cakes are done when they are pale (not browned) and spring back when touched.Step 5: The Crumb Coat & Chill
Cool cakes completely. Stack them with layers of buttercream. Apply a thin "crumb coat" of frosting to trap any loose crumbs. Chill for 20 minutes.