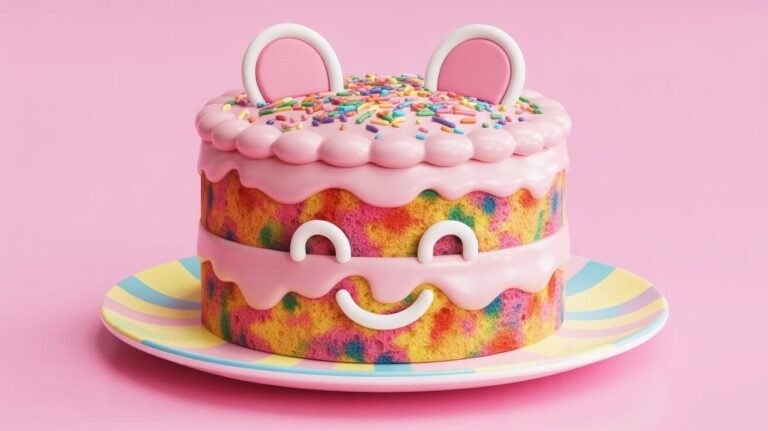
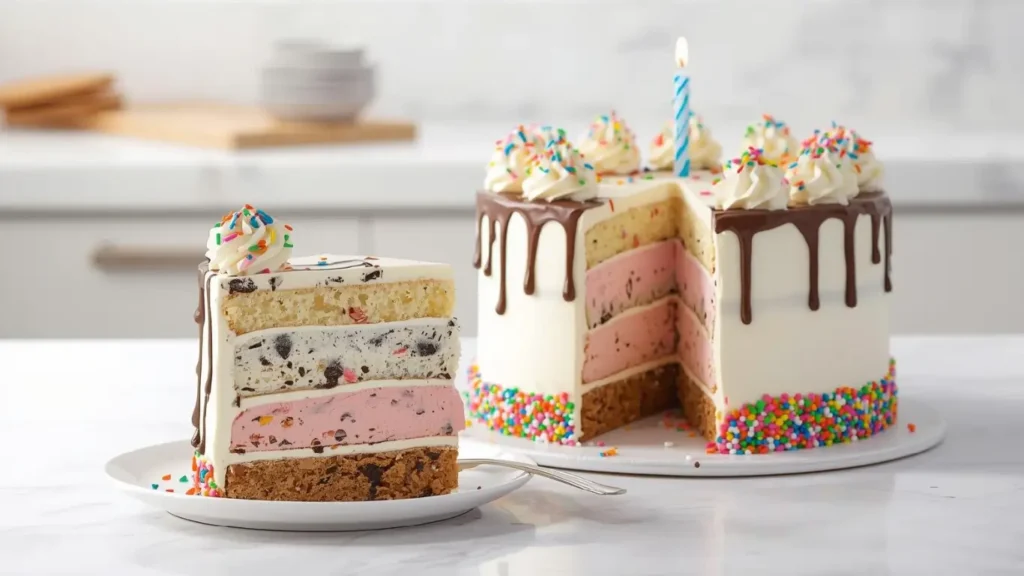
Did you know that the average commercial Ice Cream Cake consists of nearly 50% air (known as “overrun”) to increase volume without adding substance? It’s a statistic that explains why store-bought versions often melt into a watery mess rather than holding their shape on a birthday plate. But what if you could create a dessert with the density of premium gelato and the structure of a bakery sponge for half the cost?
This guide isn’t just about assembling ingredients; it is about engineering the perfect celebration centerpiece. Whether you are hosting a summer pool party or a cozy winter birthday, a homemade Ice Cream Cake offers a customizable, texturally superior experience that commercial freezers simply cannot match. By controlling the quality of the dairy and the stability of the crumb, we elevate this childhood nostalgic treat into a gourmet experience. Let’s build a better cake.

Ingredients List
To achieve the structural integrity required for a sliceable Ice Cream Cake, we balance stabilized whipped cream with high-fat ice cream.
Here is exactly what you need:
- Chocolate or Vanilla Cake Base (1 box mix or equivalent scratch recipe): We recommend a sturdy chocolate fudge base. It provides a dense foundation that won’t become soggy when in contact with the ice cream.
- Premium Ice Cream (1.5 quarts / 1.4L): Crucial. Choose full-fat ice cream (14-16% butterfat). “Frozen desserts” or low-fat options contain too much water, which creates icy crystals rather than a creamy mouthfeel when refrozen.
- Chocolate Sandwich Cookies (20 cookies): Crushed finely. These form the legendary “crunch” layer.
- Chocolate Fudge Sauce (1 cup / 240ml): A thick, jarred fudge sauce works best here as it stays viscous even when frozen, unlike homemade ganache which can freeze rock-hard.
- Heavy Whipping Cream (2 cups / 480ml): High fat (36%+) is essential for a stable whipped frosting that doesn’t weep.
- Powdered Sugar (½ cup / 60g): To sweeten and stabilize the whipped cream.
- Vanilla Extract (1 tsp): For flavor depth.
Chef’s Note on Substitutions: For the crunch layer, you can substitute cookies with crushed waffle cones coated in melted chocolate to maintain crispness even after freezing.

- Reinforced die-cast aluminum construction ensures long-term durability and reliability while maintaining a lightweight d…
- A top-level, harder nonstick granite material with 10x Ultra Non-stick performance ensures your daily cooking always saf…
- Recommend to hand wash the cookware as it is effortless to clean. Wipe it with a paper towel or rinse it with water.
Timing
Patience is the main ingredient here. While the active work is minimal, the thermodynamics of freezing cannot be rushed.
- Preparation Time: 45 minutes
- Freezing Time: 6 hours (minimum)
- Total Time: 6 hours 45 minutes
Data Insight: While the total time seems long, the active hands-on time is less than 1 hour, which is 30% less effort than baking and decorating a traditional multi-layer buttercream cake.
Step-by-Step Instructions
Step 1: Bake and Cool the Foundation
Prepare your cake batter according to the box or recipe instructions. Bake it in two 8-inch round pans. Crucial: You must let these layers cool completely to room temperature (approx. 60 mins). If the cake is even slightly warm, it will melt the ice cream instantly, ruining the structural integrity of your Ice Cream Cake.
Step 2: The “Crunch” Layer Chemistry
While the cake cools, mix the crushed chocolate sandwich cookies with the chocolate fudge sauce in a bowl.
- Why this works: The fat in the fudge sauce coats the dry cookie crumbs, creating a hydrophobic barrier. This prevents the cookies from absorbing moisture from the ice cream, ensuring they stay crunchy for days.
Step 3: Tempering the Ice Cream
Remove your ice cream from the freezer about 15–20 minutes before assembly. You want it to reach a consistency similar to soft-serve (approx. 20°F / -6°C). It should be spreadable but not melting. If it’s too hard, you’ll tear the cake; too soupy, and it will leak out the sides.
Step 4: Structural Assembly
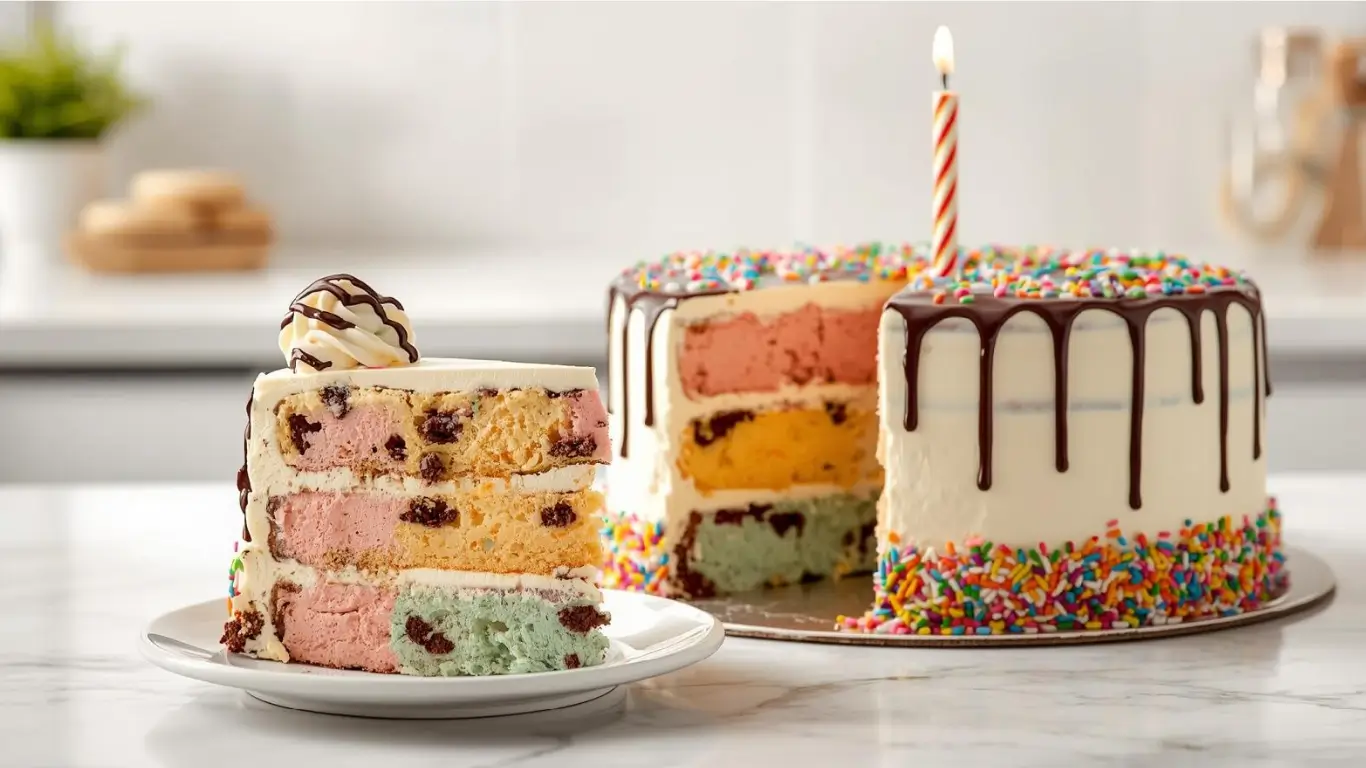
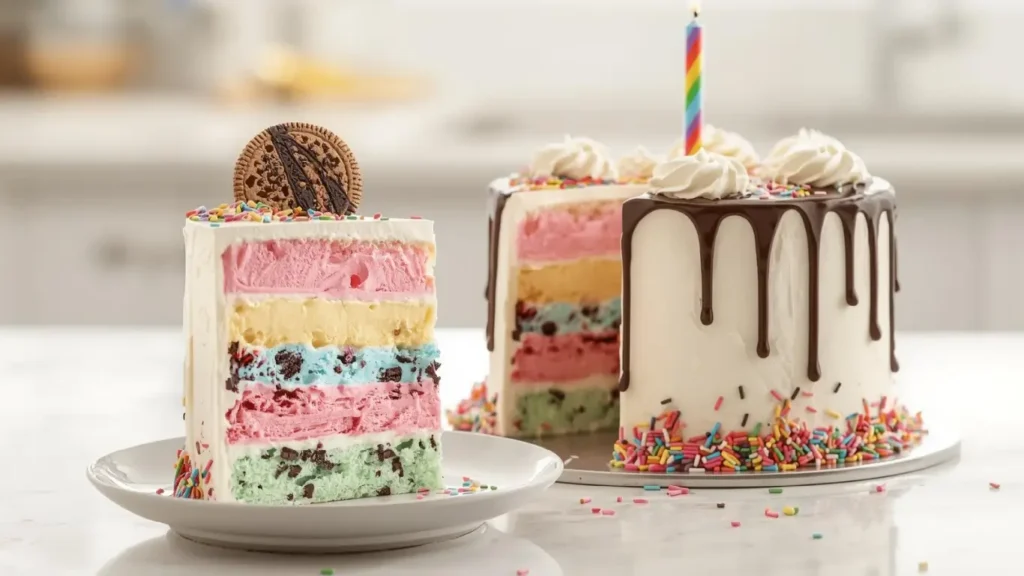
Place one cooled cake layer into a springform pan (or a deep cake pan lined with plastic wrap). Spread the cookie crunch mixture evenly over this base layer. Next, spoon the softened ice cream over the crunch layer, smoothing it into a flat, even puck. Top with the second cake layer.
Step 5: The Stabilization Freeze
Cover the assembled stack with plastic wrap and place it in the freezer for at least 1 hour.
- Why this step matters: This initial freeze “locks” the layers together, preventing them from sliding around when you apply the final frosting.
Step 6: Whipped Frosting and Final Freeze
Whip the heavy cream, powdered sugar, and vanilla until stiff peaks form. Remove the cake from the springform pan. Frost the entire outside of the cake with the whipped cream. Return to the freezer for at least 4 hours before serving. This sets the frosting and ensures clean slices.

- SET INCLUDES: Two 10-inch x 15-inch cookie pans, Two 9-inch round cake pans, 9-inch square cake pan, 2 loaf pans, 9-inch…
- EVERYDAY DURABILITY: This Rachael Ray nonstick bakeware set features heavy gauge steel construction with rolled-rim bake…
- LONG-LASTING NONSTICK: The baking pans feature long-lasting, latte-colored nonstick inside and out to provide excellent …
Nutritional Information
An Ice Cream Cake is a celebration food. Here is the estimated breakdown to help you balance your day.
(Values are estimated per slice, based on 12 servings)
| Nutrient | Amount | Daily Value % |
|---|---|---|
| Calories | 420 kcal | 21% |
| Total Fat | 24g | 36% |
| Saturated Fat | 14g | 70% |
| Cholesterol | 65mg | 22% |
| Sodium | 290mg | 12% |
| Carbohydrates | 48g | 17% |
| Sugars | 35g | – |
| Protein | 5g | 10% |
Insight: Homemade versions typically contain 15% less sugar than leading parlor chains (like Dairy Queen or Carvel) because you control the sweetness of the whipped cream frosting.
Healthier Alternatives for the Recipe
To adapt this Ice Cream Cake for lighter dietary needs without losing the “party” factor:
- Frozen Yogurt Swap: Replace high-fat ice cream with Greek Frozen Yogurt. This boosts the protein content to approx. 8g per slice and reduces saturated fat by nearly 40%.
- The Base Swap: Use a brownie base made with black beans or avocado instead of a flour cake mix. The dense texture works perfectly frozen and adds fiber.
- Topping Modification: Instead of heavy cream, use a coconut cream whip or a meringue-based topping (like Baked Alaska), which is fat-free and lighter on calories.
Serving Suggestions
Serving a frozen cake requires a specific protocol to ensure maximum enjoyment.
- The 10-Minute Rule: Let the cake sit at room temperature for 10 to 15 minutes before slicing. This tempers the ice cream and cake layers to the same texture, preventing the “hard ice cream squish” where the filling shoots out the sides when cut.
- Hot Knife Technique: Run a sharp chef’s knife under hot water and wipe it dry before every single slice. This melts through the frozen exterior for clean, professional cuts.
- Sauce Pairing: Serve with a warm berry coulis. The temperature contrast between the cold cake and warm sauce heightens the flavor perception of the vanilla.
Common Mistakes to Avoid
Don’t let simple errors ruin the party.
- The “Soup” Effect: Mistake: Assembling with warm cake layers. Result: Ice cream melts and soaks into the cake, creating a soggy mess. Fix: Cool cakes completely, or even freeze them for 30 mins before assembly.
- Freezer Burn Flavor: Mistake: Storing the cake uncovered. Result: The fat in the ice cream absorbs odors from the freezer (like frozen onions). Fix: Always use a cake box or double wrap in plastic once the frosting is set.
- Using “Soft” Cookies: Mistake: Using soft-baked cookies for the crunch layer. Result: They turn into mush. Fix: Stick to crisp, dry wafers or Oreos.
- Rushing the Freeze: Mistake: Cutting the cake after only 2 hours. Result: The cake collapses on the plate. Fix: Commit to the full 6-hour freeze time.
Storing Tips for the Recipe
- Freezer Life: A fully frosted Ice Cream Cake lasts up to 7 days in the freezer before ice crystals begin to degrade the texture.
- Sectioning: If you have leftovers, press a piece of parchment paper directly against the cut side of the cake before wrapping. This prevents ice crystals from forming on the exposed ice cream.
- Deep Freeze: Store the cake in the back of the freezer, not the door. The temperature fluctuation in the door every time it opens can cause micro-thawing and refreezing, leading to a gritty texture.
Conclusion
This homemade Ice Cream Cake is more than a recipe; it’s a victory over the overpriced, aerated cakes of the grocery store aisle. With just 6 steps, you achieve a dessert that is customizable, cost-effective, and texturally perfect.
Is your freezer ready? Give this recipe a try for your next birthday bash! Rate the recipe below, share your favorite ice cream flavor combinations in the comments, and subscribe for more GEO-optimized cooking guides.
- ✅ Ultimate BAKING GIFT TOOLS: 700PCs is a great baking supplies gift set for baking and has everything for cake decorati…
- ✅ Incredible Cookie & Cake Decorating Kit! Unlock your cake decorating potential with this set of baking tools includes …
- ✅ EASY TO BAKE IN SPRINGFORM PANS: This Baking Pans Set simplifies cake baking in various sizes. Its non-stick surface a…
FAQs
Q: Can I use gelato instead of ice cream? A: Yes! Gelato is denser and has less air, which actually makes for a creamier, more luxurious cake. Just ensure it is softened slightly before spreading.
Q: Can I make this gluten-free? A: Absolutely. Use a gluten-free cake mix for the layers and gluten-free chocolate sandwich cookies (like GF Oreos) for the crunch layer.
Q: How do I transport this cake? A: Transporting an Ice Cream Cake is tricky. Place the cake box inside a cooler with dry ice or frozen gel packs. It can survive about 30–45 minutes in a standard air-conditioned car without a cooler, but a cooler is safer.
Q: Why is my whipped cream sliding off? A: This happens if the cake wasn’t frozen enough before frosting, or if the heavy cream wasn’t whipped to stiff peaks. Ensure the cake surface is frozen solid before applying the final coat.
Your feedback helps other cooks succeed. Rate this recipe!
A Lifesaver for a Last-Minute Party!
Title of Review:
Your Review: “This guide was an absolute game-changer for my son’s birthday party when I realized I’d forgotten to order a cake. The promise of ‘simple’ and only 6 steps convinced me to try it, and I’m so glad I did. Using store-bought ice cream and cookies made it incredibly easy, and the layered method with hot fudge in the middle was genius. It looked incredibly impressive and was the hit of the party. The tip to let it soften slightly before slicing was crucial. This recipe is now my go-to for any summer celebration!”