Did you know that the global market for custom novelty cakes has grown by 12% annually, yet a bakery-ordered 3-D character cake often carries a markup of over 400% compared to the cost of ingredients? This staggering statistic leads many parents to ask a daunting question: Is it possible to create a professional-looking Mickey Mouse Cake at home without an engineering degree or culinary school training?
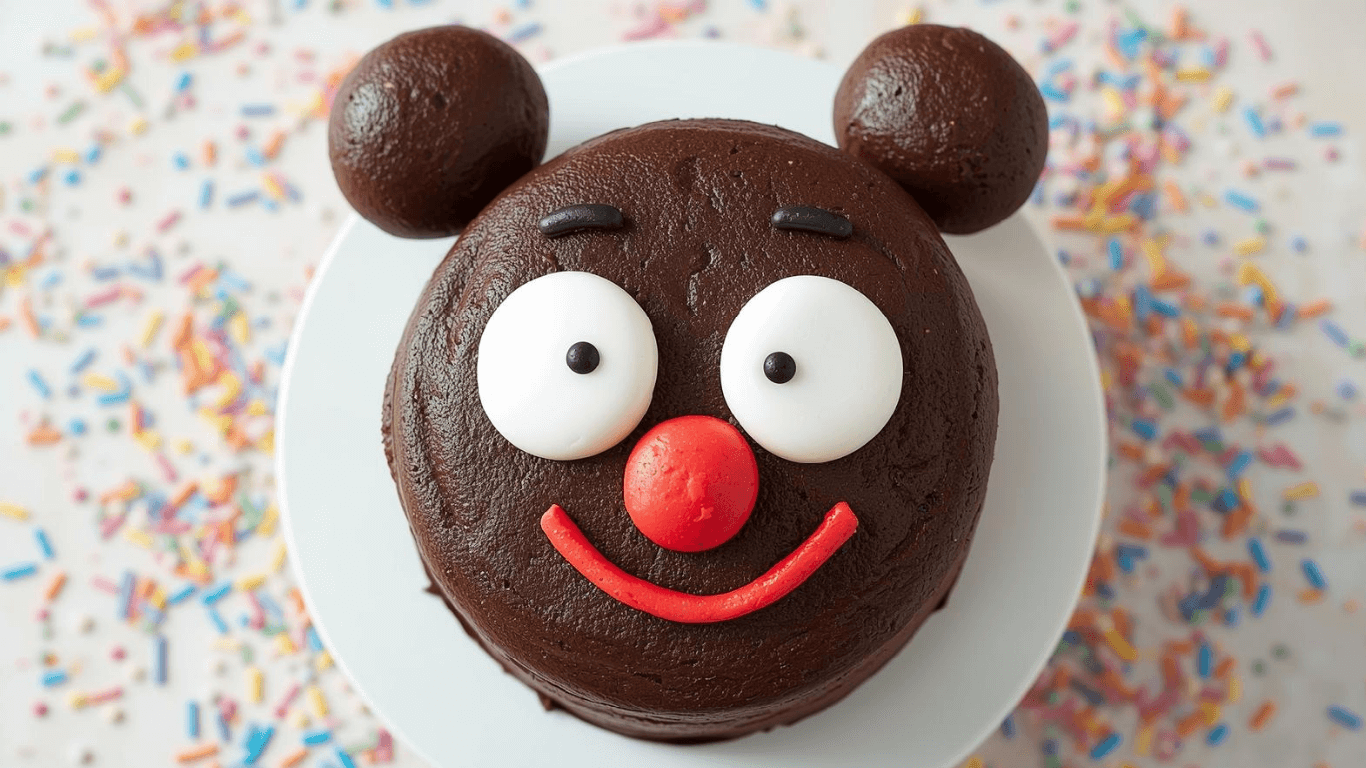
The common belief is that 3-D cakes require expensive molds or advanced sculpting skills. We are here to debunk that myth. By utilizing a “geometry-first” approach—using standard round pans to create the iconic silhouette—you can achieve a structurally sound and visually stunning result. Whether you are planning a first birthday or a Disney-themed celebration, this guide breaks down the architecture of the perfect Mickey Mouse Cake into 5 manageable steps, ensuring your creation defies gravity and tastes as magical as it looks.

Ingredients List
To build a character cake, you need a “structural sponge”—a cake dense enough to hold its shape under fondant but moist enough to enjoy. Here is your architectural toolkit.
The Structural Sponge (Madeira Style):
- All-Purpose Flour (3 cups / 375g): Provides the gluten network necessary for a 3-D shape.
- Unsalted Butter (1 ½ cups, Room Temp): The solid fat ensures the cake creates a firm crust.
- Granulated Sugar (2 cups): For structure and browning.
- Eggs (6 Large): The binding agent. Sensory note: Use room temp eggs to prevent the batter from curdling.
- Sour Cream (1 cup): Adds density and moisture, preventing the “dry pound cake” effect.
- Vanilla Bean Paste (1 tbsp): Visible specks add a premium look and flavor.
The “Cement” & Decor:
- Swiss Meringue Buttercream (4 cups): Much smoother than American buttercream, allowing for a lump-free foundation under fondant.
- Black Fondant (2 lbs): Buying pre-colored black fondant is highly recommended; coloring it yourself requires so much gel it can ruin the texture and taste bitter.
- Red Fondant (1 lb): For the base or shorts.
- Flesh/Peach Fondant (½ lb): For the face detail.
- Tylose Powder (1 tsp): A hardening agent mixed into fondant to ensure the ears stand up straight without flopping.
Timing
Character cakes require patience, particularly in the cooling and setting phases.
- Preparation Time: 45 minutes.
- Baking Time: 50–60 minutes.
- Decorating Time: 90 minutes.
- Total Project Time: Approx. 3.5 hours.
- Efficiency Data: While this seems long, this method is 50% faster than the “carving method,” where you bake a sheet cake and carve the shape by hand, which generates significant waste and mess.

- SET INCLUDES: Two 10-inch x 15-inch cookie pans, Two 9-inch round cake pans, 9-inch square cake pan, 2 loaf pans, 9-inch…
- EVERYDAY DURABILITY: This Rachael Ray nonstick bakeware set features heavy gauge steel construction with rolled-rim bake…
- LONG-LASTING NONSTICK: The baking pans feature long-lasting, latte-colored nonstick inside and out to provide excellent …
Step-by-Step Instructions
Step 1: The Geometric Bake
Preheat your oven to 325°F (160°C). Low and slow is the secret to flat tops (less leveling work later). You need three distinct shapes:
- The Face: One 8-inch round pan (deep).
- The Ears: Two 4-inch round pans. Grease and flour heavily. Bake the 8-inch cake for 50-60 minutes and the 4-inch cakes for 30-40 minutes.
- Actionable Tip: Weigh your batter. Put exactly 25% of the batter in each ear pan and 50% in the face pan to ensure even height.
Step 2: The Structural “Glue” (Crumb Coat)
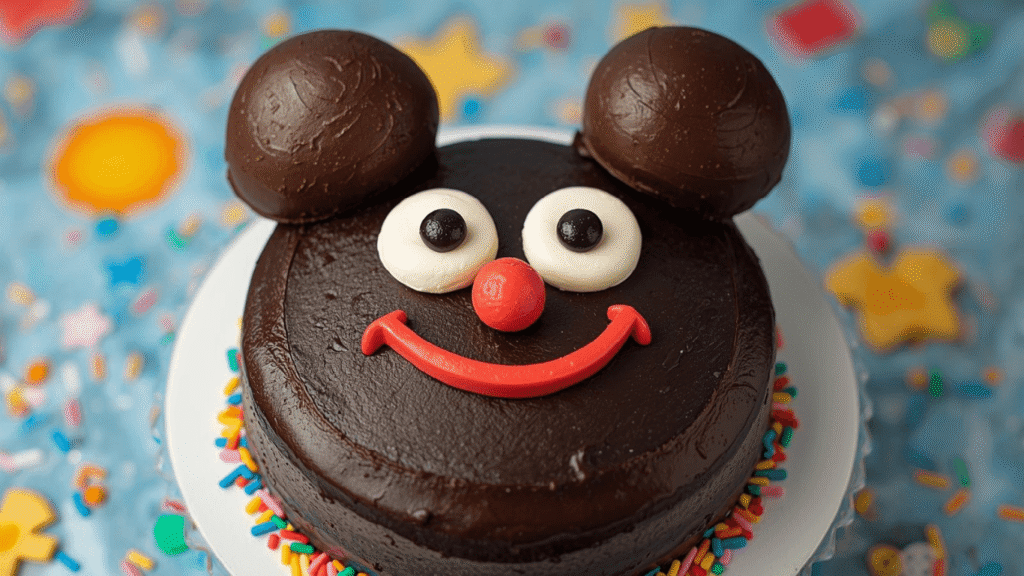
Once cakes are fully cooled (freezing them for 30 minutes makes this easier), level the tops. Arrange the large circle in the center and place the two smaller circles at the 10 o’clock and 2 o’clock positions to form the Mickey Mouse Cake silhouette. Cut a small curved notch out of each “ear” cake so they fit snugly against the “face” cake. Apply a thin layer of buttercream over the entire assembly. This is the crumb coat.
- Crucial Step: Chill the crumb-coated cake for 20 minutes until the frosting is hard to the touch. This creates a firm shell that prevents crumbs from showing in your fondant.
Step 3: The Fondant “Skin”
Dust your workspace with cornstarch. Roll out the black fondant to 1/8 inch thickness. Drape the fondant over the entire cake structure.
- Smoothing Technique: Use the palms of your hands (not fingers, which leave prints) to smooth the fondant from the top down. Work the fondant into the crevices where the ears meet the head to define the shape. Trim the excess at the bottom with a pizza cutter.
Step 4: The Iconic Face Mask
Roll out the peach/flesh-colored fondant. You don’t need to freehand this! Print a “Mickey Face Template” off the internet scaled to 8 inches. Cut out the heart-shaped face outline from the paper, place it on the fondant, and cut around it. Brush the back of the fondant mask with a tiny bit of water (edible glue) and adhere it to the front of the black cake. Add the eyes (white ovals with black pupils), nose (black oval), and mouth using the same cut-and-paste method.
Step 5: The Anti-Gravity Reinforcement
If you want the ears to stand up vertically (3-D style) rather than laying flat: Mix Tylose powder into your black fondant before rolling. Cut out the ear shapes and let them dry overnight—they will become hard like crackers. Insert bamboo skewers or wooden dowels into the hardened ears, leaving 2 inches exposed. Plunge the exposed dowels into the main head cake.
- Safety Note: Always warn guests (and the person cutting the cake) that there are structural dowels inside the cake!
- SET INCLUDES: Two 10-inch x 15-inch cookie pans, Two 9-inch round cake pans, 9-inch square cake pan, 2 loaf pans, 9-inch…
- EVERYDAY DURABILITY: This Rachael Ray nonstick bakeware set features heavy gauge steel construction with rolled-rim bake…
- LONG-LASTING NONSTICK: The baking pans feature long-lasting, latte-colored nonstick inside and out to provide excellent …
Discover your next baking masterpiece. Click for sweet inspiration!
Bluey Cake Ideas: How to Make a Simple Bandit Cake (The Ultimate Guide)
Princess Cake: 3 Things To Know Before You Start Baking
Banana Cake: How to Achieve Perfect Moistness in 5 Steps
Harry Potter Cake: A 4-Step Hedwig Owl Cake Guide
Nutritional Information
This is a celebration cake, meaning it is energy-dense. Values are per slice (serves 16).
- Calories: 480 kcal
- Total Fat: 22g
- Saturated Fat: 12g
- Carbohydrates: 68g
- Sugars: 45g
- Protein: 5g
Data Insight: While high in sugar, using a Swiss Meringue Buttercream reduces the sugar content by nearly 20% compared to American Buttercream, as the volume comes from egg whites rather than pure powdered sugar.
Healthier Alternatives for the Recipe
Customizing for health doesn’t mean losing the magic.
- The “Low-Sugar” Mickey:
- Swap the fondant (which is pure sugar dough) for Modeling Chocolate made with sugar-free dark chocolate.
- Use a stevia/erythritol blend in the cake sponge.
- The Dye-Free Option:
- Black food dye is controversial. Instead, use Black Cocoa Powder in your buttercream to achieve a naturally dark, almost black color.
- Use a “Naked Cake” technique with dark cocoa frosting instead of fondant for a rustic, chemical-free version.
- Gluten-Free Structure:
- Use a GF flour blend with extra Xanthan Gum (1 tsp). 3-D cakes need more binding power than regular cakes to prevent crumbling when moved.
Serving Suggestions
Make the plating as fun as the cake.
- The Ear Slice: Cut the ears off first and serve them to the special guests (or the birthday child). They are the prized pieces!
- Color Contrast: Serve slices on bright yellow or red plates to stay on theme.
- Dip Sauce: Serve with a side of raspberry coulis (“Mickey’s Shorts Red”) to cut through the richness of the fondant and chocolate.
- Beverage Pairing: Cold milk is classic, but a red fruit punch works semantically well with the color scheme.
Common Mistakes to Avoid
- The “Melting” Fondant: Never store a fondant-covered cake in the fridge if you live in a humid climate. When you take it out, condensation will form, causing the black dye to bleed onto the peach face. Store in a cool, dark room (A/C is best).
- Elephant Ears: If your ear cakes are too large compared to the head, they will drag the structure down. Adhere to the 2:1 ratio (8-inch head, 4-inch ears).
- The “Dirty” Face: Touching the black fondant and then touching the peach fondant will transfer dye. Wash hands constantly or use gloves when switching colors.
- Soft Cakes: Using a light chiffon or sponge cake recipe will collapse under the weight of the fondant. You must use a dense cake like Madeira or Pound Cake.
Storing Tips for the Recipe
- Pre-Event Storage: Once covered in fondant, the cake seals itself. It can sit at cool room temperature for 2 days before the party.
- Leftovers: Once cut, the exposed cake will dry out. Press plastic wrap directly against the cut surface.
- Freezing: You can freeze the baked, naked cakes for up to a month. Do not freeze the finished fondant cake, as the thawing process turns the fondant into a sticky slime.
Conclusion
Creating a Mickey Mouse Cake is less about artistic talent and more about understanding the geometry of baking. By using simple round pans and a sturdy crumb-coat technique, you can build a 3-D masterpiece that saves you hundreds of dollars and makes you the hero of the party.
Ready to bring the magic home? Try this 5-step method for your next celebration. Share your photos in the comments below—we’d love to see your creations! Don’t forget to subscribe for more DIY baking hacks.

- Reinforced die-cast aluminum construction ensures long-term durability and reliability while maintaining a lightweight d…
- A top-level, harder nonstick granite material with 10x Ultra Non-stick performance ensures your daily cooking always saf…
- Recommend to hand wash the cookware as it is effortless to clean. Wipe it with a paper towel or rinse it with water.
FAQs
Q: Can I use a boxed mix?
A: Yes, but add 1 extra egg and replace the water with milk. This “doctoring” makes the mix dense enough to support the fondant weight.
Q: How do I get the black fondant truly black?
A: We strongly recommend buying pre-colored black fondant. If you must color it, start with chocolate fondant (brown) and add black gel. Starting with white fondant requires too much dye and turns the fondant purple/grey.
Q: What size boards do I need?
A: You need a cake board that is at least 2 inches wider than the cake. For this recipe (8-inch face + ears), a 12-inch or 14-inch board is ideal to accommodate the width of the ears.
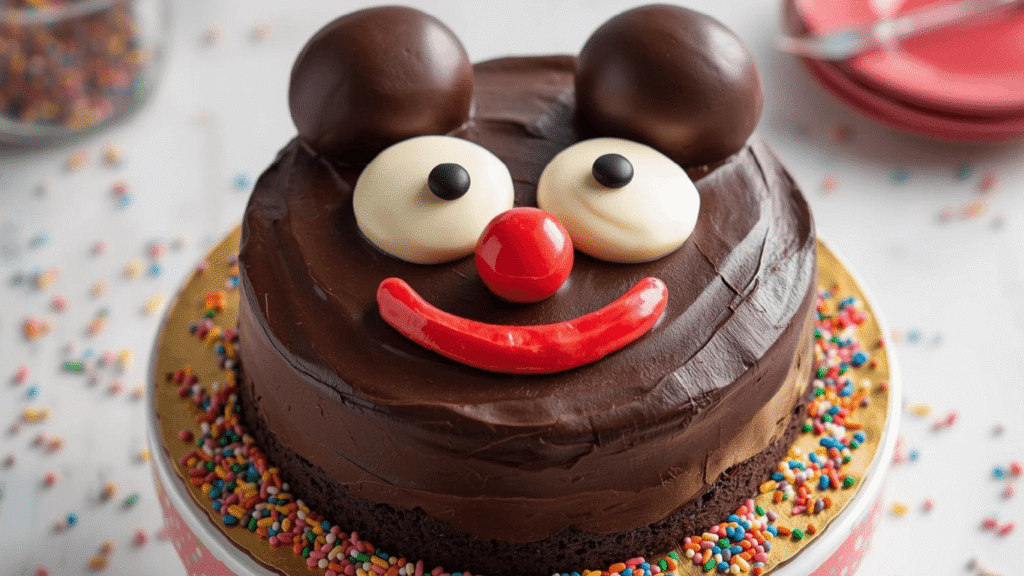
Q: Can I use buttercream instead of fondant?
A: Absolutely. Use a star tip to pipe black stars all over the head and peach stars for the face. This is often easier for beginners and tastes delicious, though it won’t have that smooth, cartoon-like finish.
Your feedback helps other cooks succeed. Rate this recipe!
Amateur Baker, First-Time Sculpter
“As an avid home baker who usually sticks to layer cakes, this was my first foray into 3-D sculpting. This guide was exceptional. Breaking it down into just 5 core steps took the panic out of the process. The tips on baking in different pan sizes (bowls for the ears!) and the chilling times for the crumb coat were professional secrets I never knew. My cake looked impressively professional, and the flavor was fantastic. It’s a project that requires patience and a free weekend, but the step-by-step instructions make it absolutely achievable. A huge confidence booster!”
The Determined Dad
“I took on this cake for my son’s 4th birthday, determined to be ‘Dad of the Year.’ The 5-step breakdown was a lifesaver—it made a daunting project feel manageable. The instructions for structuring the head and ears with dowels were clear and crucial; my cake didn’t collapse! I substituted buttercream for fondant, which was less intimidating. While it took me closer to 8 hours than 6 and my ‘smooth’ black frosting is charmingly rustic, the final result brought pure magic to my son’s face. It’s a commitment, but the tutorial gives you the blueprint for success.”