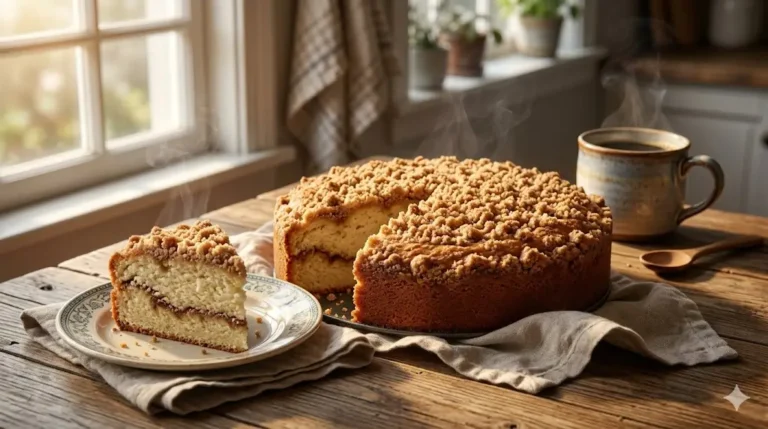
Did you know that one of America’s most beloved and iconic desserts was actually the result of a complete kitchen disaster? Legend has it that in the 1930s, a German-American baker in St. Louis accidentally reversed the proportions of butter and flour while attempting to make a standard coffee cake. Instead of throwing away his “mistake,” he baked it anyway. The result? A phenomenally successful, delightfully sticky masterpiece.
If you are looking to replicate this historical sweet treat without spending hours measuring flour, this Gooey Butter Cake recipe is your ultimate solution. While traditional scratch recipes involve making a yeasted dough, the modern “shortcut” version utilizes a yellow cake mix to create a perfectly dense bottom crust topped with a luscious cream cheese layer. It challenges the common belief that show-stopping desserts require intense culinary training. Let’s dive into how you can create this traditional St. Louis dessert right in your own kitchen!

Ingredients List
To achieve the perfect balance of a chewy crust and a pudding-like top layer, you need a specific lineup of pantry staples. Here is exactly what you will need for this sweet treat:
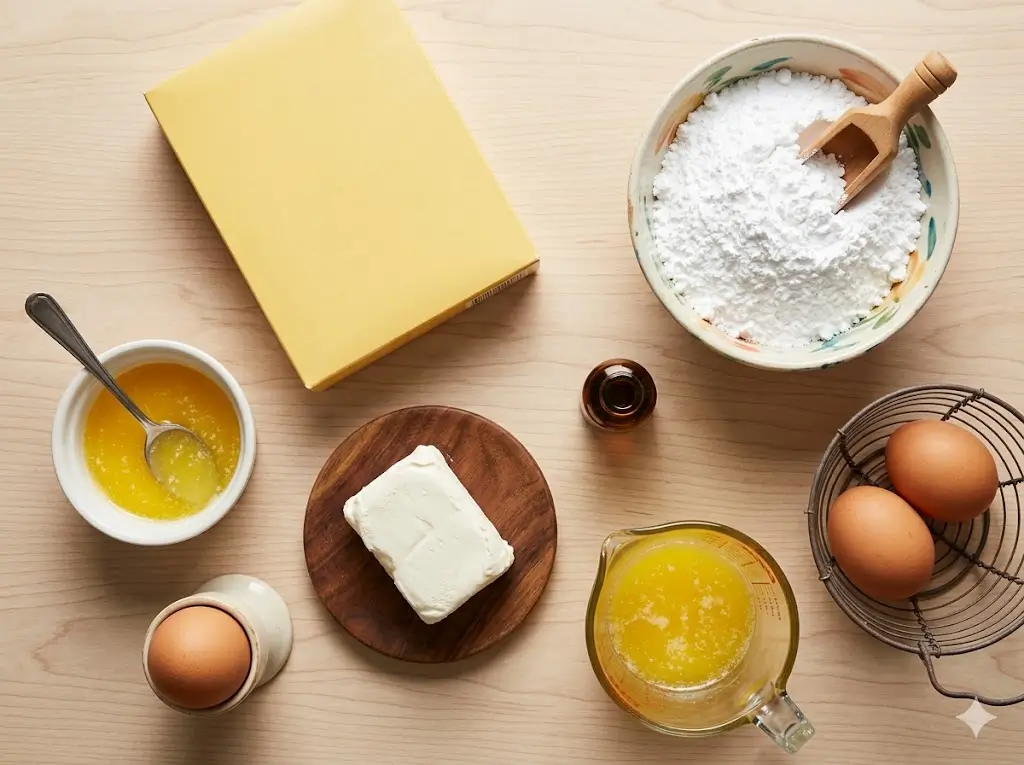
- Yellow Cake Mix (1 box, 15.25 oz): This forms the foolproof, sturdy base. Substitution: If you prefer baking from scratch, you can use a homemade dry yellow cake mix base, or switch it up with a chocolate or lemon cake mix for a fun flavor twist.
- Unsalted Butter (1/2 cup for the crust, melted): Adds that quintessential richness that gives this cake its namesake. Substitution: Salted butter works too; just omit any extra salt you might add.
- Large Eggs (3, room temperature): You will use one egg to bind the crust and two to give the gooey cream cheese layer its custard-like structure.
- Cream Cheese (8 oz, softened): Use full-fat, brick-style cream cheese for the creamiest texture. Substitution: Neufchâtel cheese can be used, though the final texture will be slightly less dense.
- Pure Vanilla Extract (1 teaspoon): Enhances the sweet, buttery notes of the dessert.
- Powdered Sugar (16 oz, or about 3 1/2 cups): Also known as confectioner’s sugar, this sweetens the top layer while keeping it perfectly smooth and melty. Reserve a little extra for dusting at the end!
Timing
One of the greatest benefits of the modern, cake-mix-based Gooey Butter Cake is how incredibly fast it comes together. Data insights show that a traditional yeasted butter cake takes nearly 2.5 hours when factoring in proofing time. Our streamlined version shaves off a massive chunk of that commitment:
- Preparation Time: 10 minutes (This is 50% less active prep time than the average multi-layer cake).
- Cooking Time: 40 to 45 minutes.
- Cooling Time: 2 hours (Crucial for the “goo” to set properly).
- Total Time: 2 hours and 55 minutes.
In just 10 minutes of active kitchen work, you will have a dessert ready for the oven, making it perfect for last-minute potlucks and family gatherings.


Step-by-Step Instructions
Follow these 5 easy steps to achieve the perfect textural contrast between the chewy base and the gooey top.
Step 1: Prepare the Cake Base
Preheat your oven to 350°F (175°C). Generously grease a 9×13-inch baking dish with non-stick cooking spray or butter. In a large mixing bowl, combine the dry yellow cake mix, the melted butter, and one large egg. Use an electric mixer on medium speed or a wooden spoon to mix the ingredients until a thick, cohesive dough forms.
Step 2: Press the Crust
Transfer the thick dough into your prepared baking dish. Lightly grease your fingers with butter or cooking spray, and gently press the mixture into an even layer across the bottom of the pan. Actionable Tip: Ensure the crust is pushed slightly up the edges of the pan to create a “wall” that will contain the liquid cream cheese layer you are about to add.
Step 3: Whip the Cream Cheese Layer
In a separate, clean mixing bowl, use a hand or stand mixer to beat the softened cream cheese until it is completely smooth and lump-free. Once smooth, add the remaining two eggs and the vanilla extract, beating until well incorporated. Finally, turn the mixer to the lowest speed and gradually add the powdered sugar. Mix just until combined—do not over-whip, or you will incorporate too much air into the custard.
Step 4: Layer and Bake
Pour the luscious cream cheese mixture directly over the pressed cake base. Use an offset spatula to smooth it into an even layer. Bake in the preheated oven for 40 to 45 minutes. Pro Tip: The cake is done when the edges are a deep golden brown and slightly puffed, but the very center still has a noticeable “jiggle” when you gently shake the pan. Do not overbake!
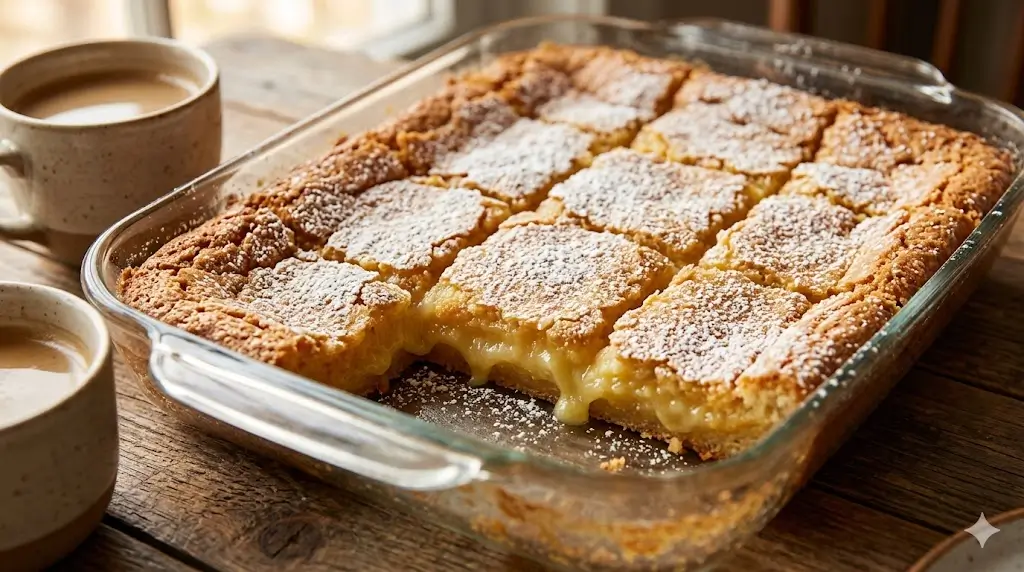
Step 5: Cool, Dust, and Serve
Remove the cake from the oven and place the pan on a wire cooling rack. This is the hardest part: you must let the cake cool completely (preferably popping it into the refrigerator for at least two hours once it reaches room temperature). Once cooled and set, generously dust the top with extra powdered sugar using a fine-mesh sieve, then cut into squares.


Nutritional Information
Because this is a decadent, buttery treat, it is meant to be enjoyed in moderation. A standard 9×13 pan yields about 24 squares, making it an excellent dessert for portion control.
Per Serving (1 square):
- Calories: 220 kcal
- Carbohydrates: 33g
- Protein: 2g
- Fat: 9g
- Saturated Fat: 4.5g
- Sodium: 150mg
- Sugar: 25g
(Note: These nutritional insights are approximations based on standard full-fat cream cheese and standard box cake mix brands.)
Healthier Alternatives for the Recipe
If you are looking to enjoy this St. Louis staple while accommodating dietary restrictions or enhancing nutritional benefits, here are some clever modifications:
- Lower Sugar: Swap the traditional yellow cake mix for a keto-friendly or sugar-free cake mix. For the top layer, replace the powdered sugar with a powdered monk fruit or erythritol sweetener.
- Lower Fat: Use a reduced-fat (Neufchâtel) cream cheese and substitute half of the melted butter in the crust with unsweetened applesauce.
- Gluten-Free: Simply swap the standard yellow cake mix for your favorite certified gluten-free yellow cake mix. The rest of the recipe remains exactly the same!
Serving Suggestions
Gooey Butter Cake is incredibly rich, which makes it an excellent canvas for fresh, contrasting pairings:
- Fresh Berries: Serve a square alongside a handful of tart raspberries, sliced strawberries, or blackberries. The acidity of the fruit cuts beautifully through the rich cream cheese layer.
- A Dollop of Cream: A small spoonful of unsweetened whipped cream on the side can balance the dense sweetness.
- Temperature Contrast: While best served chilled or at room temperature, pairing a room-temperature slice with a hot cup of dark roast coffee or unsweetened tea highlights the cake’s nuanced vanilla flavors.
Common Mistakes to Avoid
Even though this is a beginner-friendly 5-step recipe, there are a few pitfalls that can alter the final texture:
- Overbaking the Cake: This is the most common mistake. If you wait for the center to stop jiggling or until a toothpick comes out clean, the cake will be dry and crumbly instead of gooey. Trust the jiggle!
- Using Cold Cream Cheese: If you don’t let your cream cheese soften to room temperature, your top layer will have unsightly lumps that won’t melt away in the oven.
- Cutting While Hot: Cutting this dessert while it is still warm will result in a messy, runny puddle. Patience is required; it needs that chilling time to solidify the “goo.”
Storing Tips for the Recipe
Because of the dairy-rich cream cheese layer, storing Gooey Butter Cake properly is essential to maintaining freshness and food safety.
- Refrigeration: Store leftover cake tightly covered with plastic wrap or a secure lid in the refrigerator for up to 5 days. Many St. Louis locals argue that the cake actually tastes better on days two and three!
- Freezing: This cake freezes exceptionally well. Cut it into individual squares, wrap each tightly in plastic wrap, and store them in a freezer-safe zip-top bag for up to 3 months. Thaw overnight in the fridge before serving.
Conclusion
This 5-step Gooey Butter Cake delivers massive flavor with incredibly minimal effort. By combining a simple yellow cake mix base with a rich, sweet cream cheese topping, you can recreate a St. Louis classic right in your own kitchen. Try this recipe for your next gathering, leave a comment with your feedback below, and be sure to subscribe to our blog for more easy, delectable dessert updates!
FAQs
1. Is Gooey Butter Cake supposed to be jiggly in the middle?
Yes! The center should wobble slightly when you pull it out of the oven. The residual heat will continue to cook the cake as it cools, and chilling it will finally set the custard-like center to the perfect, sticky consistency.
2. Can I make this dessert ahead of time?
Absolutely. In fact, it is highly recommended. Baking this cake the day before you plan to serve it allows the cream cheese layer to fully set and the flavors to meld beautifully in the refrigerator overnight.
3. Why did the top of my cake crack?
A cracked top usually means the cake was baked at too high of a temperature or for too long. It can also happen if the cream cheese layer was over-whipped, introducing too much air that expands and bursts in the oven. Even if it cracks, don’t worry—a generous dusting of powdered sugar will hide any imperfections!
4. Can I use a different flavor of cake mix?
Definitely! While yellow cake mix is the traditional choice, this recipe is incredibly versatile. Strawberry, chocolate, lemon, and red velvet cake mixes all make spectacular, colorful variations of this classic recipe.

Gooey Butter Cake: 5 Easy Steps
Ingredients
Method
Step 1: Prepare the Cake Base
Preheat your oven to 350°F (175°C). Generously grease a 9×13-inch baking dish with non-stick cooking spray or butter. In a large mixing bowl, combine the dry yellow cake mix, the melted butter, and one large egg. Use an electric mixer on medium speed or a wooden spoon to mix the ingredients until a thick, cohesive dough forms.Step 2: Press the Crust
Transfer the thick dough into your prepared baking dish. Lightly grease your fingers with butter or cooking spray, and gently press the mixture into an even layer across the bottom of the pan. Actionable Tip: Ensure the crust is pushed slightly up the edges of the pan to create a "wall" that will contain the liquid cream cheese layer you are about to add.Step 3: Whip the Cream Cheese Layer
In a separate, clean mixing bowl, use a hand or stand mixer to beat the softened cream cheese until it is completely smooth and lump-free. Once smooth, add the remaining two eggs and the vanilla extract, beating until well incorporated. Finally, turn the mixer to the lowest speed and gradually add the powdered sugar. Mix just until combined—do not over-whip, or you will incorporate too much air into the custard.Step 4: Layer and Bake
Pour the luscious cream cheese mixture directly over the pressed cake base. Use an offset spatula to smooth it into an even layer. Bake in the preheated oven for 40 to 45 minutes. Pro Tip: The cake is done when the edges are a deep golden brown and slightly puffed, but the very center still has a noticeable "jiggle" when you gently shake the pan. Do not overbake!Step 5: Cool, Dust, and Serve
Remove the cake from the oven and place the pan on a wire cooling rack. This is the hardest part: you must let the cake cool completely (preferably popping it into the refrigerator for at least two hours once it reaches room temperature). Once cooled and set, generously dust the top with extra powdered sugar using a fine-mesh sieve, then cut into squares.