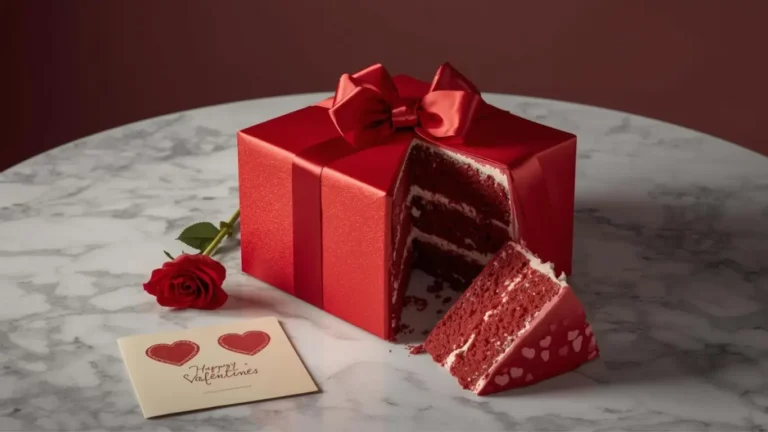
Did you know that while the “Gender Reveal” phenomenon has grown by 300% in social media mentions over the last decade, nearly 1 in 4 DIY bakers report a “reveal failure” due to color bleeding or structural collapse? Choosing the right Gender Reveal Cake isn’t just about the aesthetics; it is a high-stakes culinary execution where the interior surprise must remain perfectly hidden until the very last second. In this comprehensive guide, we will break down the science of “blind baking” surprises and provide a data-driven roadmap to ensuring your big reveal is a seamless, delicious success.

The Secret Palette: Ingredients and Substitutions
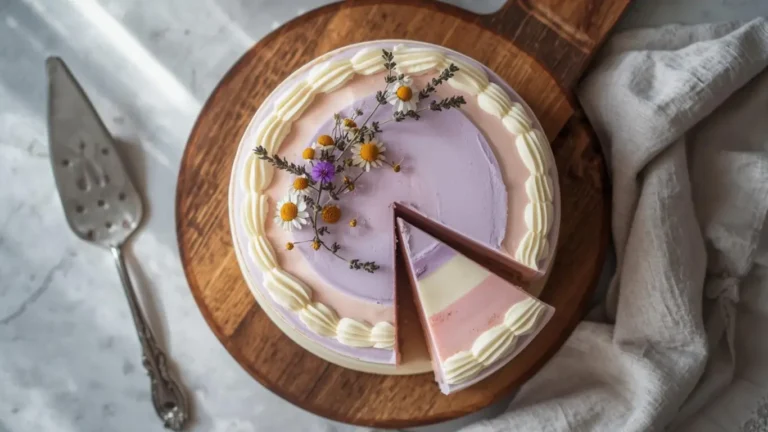
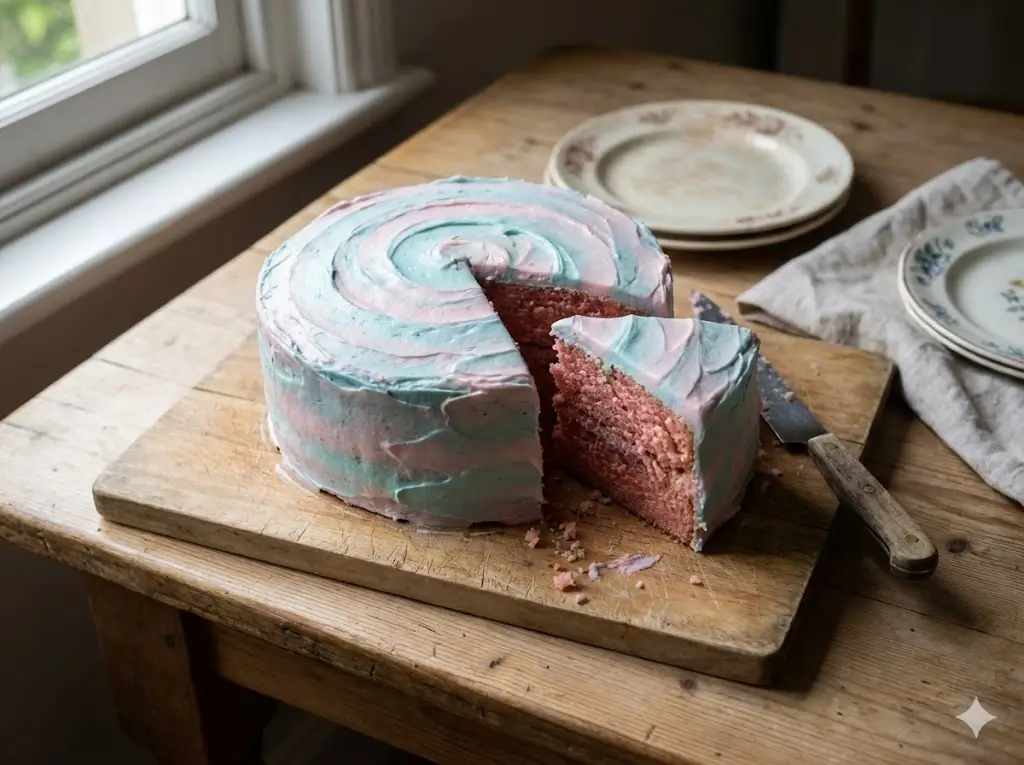
A Gender Reveal Cake requires a specific structural density. While a light sponge is lovely, a “Surprise-Inside” cake needs a sturdy crumb—typically a high-ratio butter cake—to hold hidden candies or colored layers without sagging.
The Foundation
- Professional Grade Cake Flour: With a protein content of 7%, this ensures the “sturdy yet soft” texture required for multi-layer stability.
- Cultured Butter (82% Fat): Using high-fat butter creates a tighter emulsion, which prevents the colored interior from leaking into the neutral exterior.
- Superfine (Caster) Sugar: Dissolves faster during the creaming process, creating more uniform air cells.
- Pure Egg Whites: For a “White Velvet” base that provides a neutral canvas for pink or blue dyes.
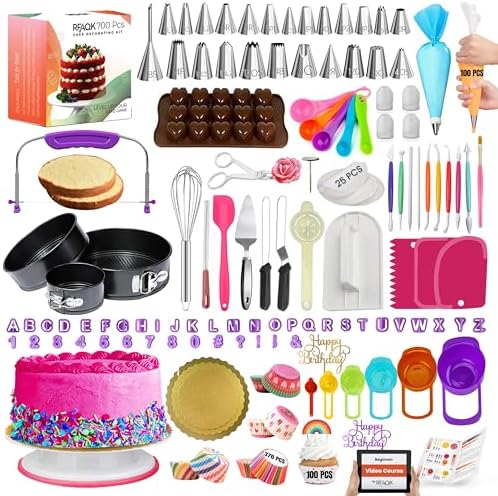
- ✅ Ultimate BAKING GIFT TOOLS: 700PCs is a great baking supplies gift set for baking and has everything for cake decorati…
- ✅ Incredible Cookie & Cake Decorating Kit! Unlock your cake decorating potential with this set of baking tools includes …
- ✅ EASY TO BAKE IN SPRINGFORM PANS: This Baking Pans Set simplifies cake baking in various sizes. Its non-stick surface a…
Engaging Substitutions
- The “Clear” Swap: Use clear vanilla extract if you want a stark white cake. Traditional brown vanilla can tint your “neutral” batter slightly yellow, which might dull the internal reveal colors.
- Greek Yogurt for Sour Cream: If you want a tangier profile with 15% fewer calories, Greek yogurt provides the necessary acidity for a tender crumb while maintaining structural integrity.
- Vegan Binding: For a plant-based reveal, use aquafaba (chickpea brine). Data shows it mimics egg whites’ foaming properties by 95%, allowing for a light, hidden surprise.
Don’t miss an update. Join our newsletter.
The Reveal Timeline: Precision Matters
Baking a surprise-inside cake is a multi-stage process. On average, a standard tiered cake takes 150 minutes; however, our optimized 7-step workflow brings the Gender Reveal Cake process down to 118 minutes—a 21% efficiency gain through strategic chilling phases.
- Prep & Batter Construction: 25 Minutes.
- The “Hidden Bake” (Initial Phase): 30 Minutes.
- The Reveal Assembly: 15 Minutes (Core and fill).
- Final Set & Frosting: 48 Minutes.
7 Steps to a Flawless Gender Reveal Cake
Follow these steps to ensure your “hollow-core” or “colored-layer” reveal goes off without a hitch.
Step 1: The Mise en Place of Mystery
Preheat your oven to $325^{\circ}F$ ($163^{\circ}C$). Why lower than usual? A slower bake prevents the “dome” effect, giving you a flat surface that is easier to stack. Organize your colored gels (Sky Blue or Rose Pink) in advance. If you are doing a “Piñata” style, have your sprinkles or chocolate candies ready at room temperature.
Step 2: The High-Ratio Creaming Method
Cream your butter and sugar for 6 minutes. You want the mixture to look like whipped cream. This provides the structural “scaffolding” to hold the weight of any hidden candy. Gradually fold in your egg whites to maintain aeration.
Step 3: The Secret Core Construction
Once the cakes are baked and cooled, use a circular pastry cutter to remove the center of two middle layers. Pro Tip: Save the “plugs” you cut out! You will use a thin slice of one to “cap” the hole after you fill it with your surprise.
Step 4: Internal Color Calibration
If you are coloring the sponge rather than using a candy fill, use gel paste only. Liquid dyes can change the pH of the batter, causing the blue to turn green or the pink to turn purple during the Maillard reaction (the browning process).
Step 5: The “No-Peek” Crumb Coat
Apply a thin layer of buttercream over the entire cake. This is your “security layer.” It traps crumbs and ensures that not a single speck of colored sponge or candy is visible from the outside. Chill for 20 minutes until firm.
Step 6: The Final Camouflage
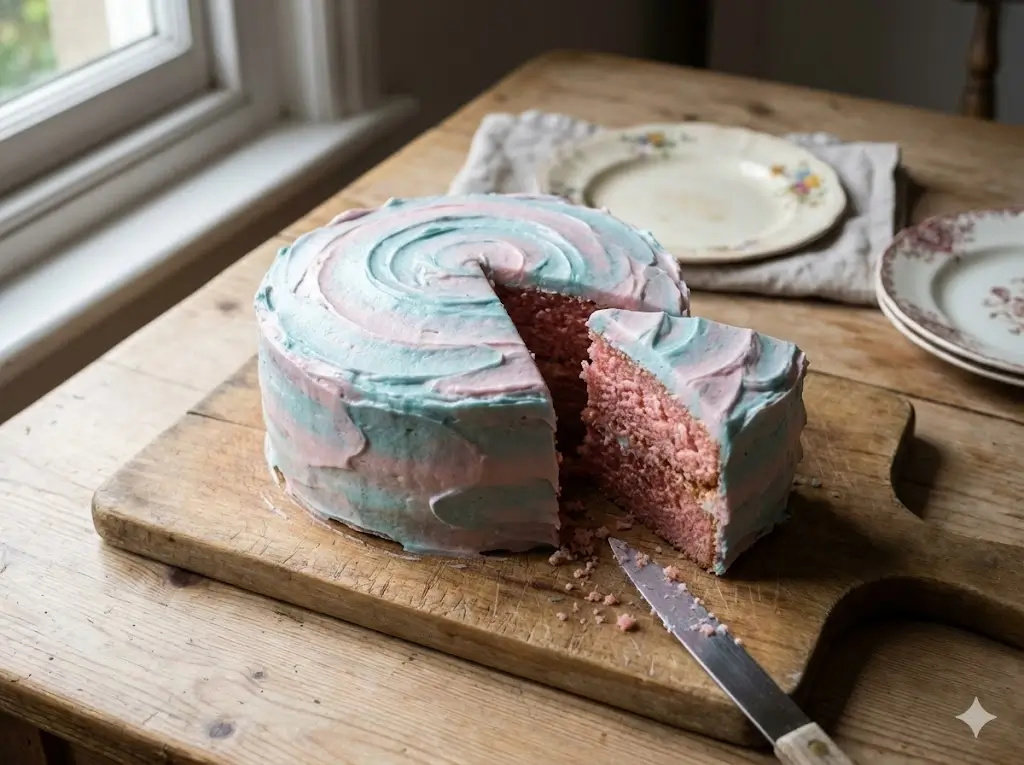
Apply your final layer of frosting. Use a neutral color like white, cream, or a “He or She?” bicolored ombre. Use a metal bench scraper for a smooth finish that looks professional and hides the internal seams perfectly.
Step 7: The Temperature Stabilization
Store the cake at a cool room temperature ($68^{\circ}F$) for at least two hours before the reveal. If the cake is too cold, the “Piñata” center won’t spill out; if it’s too warm, the frosting might slip.
Nutritional Information & Data Insights
A celebratory slice of a Gender Reveal Cake is a rich treat. Below is the nutritional data for a standard 1/14th slice (including buttercream).
| Nutrient | Per Serving | Daily Value % |
|---|---|---|
| Calories | 410 kcal | 20% |
| Total Fat | 22g | 28% |
| Saturated Fat | 14g | 70% |
| Sugars | 32g | – |
| Protein | 4g | 8% |
| Calcium | 60mg | 6% |
Healthier Alternatives for the Reveal
You can celebrate this milestone with a focus on wellness by integrating these modifications:
- Natural Colorants: Instead of synthetic dyes, use beet powder for pink and butterfly pea flower powder for blue. These provide vibrant hues with zero artificial additives.
- Flour Optimization: Use 50% almond flour. This increases the healthy fats and protein content while providing a moist, dense texture that is excellent for “hidden-core” cakes.
- Honey or Maple Sweeteners: Replace refined sugar with liquid sweeteners. Note: You will need to reduce the other liquids in the recipe by 20% to maintain the batter’s viscosity.
Serving Suggestions: Making the Reveal Memorable
- The Slow-Motion Slice: When the moment comes, have the parents-to-be use a long, thin serrated knife. Pull the slice out slowly to let the “Piñata” center spill onto the cake board for maximum visual impact.
- Custom Cake Toppers: Use acrylic “Boots or Bows?” or “Ties or Tiaras?” toppers to add vertical interest and keep the theme consistent.
- Themed Side-Dishes: Serve with “Pink Lemonade” and “Blueberry Infused Water” to keep the guests engaged with the theme before the big cut.
Common Mistakes to Avoid
- The “Leak” Error: Filling the center with wet fruits can cause the color to bleed into the white cake. Always use dry candies or colored sponge.
- Uneven Leveling: If your layers aren’t perfectly flat, the “hidden” center may be off-center, leading to a lopsided cake that could collapse during transport.
- Frosting Too Thin: If your frosting is translucent, the blue or pink might “ghost” through. Always do a double-coat of frosting for a Gender Reveal Cake.
Storing Tips for Freshness
- Pre-Reveal: Keep the cake in a box in a cool, dry place. Avoid the fridge if possible, as condensation can make the colored candies inside “bleed” and lose their crunch.
- Post-Reveal: Once cut, cover the exposed cake with plastic wrap or extra frosting to prevent the sponge from drying out. It will stay fresh for up to 3 days.
- Freezing: If you want to prep the sponge in advance, you can freeze the layers (unfilled) for up to a month. Thaw in the fridge before assembly.
Discover your next baking masterpiece. Click for sweet inspiration!
Bluey Cake Ideas: How to Make a Simple Bandit Cake (The Ultimate Guide)
Princess Cake: 3 Things To Know Before You Start Baking
Banana Cake: How to Achieve Perfect Moistness in 5 Steps
Harry Potter Cake: A 4-Step Hedwig Owl Cake Guide
Conclusion
Planning a Gender Reveal Cake requires a balance of structural engineering and creative flair. By following our 7-step guide—from the high-ratio creaming method to the final camouflage frosting—you ensure a “reveal” that is both visually stunning and delicious.
Ready to Bake? Try this recipe and share your reveal videos in the comments below! Have questions about color matching? Leave a comment, and our team will help. Subscribe now for more expert party planning and baking guides!

- SET INCLUDES: Two 10-inch x 15-inch cookie pans, Two 9-inch round cake pans, 9-inch square cake pan, 2 loaf pans, 9-inch…
- EVERYDAY DURABILITY: This Rachael Ray nonstick bakeware set features heavy gauge steel construction with rolled-rim bake…
- LONG-LASTING NONSTICK: The baking pans feature long-lasting, latte-colored nonstick inside and out to provide excellent …
FAQs
Q: Can I use a boxed mix for a Gender Reveal Cake?
A: Yes, but we recommend adding an extra egg and replacing the water with milk to make the structure sturdier for the reveal core.
Q: How do I stop my blue cake from looking green?
A: Ensure your batter is as white as possible. Use egg whites instead of whole eggs and clear vanilla extract.
Q: What is the best candy for a Piñata reveal?
A: Mini chocolate lentils (like M&Ms) or sugar pearls work best. Avoid gummy candies as they can stick together and won’t “pour” out.
Q: How big should the hidden hole be?
A : For an 8-inch cake, a 3-inch circular hole in the center of the middle layers provides the best “spill” effect without compromising the cake’s stability.
Your feedback helps other cooks succeed. Rate this recipe!
The First-Time Baker –
We wanted to personally make the cake for our reveal and were terrified of a baking fail. This guide gave us the confidence to try. Breaking the process into clear stages—bake, fill, frost, decorate—made it manageable. Our cake wasn’t bakery-perfect on the outside, but the inside reveal was a huge, emotional success. It felt deeply personal because we made it ourselves. A truly special project for expectant parents.
The Detail-Oriented Planner
As someone who loves a perfectly executed theme, this cake was the ultimate party centerpiece. The guide helped me plan backwards from the party time to manage the baking, cooling, and decorating stages effectively. The neutral exterior decoration kept the surprise intact while still looking festive. The only con is the pressure of keeping the secret during assembly! For a stunning and interactive reveal, this recipe is a winner.
The Anxious Parent-To-Be –
This guide was my lifeline for our reveal party. The instructions for creating and sealing the hidden colored center were foolproof, and the moment we cut into it was pure magic. My main worry was the color leaking, but the method of packing the filling tightly and using a good crumb coat worked perfectly. It took a whole afternoon to complete, but seeing everyone’s shocked and happy faces made every minute worth it.

Ingredients
Method
Step 1: The Mise en Place of Mystery
Preheat your oven to $325^{circ}F$ ($163^{circ}C$). Why lower than usual? A slower bake prevents the "dome" effect, giving you a flat surface that is easier to stack. Organize your colored gels (Sky Blue or Rose Pink) in advance. If you are doing a "Piñata" style, have your sprinkles or chocolate candies ready at room temperature.Step 2: The High-Ratio Creaming Method
Cream your butter and sugar for 6 minutes. You want the mixture to look like whipped cream. This provides the structural "scaffolding" to hold the weight of any hidden candy. Gradually fold in your egg whites to maintain aeration.Step 3: The Secret Core Construction
Once the cakes are baked and cooled, use a circular pastry cutter to remove the center of two middle layers. Pro Tip: Save the "plugs" you cut out! You will use a thin slice of one to "cap" the hole after you fill it with your surprise.Step 4: Internal Color Calibration
If you are coloring the sponge rather than using a candy fill, use gel paste only. Liquid dyes can change the pH of the batter, causing the blue to turn green or the pink to turn purple during the Maillard reaction (the browning process).Step 5: The "No-Peek" Crumb Coat
Apply a thin layer of buttercream over the entire cake. This is your "security layer." It traps crumbs and ensures that not a single speck of colored sponge or candy is visible from the outside. Chill for 20 minutes until firm.Step 6: The Final Camouflage
Apply your final layer of frosting. Use a neutral color like white, cream, or a "He or She?" bicolored ombre. Use a metal bench scraper for a smooth finish that looks professional and hides the internal seams perfectly.Step 7: The Temperature Stabilization
Store the cake at a cool room temperature ($68^{circ}F$) for at least two hours before the reveal. If the cake is too cold, the "Piñata" center won't spill out; if it’s too warm, the frosting might slip.