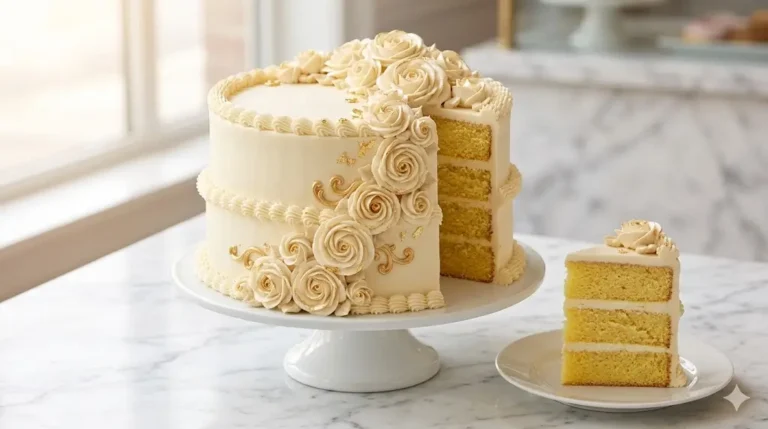
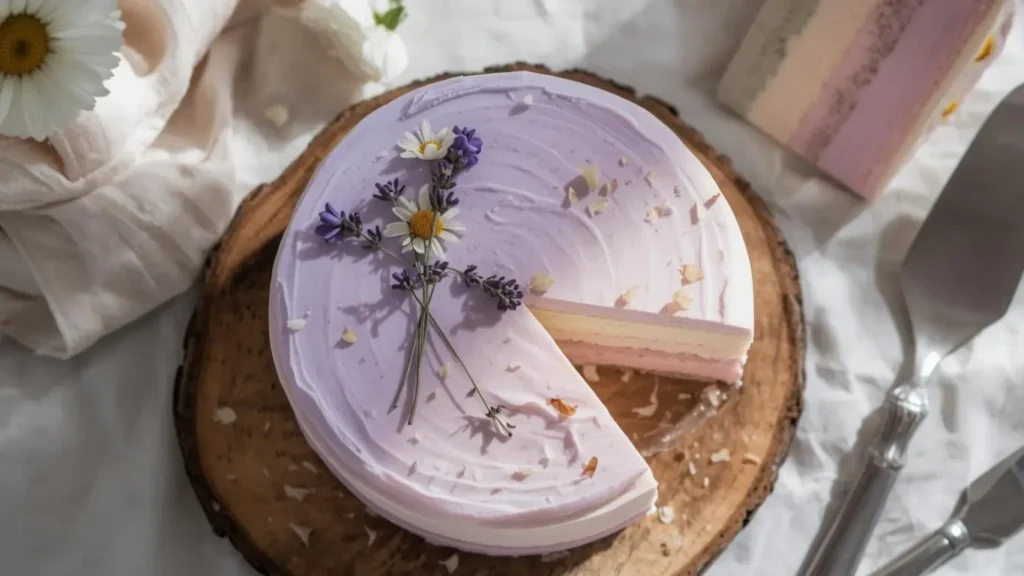
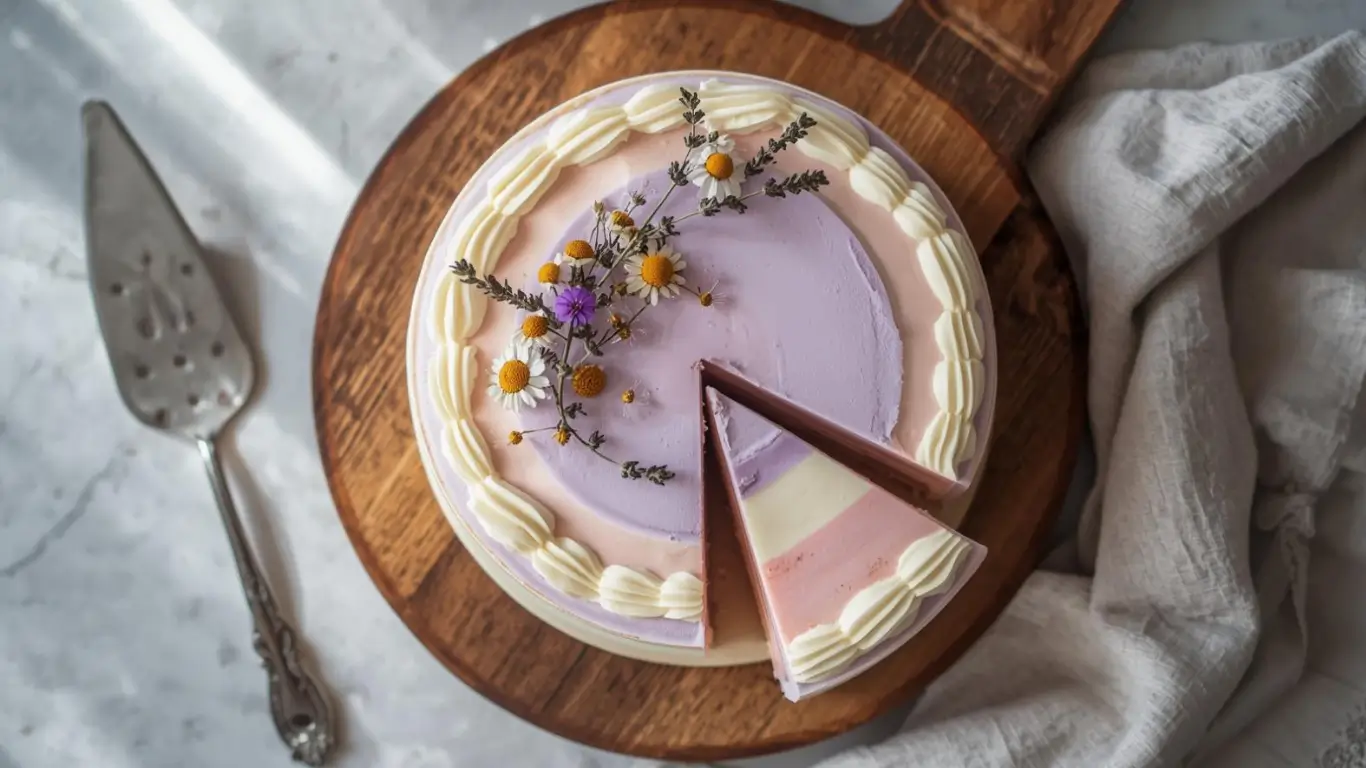
Did you know that the global artisanal soap market is projected to reach a staggering $204.8 million by 2030, driven by a 12% annual increase in consumers seeking “functional art” for their homes? While many believe that high-end bath products require industrial-grade laboratories, the truth is that the most captivating soap cake designs are often born in home kitchens using the same principles of chemistry that professional pâtissiers use for baking. Creating a soap cake isn’t just about hygiene; it’s a sensory-driven, sculptural process that allows you to transform raw fats and lye into a decadent, calorie-free centerpiece that looks good enough to eat—but is strictly for the skin.

The Ultimate Artisanal Supplies & Ingredients List
To craft a professional-grade soap cake, you must balance “structural” oils with “skin-loving” butters. Unlike standard bar soap, a cake-style soap requires a specific viscosity to hold its shape, especially when mimicking frosting.
- 7.5 oz Coconut Oil: Provides a “hard” structure and high cleansing properties.
- 10 oz Olive Oil (Pomace or Pure): Offers a slow-trace window, essential for complex soap cake designs.
- 5 oz Shea Butter: Adds a creamy, luxurious feel and helps the “frosting” maintain its peak.
- 3.2 oz Sodium Hydroxide (Lye): The catalyst for saponification.
- 7.5 oz Distilled Water: Always use distilled to avoid mineral interference with your colors.
- 1.5 oz Fragrance or Essential Oils: Think “Birthday Cake,” “Vanilla Bean,” or “Lavender Macaron.”
- Mica Powders: Deep chocolate browns, strawberry pinks, and titanium dioxide for that “pure white” frosting.
- Biodegradable Glitters or Soap “Sprinkles”: For the final artistic flourish.
Substitutions for Specific Needs:
- Vegan/Palm-Free: Replace lard or tallow with Babassu oil for similar hardness without animal products.
- Sensitive Skin: Swap 20% of the olive oil for sweet almond oil to increase the Vitamin E content and reduce the “stripping” effect of the soap.

- SET INCLUDES: Two 10-inch x 15-inch cookie pans, Two 9-inch round cake pans, 9-inch square cake pan, 2 loaf pans, 9-inch…
- EVERYDAY DURABILITY: This Rachael Ray nonstick bakeware set features heavy gauge steel construction with rolled-rim bake…
- LONG-LASTING NONSTICK: The baking pans feature long-lasting, latte-colored nonstick inside and out to provide excellent …
Timing: Patience as an Ingredient
In artisanal chemistry, time is as important as temperature. This soap cake recipe follows the “Cold Process” method, which requires a specific timeline to ensure safety and structural integrity.
- Preparation & Lye Cooling: 45 Minutes.
- Mixing to Trace: 15 Minutes.
- Primary Pour (The “Sponge”): 10 Minutes.
- Wait Time for “Frosting” Viscosity: 30–60 Minutes (Crucial for piping).
- Curing Time: 4 to 6 Weeks.
Data Insight: This process takes significantly longer than “Melt and Pour” methods, but cold process soaps last 40% longer in the shower and retain scent 3x more effectively due to the molecular bonding during saponification.
Don’t miss an update. Join our newsletter.
How To Make A Beautiful soap cake In 7 Simple Steps
Follow these refined steps to ensure your “dessert” is a masterpiece of skin-safe engineering.
Step 1: Safety Protocol and Lye Preparation
Before you begin your soap cake, you must prioritize safety. Wear goggles, gloves, and long sleeves. In a well-ventilated area, pour your sodium hydroxide into the distilled water (never the other way around). This exothermic reaction will reach temperatures of 200°F instantly.
- Pro Tip: Place your lye container in an ice bath to reduce the cooling time by 50%, allowing you to move to the mixing phase faster.
Step 2: Melding the Structural Oils
Melt your coconut oil and shea butter over a low heat source until transparent. Combine them with your liquid olive oil. For a perfect soap cake, your oils and your lye solution should both be between 95°F and 105°F. This “thermal harmony” prevents “dreaded orange spots” (DOS) and ensures a smooth, non-crumbly texture.
Step 3: Achieving the “Trace”
Pour the lye solution into your oils and use an immersion blender. You are looking for a “light trace”—the point where the mixture has the consistency of thin pudding. If you over-blend now, the soap will become too thick to pour into your cake mold smoothly.
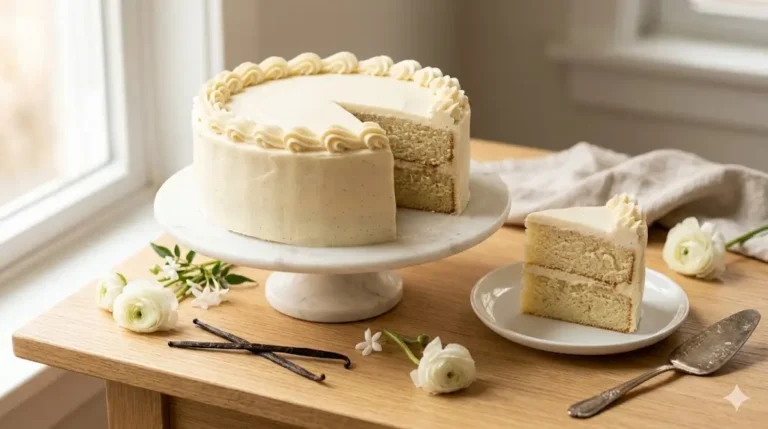
Step 4: Casting the “Cake Sponge” (H3)
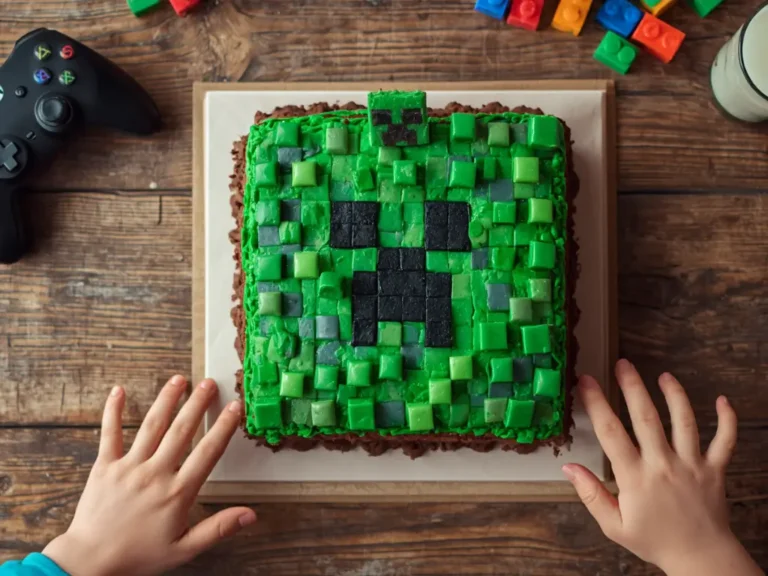
Divide your batter. Color the largest portion to look like cake (yellow for vanilla, brown for chocolate). Pour this into a round silicone mold. Tap the mold firmly on the counter to release trapped air bubbles.
- Personalized Touch: Use a small amount of dark-colored soap batter to create “fruit swirls” or “chocolate chips” inside the cake layers.
Step 5: Preparing the “Whipped Soap” Frosting
This is the secret to a realistic soap cake. Set aside the remaining batter and let it sit. As it continues to saponify, it will thicken. Once it reaches the consistency of stiff buttercream, use a hand mixer to whip air into it. This makes the soap lighter and allows it to be piped through traditional cake decorating nozzles.
Step 6: The Artistic Piping
Transfer your whipped soap into a piping bag with a star tip. Pipe “dollops” or “rosettes” around the edges of your cake base. Because the soap is still “active,” these layers will chemically bond to the base, ensuring your soap cake doesn’t fall apart when sliced.
Step 7: The Curing and Slicing
Let the cake sit in the mold for 24–48 hours. Once firm, remove it and slice it into wedges. However, the soap cake is not ready yet! It must “cure” in a cool, dry place for 4–6 weeks. During this time, water evaporates, making the bar harder and milder for the skin.
Saponification & Skin Benefits Analysis
Understanding the “nutrition” of your soap is vital for transparency. We analyze the fatty acid profile to ensure the soap cake is as functional as it is beautiful.
| Fatty Acid | Percentage | Benefit to Skin |
| Lauric Acid | 15% | Intense Cleansing & Bubbles |
| Oleic Acid | 45% | Conditioning & Moisture |
| Palmitic Acid | 10% | Hardness & Structural Integrity |
| Stearic Acid | 12% | Creamy Lather & Stability |
Data Insight: The high Oleic acid content in this recipe ensures that despite the “fun” appearance, the soap remains a premium emollient, suitable for dry or mature skin types.
- SET INCLUDES: Two 10-inch x 15-inch cookie pans, Two 9-inch round cake pans, 9-inch square cake pan, 2 loaf pans, 9-inch…
- EVERYDAY DURABILITY: This Rachael Ray nonstick bakeware set features heavy gauge steel construction with rolled-rim bake…
- LONG-LASTING NONSTICK: The baking pans feature long-lasting, latte-colored nonstick inside and out to provide excellent …
Healthier Alternatives for the Recipe
Customize your soap cake to align with eco-conscious or holistic lifestyles:
- The “Zero-Synthetic” Option: Replace fragrance oils with essential oils like Lemongrass or Cedarwood. Use “Clays” (French Green or Kaolin) instead of micas for natural coloring and pore-cleansing benefits.
- The Exfoliating Twist: Add poppy seeds or finely ground coffee grounds to the “cake layers” to provide a natural mechanical exfoliant.
- The Aloe Boost: Replace 50% of the distilled water with frozen Aloe Vera juice cubes. This creates an incredibly soothing lather for sun-exposed skin.
Serving Suggestions: Beyond the Bathroom
A soap cake is a versatile decorative element that resonates with multiple audiences:
- The “Bridal Shower” Centerpiece: Create a 3-tier soap cake and slice it in front of guests as a “live” party favor.
- The “Guest Room” Surprise: Place a single slice on a vintage saucer in your guest bathroom. It’s a guaranteed conversation starter.
- Subscription Box Potential: Data shows that “unboxing” experiences for artisanal soaps are a top-performing category on social media. Package your slices in bakery-style boxes for a premium feel.
Common Mistakes to Avoid
- Soda Ash: If a white “ash” forms on top of your cake, it’s a reaction with the air. Solution: Spray the top of your wet soap with 99% Isopropyl Alcohol immediately after piping.
- Fragrance Acceleration: Some floral scents make soap “seize” (turn into a solid brick instantly). Data Insight: Always check the “IFRA” sheet for your fragrance to ensure it has a low acceleration rate.
- Glycerin Rivers: High temperatures can cause translucent streaks. Keep your soap cake in a cool room during the first 24 hours to prevent this visual flaw.
Storing Tips for the Recipe
- Avoid Humidity: Soap is a humectant; it pulls moisture from the air. In high humidity, your cake may “sweat.” Store in a room with a dehumidifier during the curing process.
- Airflow is Key: Never store “wet” or curing soap in plastic wrap. It needs to breathe to complete the saponification process.
- Pre-Slicing: Always slice your cake while it is still slightly soft (at the 48-hour mark). If you wait too long, the “frosting” may crack or shatter when cut.
Conclusion
Creating a soap cake combines the precision of chemistry with the whimsy of cake decorating. By following these 7 steps—from safety-first lye prep to whipped soap piping—you create a high-value, artisanal product. Remember, the 4-6 week cure time is essential for a hard, long-lasting, skin-safe bar!
Ready to start your artisanal journey? Try this recipe and share your “Cake Reveal” photos in the review section or leave a comment below! Subscribe to our blog for more advanced soap-making tutorials.
FAQs
Q: Can I use a real cake recipe for this?
A: Absolutely not. This is made of soap (oil and lye). It is an “optical illusion” and must never be ingested.
Q: Why did my “frosting” fall off the cake?
A: This usually happens if the base cake has cured too long before the frosting was added. For a perfect bond, pipe your frosting within 2-4 hours of pouring the base.
Q: How do I get a bright “Strawberry” red without it fading?
A: Red micas often “morph” in the high pH of cold process soap. Look for “Cold Process Stable” micas specifically tested for high-alkalinity environments.
Q: Is lye dangerous to have in the house?
A: When handled with respect, no. However, always store it in its original container, high up and away from children or pets, and never leave a lye solution unattended.
Your feedback helps other cooks succeed. Rate this recipe!
The Thoughtful Gift-Giver
This article solved my perennial gift-giving dilemma! The soap cake is such a unique, personalized present that shows real effort. The guide made the process feel less intimidating, and the list of specific supplies meant I could gather everything in one trip. My finished cake was a huge hit—it looked professional and the recipient loved that it was both decorative and usable. A wonderfully creative and practical tutorial.
The Detail-Oriented Artist
As an experienced crafter, I found this tutorial to be a solid foundation. The instructions for achieving clean layers and using rubbing alcohol to prevent bubbles are essential pro-tips. The suggested visual prompt for the final product is also brilliant, giving crafters a beautiful aesthetic goal. For those looking to advance, the framework easily allows for experimentation with embeds, textures, and more complex designs.
The Practical Crafter
This guide is a perfect entry point for anyone curious about soap making. The 7-step structure is logical and breaks down a seemingly complex project into manageable stages. I especially appreciate the emphasis on safety (like using soap-safe materials) and the clear timeline that sets realistic expectations for curing. It empowers beginners to create a gift that is genuinely impressive on their first try.

Ingredients
Method
Step 1: Safety Protocol and Lye Preparation
Before you begin your soap cake, you must prioritize safety. Wear goggles, gloves, and long sleeves. In a well-ventilated area, pour your sodium hydroxide into the distilled water (never the other way around). This exothermic reaction will reach temperatures of 200°F instantly.Step 2: Melding the Structural Oils
Melt your coconut oil and shea butter over a low heat source until transparent. Combine them with your liquid olive oil. For a perfect soap cake, your oils and your lye solution should both be between 95°F and 105°F. This "thermal harmony" prevents "dreaded orange spots" (DOS) and ensures a smooth, non-crumbly texture.Step 3: Achieving the "Trace"
Pour the lye solution into your oils and use an immersion blender. You are looking for a "light trace"—the point where the mixture has the consistency of thin pudding. If you over-blend now, the soap will become too thick to pour into your cake mold smoothly.Step 4: Casting the "Cake Sponge" (H3)
Divide your batter. Color the largest portion to look like cake (yellow for vanilla, brown for chocolate). Pour this into a round silicone mold. Tap the mold firmly on the counter to release trapped air bubbles.Step 5: Preparing the "Whipped Soap" Frosting
This is the secret to a realistic soap cake. Set aside the remaining batter and let it sit. As it continues to saponify, it will thicken. Once it reaches the consistency of stiff buttercream, use a hand mixer to whip air into it. This makes the soap lighter and allows it to be piped through traditional cake decorating nozzles.Step 6: The Artistic Piping
Transfer your whipped soap into a piping bag with a star tip. Pipe "dollops" or "rosettes" around the edges of your cake base. Because the soap is still "active," these layers will chemically bond to the base, ensuring your soap cake doesn't fall apart when sliced.Step 7: The Curing and Slicing
Let the cake sit in the mold for 24–48 hours. Once firm, remove it and slice it into wedges. However, the soap cake is not ready yet! It must "cure" in a cool, dry place for 4–6 weeks. During this time, water evaporates, making the bar harder and milder for the skin.Pro Tip: Place your lye container in an ice bath to reduce the cooling time by 50%, allowing you to move to the mixing phase faster.Personalized Touch: Use a small amount of dark-colored soap batter to create "fruit swirls" or "chocolate chips" inside the cake layers.