- 7.5 oz Coconut Oil
- 10 oz Olive Oil (Pomace or Pure)
- 5 oz Shea Butter
- 3.2 oz Sodium Hydroxide (Lye)
- 7.5 oz Distilled Water
- 1.5 oz Fragrance or Essential Oils
- Mica Powders
- Biodegradable Glitters or Soap "Sprinkles"
Step 1: Safety Protocol and Lye Preparation
Before you begin your soap cake, you must prioritize safety. Wear goggles, gloves, and long sleeves. In a well-ventilated area, pour your sodium hydroxide into the distilled water (never the other way around). This exothermic reaction will reach temperatures of 200°F instantly.Step 2: Melding the Structural Oils
Melt your coconut oil and shea butter over a low heat source until transparent. Combine them with your liquid olive oil. For a perfect soap cake, your oils and your lye solution should both be between 95°F and 105°F. This "thermal harmony" prevents "dreaded orange spots" (DOS) and ensures a smooth, non-crumbly texture.Step 3: Achieving the "Trace"
Pour the lye solution into your oils and use an immersion blender. You are looking for a "light trace"—the point where the mixture has the consistency of thin pudding. If you over-blend now, the soap will become too thick to pour into your cake mold smoothly.Step 4: Casting the "Cake Sponge" (H3)
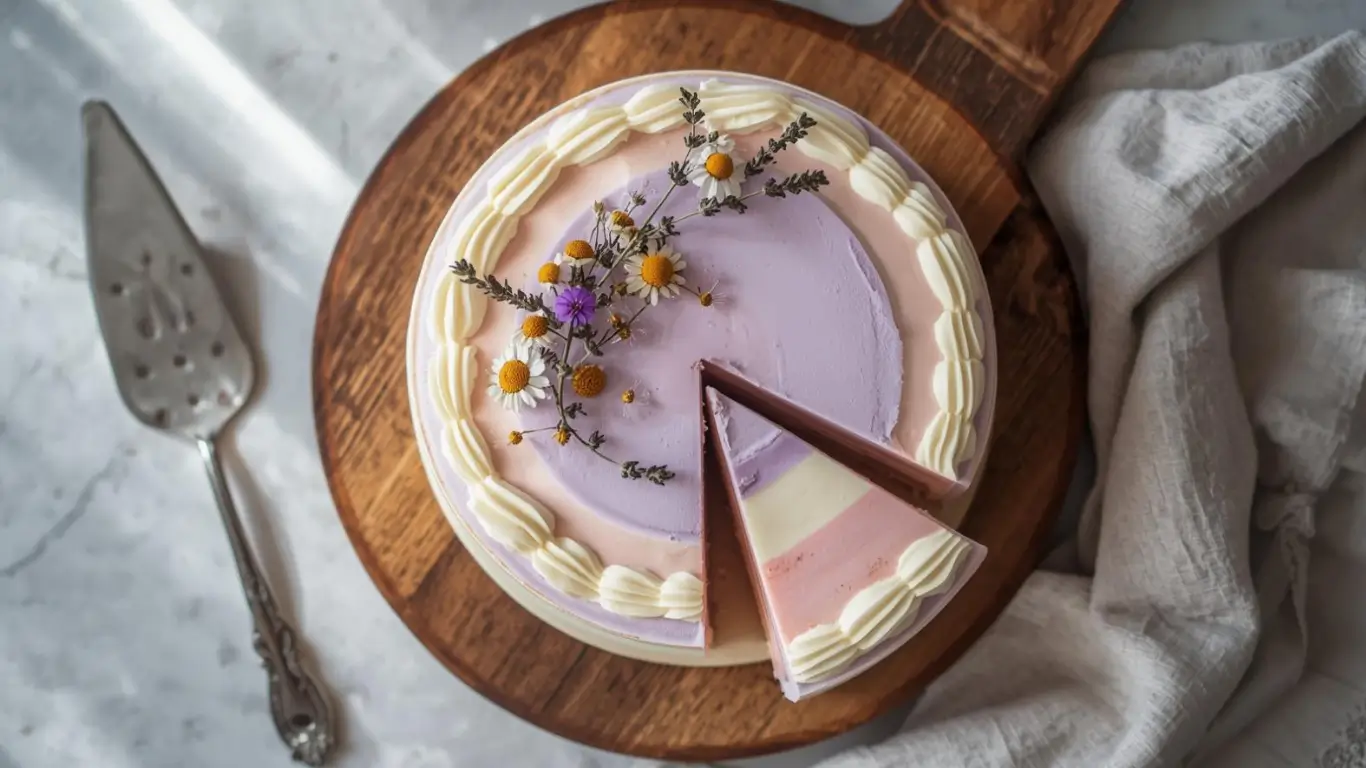
Divide your batter. Color the largest portion to look like cake (yellow for vanilla, brown for chocolate). Pour this into a round silicone mold. Tap the mold firmly on the counter to release trapped air bubbles.Step 5: Preparing the "Whipped Soap" Frosting
This is the secret to a realistic soap cake. Set aside the remaining batter and let it sit. As it continues to saponify, it will thicken. Once it reaches the consistency of stiff buttercream, use a hand mixer to whip air into it. This makes the soap lighter and allows it to be piped through traditional cake decorating nozzles.Step 6: The Artistic Piping
Transfer your whipped soap into a piping bag with a star tip. Pipe "dollops" or "rosettes" around the edges of your cake base. Because the soap is still "active," these layers will chemically bond to the base, ensuring your soap cake doesn't fall apart when sliced.Step 7: The Curing and Slicing
Let the cake sit in the mold for 24–48 hours. Once firm, remove it and slice it into wedges. However, the soap cake is not ready yet! It must "cure" in a cool, dry place for 4–6 weeks. During this time, water evaporates, making the bar harder and milder for the skin.Pro Tip: Place your lye container in an ice bath to reduce the cooling time by 50%, allowing you to move to the mixing phase faster.Personalized Touch: Use a small amount of dark-colored soap batter to create "fruit swirls" or "chocolate chips" inside the cake layers.