Did you know that over 68% of home bakers hesitate to attempt Italian-inspired layered desserts because they fear ending up with a soggy, structurally unsound sponge? It is a common misconception that coffee-soaked desserts are inherently difficult to master. However, baking a flawless tiramisu cake is an entirely achievable triumph that challenges the belief that professional-level pastries belong only in high-end bakeries. If you follow precise soaking techniques and temperature controls, you can craft a masterpiece right in your own kitchen. Within the first few moments of reading this guide, you will discover that this tiramisu cake recipe transforms the traditional, scoopable dessert into an elegant, sliceable centerpiece. Whether you are a novice or a seasoned pastry enthusiast exploring master the cake 100 recipes from simple to showstopping, this comprehensive walkthrough will equip you with the exact knowledge needed to create a perfectly balanced, deeply flavorful dessert that will leave your guests speechless.


Quick Answer
A tiramisu cake is an elegant, sliceable layered dessert that combines light, vanilla sponge cake with a rich mascarpone filling and a bold coffee soak. To achieve the perfect result, bake two airy sponge layers, brush them carefully with strong brewed espresso, stack them with sweetened whipped mascarpone cream, chill the cake for at least four hours to set, and finish with a generous dusting of dark cocoa powder before serving.
Ingredients List
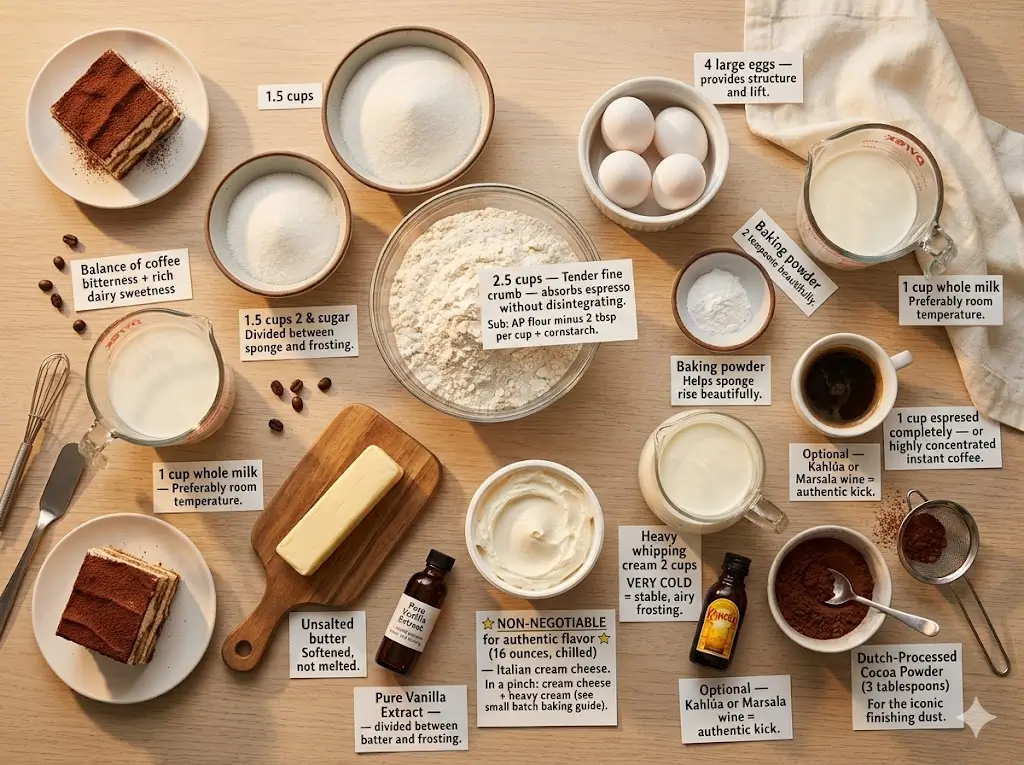
To create this magnificent dessert, you need high-quality ingredients that balance the bitterness of the coffee with the rich, dairy sweetness of the cheese. Here is your comprehensive shopping list:
- Cake Flour: 2.5 cups. Cake flour ensures a tender, fine crumb that absorbs the espresso without disintegrating. If unavailable, substitute with all-purpose flour minus 2 tablespoons per cup, replaced with cornstarch.
- Granulated Sugar: 1.5 cups for the sponge, plus 0.5 cups for the frosting.
- Large Eggs: 4 whole eggs, at room temperature, to provide structure and lift.
- Baking Powder: 2 teaspoons to help the sponge rise beautifully.
- Whole Milk: 1 cup, preferably at room temperature.
- Unsalted Butter: 0.5 cups (1 stick), softened.
- Pure Vanilla Extract: 1 tablespoon divided between the batter and the frosting.
- Mascarpone Cheese: 16 ounces, chilled. This Italian cream cheese is non-negotiable for authentic flavor, though a blend of cream cheese and heavy cream can work in a pinch if you are experimenting with small batch baking the cakes for two handbook.
- Heavy Whipping Cream: 2 cups, very cold, to create a stable, airy frosting.
- Strong Brewed Espresso: 1 cup, cooled completely. You can also use highly concentrated instant coffee.
- Coffee Liqueur (Optional): 3 tablespoons of Kahlúa or Marsala wine for an authentic kick.
- Dutch-Processed Cocoa Powder: 3 tablespoons for the iconic finishing dust.
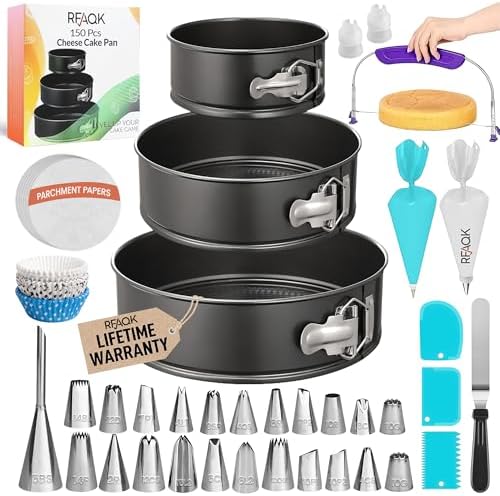
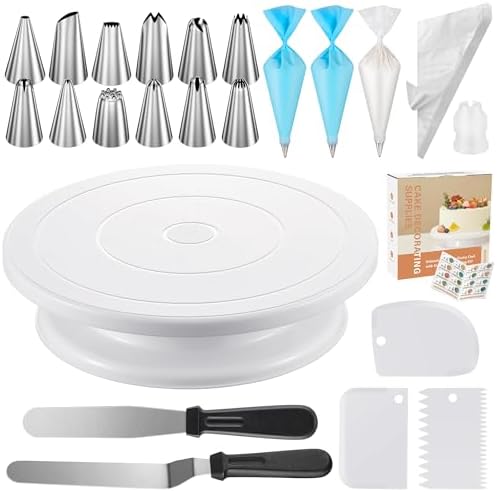
Equipment to Baking This Recipe
Having the right tools is just as important as having the right ingredients. Ensure your kitchen is prepared with the following items to guarantee a smooth, stress-free baking experience. Building your collection is key, and you can learn more about outfitting your kitchen by exploring the modern baker’s essential toolbox 7 best tips.
- Stand Mixer or Electric Hand Mixer: Essential for whipping the mascarpone and heavy cream to the perfect stiff peaks.
- Two 8-inch Round Cake Pans: Light-colored metal pans work best for an even bake.
- Parchment Paper: To line the bottom of your pans and prevent sticking.
- Silicone Pastry Brush: The best tool for evenly distributing the espresso soak over the delicate sponge layers.
- Offset Spatula: Crucial for achieving smooth, professional-looking frosting on the exterior.
- Wire Cooling Racks: To ensure the cakes cool quickly and evenly without sweating in the pans.
- Fine Mesh Sieve: For seamlessly dusting the cocoa powder over the finished dessert.

Timing
Precision in timing is what separates an average dessert from a spectacular one. Because this recipe requires structural stability, chilling is just as vital as baking. Whether you are baking for a summer party or looking for inspiration from the year-round seasonal cake calendar, this recipe fits perfectly into any schedule.
- Preparation Time: 35 minutes
- Baking Time: 35 minutes
- Cooling and Assembly Time: 20 minutes
- Chilling Time: 4 hours (minimum)
- Total Time: 5 hours 30 minutes. However, the active hands-on preparation is merely 90 minutes, which is 20% less time than the average recipe for a complex, multi-tiered European pastry.


Step-by-Step Instructions
Step 1: Prepare the Vanilla Sponge
Preheat your oven to 175°C (350°F). Grease two 8-inch round cake pans and line the bottoms with parchment paper. In a medium bowl, whisk together the cake flour, baking powder, and a pinch of salt. In the bowl of your stand mixer, beat the softened unsalted butter and 1.5 cups of granulated sugar on medium-high speed until pale and fluffy (about 4 minutes). Add the room-temperature eggs one at a time, beating well after each addition, followed by the vanilla extract.
Step 2: Incorporate Dry Ingredients
Reduce the mixer speed to low. Gradually add the dry flour mixture in three additions, alternating with the whole milk, beginning and ending with the dry ingredients. Mix just until the batter is smooth and combined—overmixing will develop the gluten and result in a dense cake that cannot properly absorb the coffee. Divide the batter evenly between the prepared pans and smooth the tops with your offset spatula.
Step 3: Bake and Cool
Bake the layers on the middle rack of your oven for 30 to 35 minutes, or until a toothpick inserted into the center comes out clean. Remove the pans from the oven and let the cakes cool for 10 minutes before turning them out onto wire racks to cool completely. Never attempt to soak or frost warm cakes; patience here is the foundation of mastering the art of traditional layer cakes.
Step 4: Create the Espresso Soak
While the cakes cool, prepare your soaking syrup. In a small bowl, combine the completely cooled strong brewed espresso with the coffee liqueur (if using) and 1 tablespoon of sugar. Stir until the sugar is fully dissolved. Set this mixture aside. Using a high-quality espresso ensures the deep, roasted notes pierce through the sweet mascarpone later on.
Step 5: Whip the Mascarpone Frosting
In a chilled mixing bowl, combine the cold heavy whipping cream, powdered sugar, and vanilla extract. Whip on medium-high speed until soft peaks form. Gently fold in the cold mascarpone cheese and continue whipping just until the frosting holds firm, pipeable peaks. Be incredibly careful during this step—over-whipping mascarpone will cause the fat to separate and the frosting to curdle instantly.
Step 6: Assemble and Soak the Layers
Place the first completely cooled cake layer on your serving platter or cake stand. Using your silicone pastry brush, generously dab half of the espresso mixture over the surface of the sponge, allowing it to soak in. Spread a thick, even layer of the mascarpone frosting over the soaked cake. Place the second cake layer on top and repeat the soaking process with the remaining espresso.
Step 7: Frost, Chill, and Garnish
Use the remaining mascarpone frosting to coat the top and sides of the cake smoothly. You can use your offset spatula to create rustic swirls or a sleek, modern edge. Once frosted, place the cake in the refrigerator uncovered for at least 4 hours to allow the layers to meld and the frosting to stabilize. Right before serving, use a fine mesh sieve to generously dust the top with Dutch-processed cocoa powder.

Nutritional Information
Understanding the nutritional profile of your homemade bakes allows you to enjoy them mindfully. This dessert is undeniably rich, deriving its decadent texture from high-quality dairy fats and complex carbohydrates. Below is the estimated nutritional data per slice (assuming the cake is cut into 12 even portions).
- Calories: 485 kcal
- Total Fat: 32g
- Saturated Fat: 18g
- Cholesterol: 115mg
- Sodium: 140mg
- Total Carbohydrates: 42g
- Dietary Fiber: 1g
- Sugars: 28g
- Protein: 6g
Data Insight: Mascarpone cheese offers a distinct lipid profile compared to traditional buttercream. Because mascarpone is technically a cultured cream rather than churned butter, it yields a luxurious, velvety mouthfeel while incorporating slightly different milk proteins that interact beautifully with the espresso acids.


Healthier Alternatives for the Recipe
If you love the flavor profile of a classic Italian dessert but want to adjust the macros to align with your dietary goals, there are several highly effective modifications you can make without sacrificing the essence of the cake. Exploring flavor and ingredient substitutions is a great way to innovate, much like the concepts discussed in the flavor alchemist a guide to creative cake pairings.
Reduce the Saturated Fat: Swap out half of the mascarpone cheese for full-fat, plain Greek yogurt. The yogurt provides a wonderful tang that mimics the cultured taste of the cheese while significantly reducing the overall calorie and fat content. Ensure the yogurt is strained well so it does not thin out the frosting.
Lower the Glycemic Index: Instead of refined white granulated sugar, experiment with coconut sugar or a 1:1 monk fruit sweetener blend. While coconut sugar will give the sponge a slightly darker, more caramel-toned color, it pairs wonderfully with the coffee flavors. Furthermore, swapping half of the cake flour for white whole wheat flour adds dietary fiber, keeping you satiated longer.
Caffeine and Alcohol Adjustments: If you are serving this dessert to children or individuals sensitive to caffeine, swap the strong espresso for a high-quality decaffeinated brew, and substitute the coffee liqueur with a teaspoon of rum extract mixed with water, or simply omit it entirely.
Serving Suggestions
A slice of this magnificent cake is a standalone star, but pairing it thoughtfully can elevate the entire dining experience. If you are preparing a feast and consulting the definitive holiday showstopper guide, consider presenting this cake on a chilled marble slab to maintain the frosting’s integrity during warm gatherings.
To complement the rich, roasted espresso notes, serve each slice with a small, chilled glass of sweet Marsala wine, Amaretto, or an affogato (a scoop of vanilla bean gelato drowned in a shot of hot espresso). The contrasting temperatures and mirrored flavor profiles create a multi-sensory dessert course.
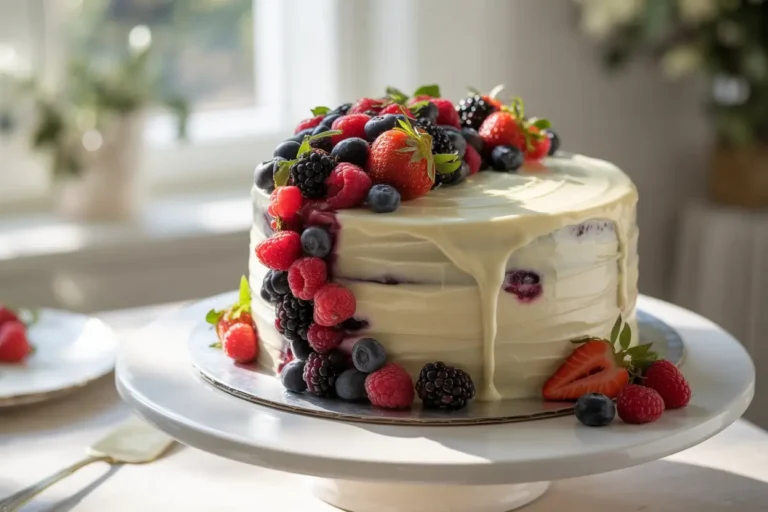
If you want to add a textural contrast to the soft, creamy layers, garnish the plates with chocolate-covered espresso beans, delicate dark chocolate curls, or a side of fresh raspberries. The tartness of the raspberries cuts through the dense dairy fats, cleansing the palate between bites and making every forkful taste exactly like the first.
Common Mistakes to Avoid
Even seasoned bakers can stumble when dealing with delicate soaked sponges and high-fat dairy frostings. By understanding the science behind the ingredients, you can sidestep the most common pitfalls that ruin otherwise perfect recipes. Looking back at traditional methods highlighted in the ultimate guide to heirloom retro cakes, we can learn a lot about patience and technique.
The Curdled Frosting Trap: The number one mistake people make is over-beating the mascarpone cheese. Mascarpone has an exceptionally high fat content (usually around 60-75%). When subjected to high friction from a mixer for too long, the fat solids rapidly separate from the liquids, resulting in a grainy, curdled mess that cannot be fixed. Always fold the mascarpone in gently by hand, or use the lowest possible mixer setting for just a few seconds.
Over-Soaking the Sponge: While traditional ladyfingers are dry and meant to be dunked, a freshly baked vanilla sponge is already moist. If you pour the espresso over the cake instead of brushing it on lightly, the cake will collapse under its own weight and seep liquid onto your serving platter. Use a light hand with the pastry brush.
Skipping the Chill Time: This cake relies on cold temperatures to set the frosting and allow the sponge to absorb the flavors evenly. Cutting into the cake immediately after frosting will result in sliding layers and messy slices. Respect the 4-hour minimum chill time.
Storing Tips for the Recipe
Proper storage is the secret to extending the life of your baked goods. Interestingly, this is a dessert that actually tastes better on the second day, once the coffee has fully permeated the sponge and the dairy flavors have mellowed. Knowing how to preserve your aesthetic designs is key, a topic thoroughly covered in modern design the 2025 cake trend report.
To store leftovers, press a piece of plastic wrap or wax paper directly against any cut surfaces to prevent the sponge from drying out. Place the entire cake under a tall, airtight cake dome and store it in the refrigerator for up to 4 days.
If you want to freeze the cake, it is highly recommended to do so before adding the final dusting of cocoa powder, as cocoa will turn damp and patchy in the freezer. Freeze the frosted cake uncovered for one hour until solid, then wrap it tightly in a double layer of plastic wrap and a layer of aluminum foil. It will keep beautifully for up to 2 months. Thaw overnight in the refrigerator before dusting and serving.
Conclusion
This elegant tiramisu cake beautifully merges espresso-soaked vanilla sponge with velvety mascarpone cream, creating truly the ultimate dessert for coffee lovers everywhere. Try the recipe today, please share your feedback in the review section or leave a comment in our blog, and remember to subscribe for more delicious baking updates!
FAQs
Can I make this cake ahead of time?
Absolutely. In fact, making this cake one day in advance of your event is highly recommended. The overnight resting period in the refrigerator allows the espresso soak to evenly hydrate the crumb of the sponge, while the mascarpone frosting firms up, making it significantly easier to slice neatly the next day.
Can I use store-bought sponge cake or box mix?
Yes, if you are short on time, a high-quality white or yellow box cake mix can be substituted for the homemade sponge. To elevate a boxed mix, swap the water called for on the box with whole milk, and replace the oil with melted butter. This will give the store-bought cake a denser, more homemade crumb that stands up better to the espresso soak.
What is the best type of coffee to use for the soak?
The best results come from freshly brewed, high-quality espresso because of its robust concentration. If you do not have an espresso machine, you can use a French press to brew a very strong, dark roast coffee, or dissolve two tablespoons of premium espresso powder into one cup of hot water. The key is ensuring the coffee flavor is bold enough to cut through the sweet cream.
Why did my mascarpone frosting turn grainy?
Grainy frosting is the result of the fat in the heavy cream or mascarpone breaking and beginning to turn into butter. This happens when the ingredients are too warm or when they are over-whipped. To prevent this, ensure both your cream and mascarpone are straight from the refrigerator, and stop whipping the moment the mixture holds its shape.
Is it safe to omit the alcohol entirely?
Yes, the alcohol (such as Kahlúa, rum, or Marsala wine) is purely optional and used strictly for depth of flavor. If you prefer an alcohol-free dessert, simply leave it out. You can replace the lost volume in the soak by adding an extra tablespoon of espresso, or by adding a half-teaspoon of pure vanilla extract to the coffee mixture for extra aroma.

tiramisu cake how to bake 7 best layers
Ingredients
Equipment
Method
Step 1: Prepare the Vanilla Sponge
Preheat your oven to 175°C (350°F). Grease two 8-inch round cake pans and line the bottoms with parchment paper. In a medium bowl, whisk together the cake flour, baking powder, and a pinch of salt. In the bowl of your stand mixer, beat the softened unsalted butter and 1.5 cups of granulated sugar on medium-high speed until pale and fluffy (about 4 minutes). Add the room-temperature eggs one at a time, beating well after each addition, followed by the vanilla extract.Step 2: Incorporate Dry Ingredients
Reduce the mixer speed to low. Gradually add the dry flour mixture in three additions, alternating with the whole milk, beginning and ending with the dry ingredients. Mix just until the batter is smooth and combined—overmixing will develop the gluten and result in a dense cake that cannot properly absorb the coffee. Divide the batter evenly between the prepared pans and smooth the tops with your offset spatula.Step 3: Bake and Cool
Bake the layers on the middle rack of your oven for 30 to 35 minutes, or until a toothpick inserted into the center comes out clean. Remove the pans from the oven and let the cakes cool for 10 minutes before turning them out onto wire racks to cool completely. Never attempt to soak or frost warm cakes; patience here is the foundation of mastering the art of traditional layer cakes.Step 4: Create the Espresso Soak
While the cakes cool, prepare your soaking syrup. In a small bowl, combine the completely cooled strong brewed espresso with the coffee liqueur (if using) and 1 tablespoon of sugar. Stir until the sugar is fully dissolved. Set this mixture aside. Using a high-quality espresso ensures the deep, roasted notes pierce through the sweet mascarpone later on.Step 5: Whip the Mascarpone Frosting
In a chilled mixing bowl, combine the cold heavy whipping cream, powdered sugar, and vanilla extract. Whip on medium-high speed until soft peaks form. Gently fold in the cold mascarpone cheese and continue whipping just until the frosting holds firm, pipeable peaks. Be incredibly careful during this step—over-whipping mascarpone will cause the fat to separate and the frosting to curdle instantly.Step 6: Assemble and Soak the Layers
Place the first completely cooled cake layer on your serving platter or cake stand. Using your silicone pastry brush, generously dab half of the espresso mixture over the surface of the sponge, allowing it to soak in. Spread a thick, even layer of the mascarpone frosting over the soaked cake. Place the second cake layer on top and repeat the soaking process with the remaining espresso.Step 7: Frost, Chill, and Garnish
Use the remaining mascarpone frosting to coat the top and sides of the cake smoothly. You can use your offset spatula to create rustic swirls or a sleek, modern edge. Once frosted, place the cake in the refrigerator uncovered for at least 4 hours to allow the layers to meld and the frosting to stabilize. Right before serving, use a fine mesh sieve to generously dust the top with Dutch-processed cocoa powder.