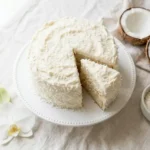
Coconut cake: How to bake the 1 best moist dessert Craving a sweet treat?
Master our ultimate coconut cake with these easy baking tips for fluffy layers and rich cream cheese frosting. Try this recipe today.
Yield: 5 people
Materials
Cake Flour (2 ½ cups): This is non-negotiable for a tender crumb. Cake flour has a lower protein content (around 7-9%) compared to all-purpose flour, which prevents excess gluten formation.Granulated Sugar (1 ¾ cups): Essential for sweetening and locking in moisture during the baking process.Unsalted Butter (1 cup, softened): Using room-temperature butter allows for proper aeration when creamed with sugar.Large Eggs (4, room temperature): Eggs provide structure and stability. If they are cold, they will seize the butter and break your emulsion.Full-Fat Coconut Milk (1 cup): Shake the can well! The high fat content here is the secret to an incredibly rich and decadent sponge. Substitution: If you cannot find this, buttermilk mixed with a teaspoon of coconut extract can mimic the acidity and flavor.Sweetened Shredded Coconut (1 ½ cups): Adds both texture and an unmistakable flavor profile. Substitution: Unsweetened desiccated coconut works well if you want to reduce overall sugar intake, just soak it in a tablespoon of milk first to soften it.Pure Vanilla Extract (2 teaspoons): Enhances the overall flavor complexity.Baking Powder (2 teaspoons) & Baking Soda (½ teaspoon): The leavening agents responsible for that glorious lift.Kosher Salt (½ teaspoon): Balances the sweetness perfectly.
Instructions
Step 1: Prepping Your Pans and Oven
Begin by preheating your oven to 350°F (175°C). Proper oven temperature is crucial for the leavening agents to activate correctly. Grease two 9-inch round cake pans generously with butter, and line the bottoms with parchment paper. This simple step guarantees that your delicate layers will slide out flawlessly without sticking or tearing.Step 2: Whisking the Dry Ingredients
In a medium-sized bowl, vigorously whisk together the cake flour, baking powder, baking soda, and kosher salt. Whisking not only distributes the leavening agents evenly—preventing large, uneven air pockets in your baked goods—but it also aerates the flour, acting as a quick alternative to sifting.Step 3: Creaming the Butter and Sugar
In the bowl of a stand mixer fitted with a paddle attachment, beat the softened unsalted butter and granulated sugar on medium-high speed. Do this for a full 4 to 5 minutes until the mixture transforms into a pale, fluffy consistency. This aeration process physically punches tiny air bubbles into the butter fat, which will later expand in the oven to give your dessert its light texture.Step 4: Incorporating the Eggs and Extracts
Reduce your mixer speed to low and add the room-temperature eggs one at a time. Wait until the yellow of the yolk just barely disappears before adding the next one. Scrape down the sides of the bowl with a silicone spatula halfway through. Pour in the pure vanilla extract and mix until just combined.Step 5: Alternating Wet and Dry Ingredients
To prevent the gluten from overdeveloping, alternate adding your dry ingredients and your full-fat coconut milk to the butter mixture. Start and end with the flour mixture (three parts flour, two parts milk). Mix on the lowest possible speed, and turn the mixer off the second the last streak of flour vanishes.Step 6: Folding in the Shredded Coconut
Remove the bowl from the stand mixer. Using your silicone spatula, gently fold the sweetened shredded coconut into the batter by hand. This ensures the add-ins are evenly distributed without accidentally overworking the delicate batter.Step 7: Baking to Perfection
Divide the batter evenly between your prepared pans. Use an offset spatula to smooth the tops. Bake on the middle rack for 35 to 40 minutes. You will know they are ready when the edges pull slightly away from the pan and a toothpick inserted into the center comes out clean or with a few moist crumbs attached.Step 8: Cooling and Frosting
Allow the pans to cool on a wire rack for 10 minutes before inverting them to remove the layers. Let the layers cool entirely to room temperature before applying your favorite cream cheese frosting. Applying frosting to warm layers will cause it to melt and slide right off.