Go Back
Healthy chocolate cake recipe 9 best baking steps

Healthy chocolate cake recipe 9 best baking steps

Craving a sweet indulgence? This healthy chocolate cake recipe cuts refined sugar but keeps the rich cocoa flavor. Discover your new favorite balanced treat!
Prep Time 15 minutes
Cook Time 20 minutes
Total Time 33 minutes
Servings: 4 people
Course: Dessert
Cuisine: American
Calories: 120

Ingredients
  

Dry Ingredients:1 ½ cups of whole wheat pastry flour (or a premium 1:1 gluten-free baking blend for those with celiac or sensitivities). Whole wheat pastry flour is milled from soft white wheat, providing a tender, delicate crumb while significantly boosting dietary fiber compared to bleached all-purpose flour.½ cup of premium, unsweetened Dutch-process cocoa powder. The Dutching process neutralizes the natural acidity of cocoa, delivering a remarkably dark, aromatic, and velvety chocolate base without the need for excess added sugars to mask bitterness.1 teaspoon of baking soda and ½ teaspoon of baking powder. This dual-leavening approach ensures a beautifully airy, light lift, preventing the dense texture often associated with "healthy" bakes.½ teaspoon of fine sea salt. Salt is critical in dessert baking; it enhances the cocoa notes, balances the sweetness, and stimulates the taste buds to recognize deeper flavor profiles.
Wet Ingredients:½ cup of unsweetened organic applesauce. This acts as a brilliant, hydrocolloid fat-replacer. It adds incredible natural moisture and a subtle fruity sweetness to the cake without the heavy caloric load of traditional butter.⅓ cup of melted unrefined coconut oil or cold-pressed avocado oil. These options provide necessary healthy fats (like medium-chain triglycerides) that yield a moist, tender texture and a superior mouthfeel.¾ cup of pure maple syrup or raw, unfiltered honey. These offer an unrefined, deeply flavored natural sweetness that brings trace minerals like zinc and manganese to your dessert.1 cup of unsweetened almond milk (or any plant-based milk like oat or soy) mixed directly with 1 tablespoon of raw apple cider vinegar. This simple mixture creates a reactive vegan "buttermilk." The acidity interacts violently with the baking soda to create carbon dioxide bubbles, translating to maximum fluffiness in the oven.2 large pasture-raised eggs, carefully brought to room temperature to ensure they emulsify seamlessly with the oils.2 teaspoons of pure, high-quality vanilla extract. Vanilla elevates chocolate mathematically, acting as a floral, warm aromatic finish that tricks the brain into perceiving more sweetness.
Method
 

  1. Step 1: Prepare Your Baking Environment

    Begin by preheating your oven to 350°F (175°C). Taking the time to properly preheat your oven ensures an even, immediate bake and prevents a gummy texture. Lightly grease an 8-inch round cake pan with a touch of coconut oil, then line the bottom with a precise circle of parchment paper. This crucial step guarantees your cake will release smoothly without tearing the delicate, freshly baked crumb.

    Step 2: Sift and Whisk the Dry Elements

    In a large, spacious mixing bowl, combine your whole wheat pastry flour, unsweetened Dutch-process cocoa powder, baking soda, baking powder, and fine sea salt. Pro Tip: Always sift the cocoa powder before whisking. Cocoa powder is notoriously prone to holding stubborn clumps due to its fat content, and sifting ensures a perfectly smooth batter and an even flavor distribution throughout the entire cake matrix.

    Step 3: Emulsify the Wet Components

    In a separate, medium-sized bowl, vigorously whisk together the unsweetened applesauce, melted coconut oil, pure maple syrup, your prepared homemade vegan buttermilk (the almond milk plus apple cider vinegar mixture), room-temperature eggs, and pure vanilla extract. It is mathematically critical that all these ingredients are at room temperature. If your almond milk or eggs are straight from the fridge, their cold temperature will immediately cause the warm melted coconut oil to seize and solidify into unpleasant, unmixable chunks.

    Step 4: Fold the Batter to Perfection

    Gradually and gently pour the wet ingredient mixture into the bowl containing your dry ingredients. Using a flexible silicone spatula, gently fold the batter together utilizing a sweeping figure-eight motion. Be incredibly careful not to overmix here. Stop folding the exact second the last dry streak of flour disappears into the dark batter. Overworking the batter develops the gluten strings rapidly, which can result in a dense, rubbery cake rather than a fluffy, tender one.

    Step 5: Bake and Monitor

    Pour the freshly mixed batter into your prepared parchment-lined cake pan, using the edge of the spatula to smooth the top into an even, horizontal layer. Place the pan on the exact middle rack of your preheated oven to ensure optimal heat circulation. Bake for 28 to 32 minutes. To scientifically test for doneness, insert a wooden toothpick directly into the center of the cake; it should come out clean or with just a few moist, fully baked crumbs attached.

    Step 6: Cool Down Gracefully

    Remove the cake from the oven and allow it to rest undisturbed in the hot pan for exactly 10 minutes. This mandatory resting period allows the internal gelatinized starches to set securely. Afterward, run a butter knife around the edge and gently invert the cake onto a wire cooling rack. Allow it to cool completely to room temperature before attempting to slice or apply any toppings, as frosting a warm cake guarantees a melted, structural disaster.

    Step 7: Portioning for Impact

    Once completely cooled, use a long, serrated bread knife to slice the cake. Using a gentle sawing motion rather than pressing straight down will protect the airy crumb structure you worked so hard to create. If you are practicing portion control, this recipe is easily adaptable. In fact, if you want to make a smaller version, you can halve the ingredients and follow the guidelines found in the small-batch baking the cakes for two handbook.

    Step 8: Apply Health-Conscious Garnishes

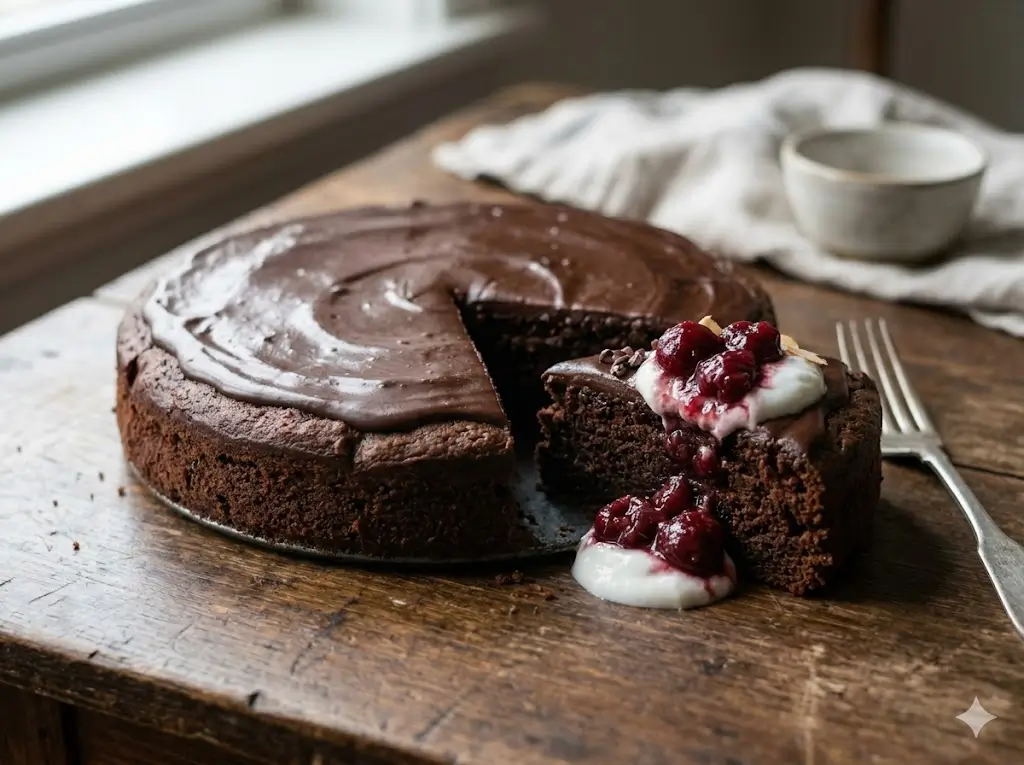
    Avoid heavy, sugar-laden buttercream frostings that defeat the purpose of this nutritional bake. Instead, prepare a light glaze, a dusting of matcha and cocoa, or a simple protein-yogurt topping.

    Step 9: Serve with Confidence

    Plate your slices on chilled dessert plates to contrast with the room-temperature cake. Whether you are serving this at a casual family dinner or presenting it as a centerpiece, it holds its own beautifully.