Ingredients
Method
Step 1: Craft and Set the Orange Jelly
Begin by blooming your gelatin in a tablespoon of cold water for 5 minutes. In a small saucepan, gently heat the orange juice, marmalade, and sugar until simmering. Remove from heat, whisk in the bloomed gelatin until completely dissolved. Pour this liquid into a shallow, flat-bottomed dish lined with plastic wrap (aim for a liquid depth of about ¼ inch). Place in the fridge for 60 minutes until firmly set. Actionable Tip: Speed up the setting process by placing the dish in the freezer for exactly 20 minutes, checking carefully to ensure it doesn't turn to ice.Step 2: Whisk to the Ribbon Stage
Preheat your oven to 350°F (175°C) and lightly grease a standard 12-hole shallow muffin tin. In a heatproof bowl set over a pan of barely simmering water (a double boiler), whisk the eggs and caster sugar using an electric hand mixer for 4-5 minutes. The mixture should triple in volume, turn pale, and leave a thick, trailing "ribbon" on the surface when you lift the beaters. This aeration is scientifically crucial as it traps air bubbles that will give your sponge its lift.Step 3: Fold and Bake the Genoise Sponges
Remove the bowl from the heat. Sift the plain flour directly over the aerated egg mixture in two batches. Using a large metal spoon or silicone spatula, gently fold the flour in using a figure-eight motion. Do not overmix, or you will knock the air out, resulting in a rubbery base! Spoon a tablespoon of the batter into each well of your muffin tin. Bake for 8-10 minutes until golden and springy to the touch. Transfer to a wire rack to cool completely.Step 4: Cut the Jelly Discs
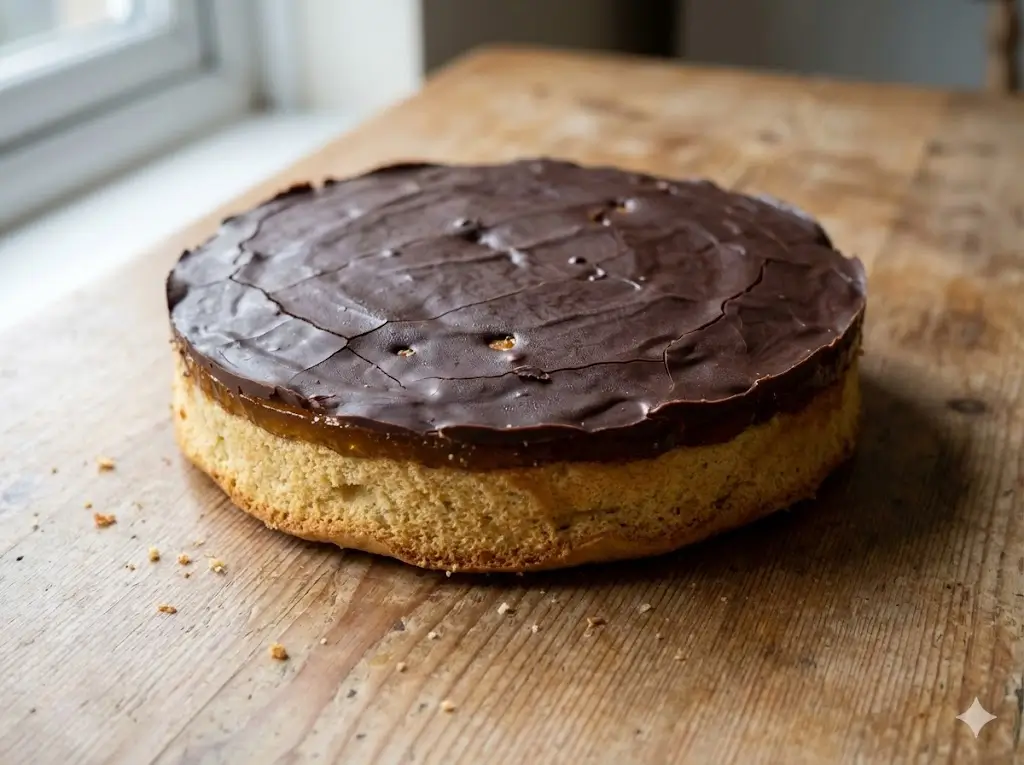
Once your sponges are completely cool and your jelly is firmly set, carefully lift the jelly out of the dish using the plastic wrap. Use a small, 1.5-inch round cookie cutter (it should be slightly smaller than your sponge bases) to punch out 12 neat jelly circles. Actionable Tip: Dip your cookie cutter in hot water and wipe it dry before each cut; the ambient heat ensures perfectly clean, sharp edges.Step 5: Assemble the Sponge and Jelly
Place one jelly disc directly into the center of each cooled Genoise sponge. Because the sponge is slightly porous, the jelly will naturally adhere to it as it comes to room temperature. Press down very gently to secure them in place.Step 6: Melt and Temper the Dark Chocolate
To achieve that iconic, satisfying "snap" when you bite into the cake, tempering your chocolate is highly recommended. Chop your dark chocolate finely. Melt two-thirds of it in a heatproof bowl over simmering water until it reaches 115°F (46°C). Remove from heat and stir in the remaining one-third of the un-melted chocolate, stirring continuously until the mixture drops to 88°F (31°C). The chocolate should look incredibly glossy and smooth.Step 7: Coat and Create the Signature Criss-Cross
Spoon a dollop of the tempered dark chocolate directly over the jelly disc on each cake, allowing it to gently cascade over the edges of the jelly to seal it against the sponge. Wait about 2 to 3 minutes for the chocolate to just begin setting, then lightly drag the tines of a fork across the surface to create that legendary, traditional criss-cross pattern. Let them set completely at room temperature before serving.
Notes
Title
Thumbnail


Price
$101.12
$94.99
$31.49
More information
Title
Thumbnail
Price
$101.12
More information
Title
Thumbnail
Price
$94.99
More information
Title
Thumbnail
Price
$31.49
More information