Ingredients
Equipment
Method
Step 1: Prep Your Oven and Pan for the Perfect Release
Begin by preheating your oven to 350°F (175°C). Take your 9x13-inch baking pan and line it cleanly with a sheet of parchment paper, leaving a two-inch overhang on the long sides. This overhang will act as a pair of manual lift handles later. Pro Tip: Lightly spritz the bare metal or glass pan with non-stick cooking spray before laying the parchment down; this anchors the paper firmly in place so it won't slide around when you attempt to spread the stiff bottom dough.Step 2: Mix the Sturdy Bottom Dough
In your first large mixing bowl, combine the dry yellow cake mix, the melted unsalted butter, and one room-temperature egg. Using a sturdy rubber spatula or a wooden spoon, fold and press the ingredients together until a thick, cohesive dough forms. It will look and feel very similar to soft commercial play-dough or rich sugar cookie batter. Do not use an electric mixer for this step; over-beating the wheat gluten in the cake mix will result in a tough, rubbery base rather than a tender, melt-in-your-mouth crust.Step 3: Press the Base Layer
Transfer your heavy bottom dough directly into the parchment-lined pan. Using your clean fingertips or the flat bottom of a glass measuring cup, press the dough firmly and evenly across the entire bottom of the pan. Make sure to push the material slightly up into the corners to create a completely uniform, watertight seal. This solid base prevents the wet top custard from seeping underneath during the bake.Step 4: Whip the Silky Cream Cheese Topping
In your second mixing bowl, beat the softened full-fat cream cheese using your electric mixer on medium-high speed for roughly 2 full minutes until it is completely smooth, fluffy, and devoid of any cold white lumps. Add the two remaining room-temperature eggs and the pure vanilla extract, beating for another 60 seconds until fully homogenized. Turn your mixer down to low speed and gradually add the powdered sugar, about one cup at a time. Once the cloud of sugar is safely incorporated, bump the speed back up to medium and whip for one final minute until the topping looks like glossy, liquid silk.Step 5: Layer and Float the Custard
Pour the liquid cream cheese mixture directly over the center of your pressed cake mix base. Take your offset spatula and gently nudge the liquid out toward the edges and corners, creating a smooth, level surface. Be gentle with your pressure here; you want the topping to float peacefully on top of the dough, not scrape up or mix into it.Step 6: The Precision Bake
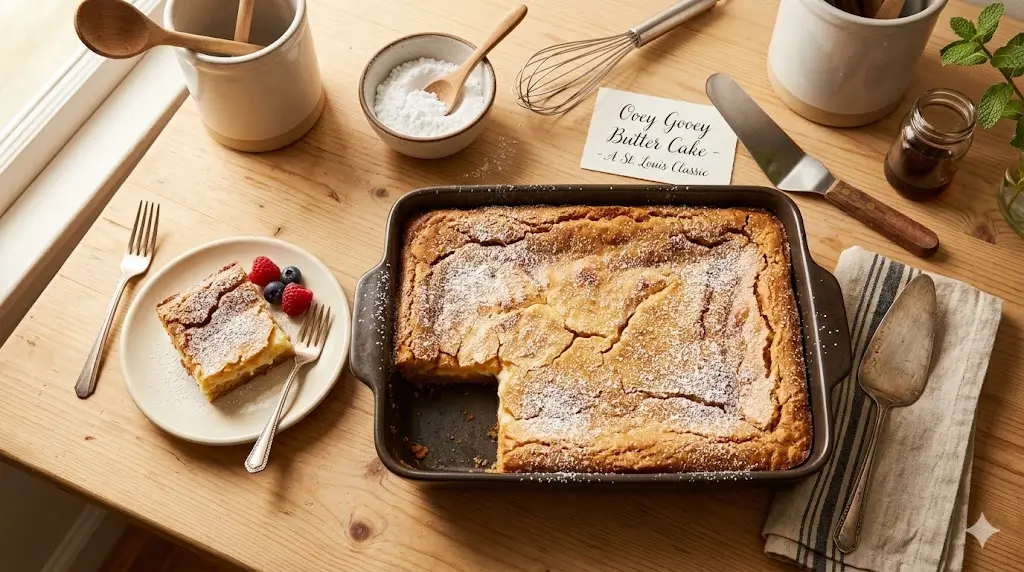
Place the pan onto the center rack of your preheated oven. Bake for 40 to 45 minutes. Keep a close eye on the perimeter: you are looking for the outer two inches of the cake to turn a pale, beautiful golden brown and puff up slightly like a soufflé. The center zone, however, should still exhibit a distinct, gentle wobble when you give the pan a light tap. Do not test the center with a wooden toothpick—it is supposed to come out wet and gooey!Step 7: The Critical Cooling Phase
Remove the baking pan from the oven and set it on a wire cooling rack. Allow the cake to sit undisturbed at room temperature for at least 2 hours. As it cools, the puffed outer edges will gently settle back down, leaving a gorgeous, slightly sunken, crackly, papery crust across the top. For the absolute cleanest, most professional slices, follow the chilling protocols outlined in our small-batch baking handbook by placing the cooled pan into the refrigerator for an additional hour prior to cutting.