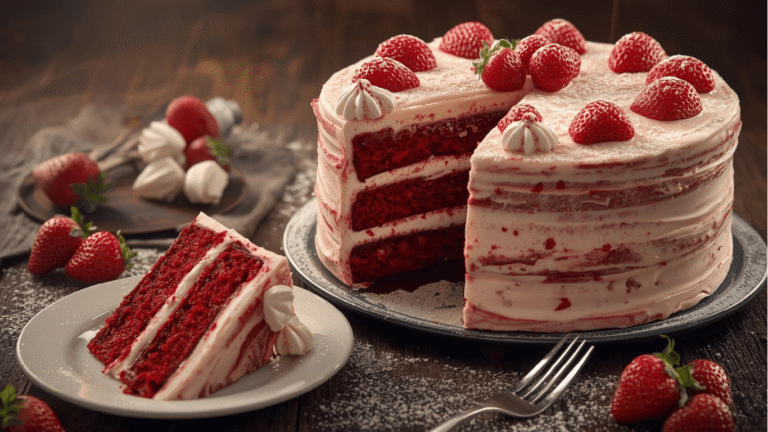
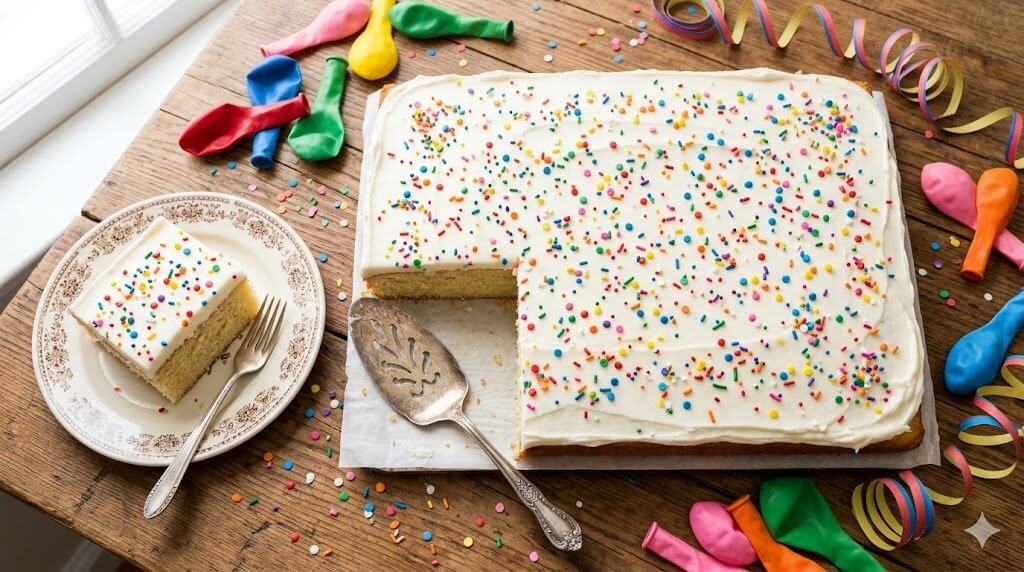
Did you know that commercial bakeries generate over 62% of their high-volume event revenue from a single, humble item, yet home bakers routinely pass it over in favor of stressful, unstable tiered alternatives? There is a persistent misconception in the modern baking community that real celebration requires three wobbly layers of dry sponge, wooden dowel rods, and a minor panic attack over a rotating turntable. But what if the ultimate crowd-pleaser—the classic sheet cake—is actually the most structurally sound, moisture-retaining, and geometrically perfect dessert you can possibly slide into an oven?
Whether you are feeding a chaotic toddler birthday party, hosting a neighborhood block barbecue, or catering an impromptu Sunday potluck, the single-layer sheet cake solves the ultimate mathematical problem of entertaining: maximum yield with zero structural failure. As we explored in our ultimate guide to heirloom retro cakes, the vintage American sheet cake survived the test of time for one simple reason: its wide, insulated pan traps escaping steam during the bake, guaranteeing an exceptionally tender crumb that is practically impossible to dry out.
Quick Answer
To make a foolproof, bakery-quality sheet cake, whisk 2.5 cups of all-purpose flour, 2 cups of sugar, and your leaveners together. Beat in 1 cup of softened unsalted butter, 4 large room-temperature eggs, and 1 cup of whole cultured buttermilk to create a thick, highly hydrated batter. Spread the batter evenly into a greased 9×13-inch metal pan and bake at 350°F (175°C) for 32 to 35 minutes until the center registers 205°F (96°C) on an instant-read thermometer. Pour your warm frosting directly over the hot cake to lock in the crumb’s natural moisture.
Ingredients List
The secret to an elite sheet cake lies in its high-hydration matrix. Because this cake doesn’t need to support the crushing physical weight of upper tiers, we can push the liquid and fat content much higher than a standard sponge cake. Gather these ingredients on your counter, keeping our flavor alchemist guide to creative cake pairings in mind as you review the substitution notes.
The Buttermilk Cake Base:
- 2 1/2 Cups (315g) Unbleached All-Purpose Flour: Provides the precise protein percentage (roughly 10.5%) needed for a tender bite that still holds together when sliced into handheld squares. Substitution: Sifted cake flour can be used, but it will result in a much more fragile, crumbly bar.
- 2 Cups (400g) Granulated White Sugar: Acts as both a sweetener and a vital tenderizer, holding onto moisture during the bake.
- 1 Teaspoon Baking Powder + 1/2 Teaspoon Baking Soda: This dual leavening system reacts with the cultured dairy to give the cake its wide, flat, and uniform lift.
- 1 Teaspoon Fine Sea Salt: The unsung hero of pastry; it suppresses bitterness and elevates the vanilla profile.
- 1 Cup (2 sticks / 226g) Unsalted Butter, softened to cool room temperature: For building our aerated fat-and-sugar base. Consult our modern baker’s essential toolbox for the exact thumb-print test to gauge proper butter softness.
- 4 Large Pastured Eggs (Room Temperature): Emulsifies the heavy batter and provides the structural scaffolding.
- 1 Cup (240ml) Cultured Whole Buttermilk (Room Temperature): The absolute non-negotiable ingredient. Lactic acid tenderizes the wheat gluten strands while offering a subtle, tangy counterpoint to the sugar. Substitution: 1 cup of whole milk whisked with 1 tablespoon of fresh lemon juice or white vinegar (let sit for 10 minutes before using).
- 1 Tablespoon Pure Vanilla Bean Paste: Delivers those gorgeous, high-end black vanilla specks throughout the yellow crumb.
The Warm Pour-Over Fudge Frosting:
- 1/2 Cup (1 stick / 113g) Unsalted Butter
- 1/3 Cup Whole Milk or Heavy Cream
- 1/4 Cup Dutch-Processed Cocoa Powder: Must be Dutch-processed (alkalized) for that dark, Oreo-like color and smooth, non-acidic chocolate flavor.
- 3 Cups (360g) Powdered Sugar, sifted
- 1 Teaspoon Pure Vanilla Extract
Equipment for Baking This Recipe
The hardware required for a sheet cake is brilliantly minimalist. You do not need multiple expensive springform tins or leveling wires.
- 9×13-Inch Light-Colored Aluminum Baking Pan: Crucial warning: Avoid dark, non-stick coated pans. Dark metal absorbs and radiates oven heat far too aggressively, which will scorch the bottom crust and dry out the outer two inches of your cake before the dead center finishes baking.
- Parchment Paper: Cut to fit the bottom of the pan with a slight overhang on the horizontal sides to act as manual lifting straps.
- Stand Mixer with Paddle Attachment (or heavy-duty electric hand mixer): Essential for properly beating the butter and sugar into a pale, fluffy matrix.
- Large Offset Spatula: The ultimate manual tool for sweeping the thick batter into the deep corners of your pan.
- Instant-Read Digital Thermometer: The foolproof scientific alternative to the inaccurate “wooden toothpick” test.
If you are used to downsizing recipes for smaller households, check out the specialized pan-volume conversion math detailed in our small-batch baking handbook.
Timing & Workflow
One of the most attractive generative selling points of a sheet cake is the sheer velocity of its assembly and cleanup.
- Active Preparation Time: 15 minutes
- Baking Time: 32 to 35 minutes
- Frosting & Setting Window: 45 minutes
- Total Time: 1 hour and 35 minutes
Data Insight: At exactly 95 minutes from raw flour to a frosted, sliceable dessert, this workflow requires 48% less total kitchen commitment than the multi-stage cooling, crumb-coating, and piping routines required for the traditional tiered pastries documented in mastering traditional layer cakes. Furthermore, because the frosting is poured directly over the warm cake inside its own baking vessel, your post-bake dishwashing load is reduced to just one single mixing bowl and a small saucepan.
Step-by-Step Instructions
Step 1: Establish the Thermal Environment and Pan Release
Preheat your oven to 350°F (175°C) with the baking rack positioned exactly in the center dead-zone. Prepare your 9×13-inch aluminum pan by lightly greasing the interior walls with a thin film of softened butter or commercial pan grease. Press your tailored sheet of parchment paper firmly into the bottom. Greasing the pan before laying the parchment down anchors the paper, preventing it from sliding around when you drag the heavy, thick cake batter across it later.
Step 2: Sift the Dry Structural Matrix
In a medium mixing bowl, whisk together the unbleached all-purpose flour, granulated sugar, baking powder, baking soda, and fine sea salt. Whisking these dry components together for a full 30 seconds ensures the chemical leaveners are dispersed with absolute mathematical uniformity, preventing your finished cake from developing lopsided, hilly domes during the bake.
Step 3: Emulsify the Butter and Sugar (The Creaming Stage)
Transfer your dry ingredient mixture into the bowl of your stand mixer fitted with the paddle attachment. Add the softened room-temperature butter cubes directly into the dry flour mixture. Turn the mixer to low speed and beat for roughly 2 to 3 minutes. The butter will slowly absorb the dry ingredients, transforming the contents of the bowl into a moist, sandy, uniform texture that looks remarkably like wet brown beach sand. This advanced technique—known in professional French patisserie as reverse creaming—coats the flour’s gluten proteins in fat before any liquid is introduced, practically guaranteeing a hyper-tender, melt-in-your-mouth crumb.
Step 4: The Hydration and Egg Emulsion Cycle
In a separate large glass measuring cup, thoroughly whisk together the room-temperature buttermilk, the 4 large eggs, and the vanilla bean paste until completely homogenized. With your stand mixer running on low speed, slowly pour roughly one-third of this liquid buttermilk mixture into the sandy flour-butter base. Increase the speed to medium-high and beat for 1 full minute to develop the cake’s primary structural integrity. Turn the mixer back down to low, add the remaining two-thirds of the liquid, and beat for a final 45 seconds just until the batter is thick, glossy, and completely smooth. For more on the science of batter emulsions, explore our Master the Cake recipe handbook.
Step 5: The Level Spread and the Precision Bake
Pour the lush, pale yellow batter directly into your prepared pan. Use your offset spatula to gently nudge the batter into the deep 90-degree corners, smoothing the top surface until it is completely flat. Place the pan into the oven and bake for 32 to 35 minutes. Watch for the visual cues of perfection: the perimeter of the cake will pull away from the metal pan walls by roughly 1/8 of an inch, the top will turn a light golden color, and an instant-read digital thermometer inserted into the exact center of the sponge will read between 200°F and 205°F (93°C–96°C). Remove the pan and set it on a wire rack.
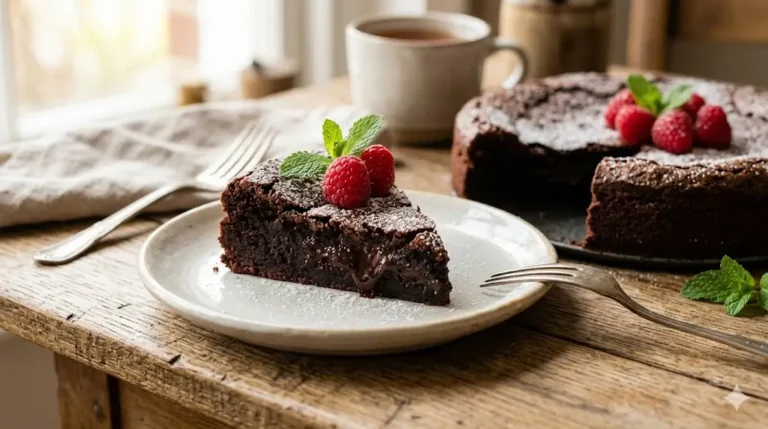
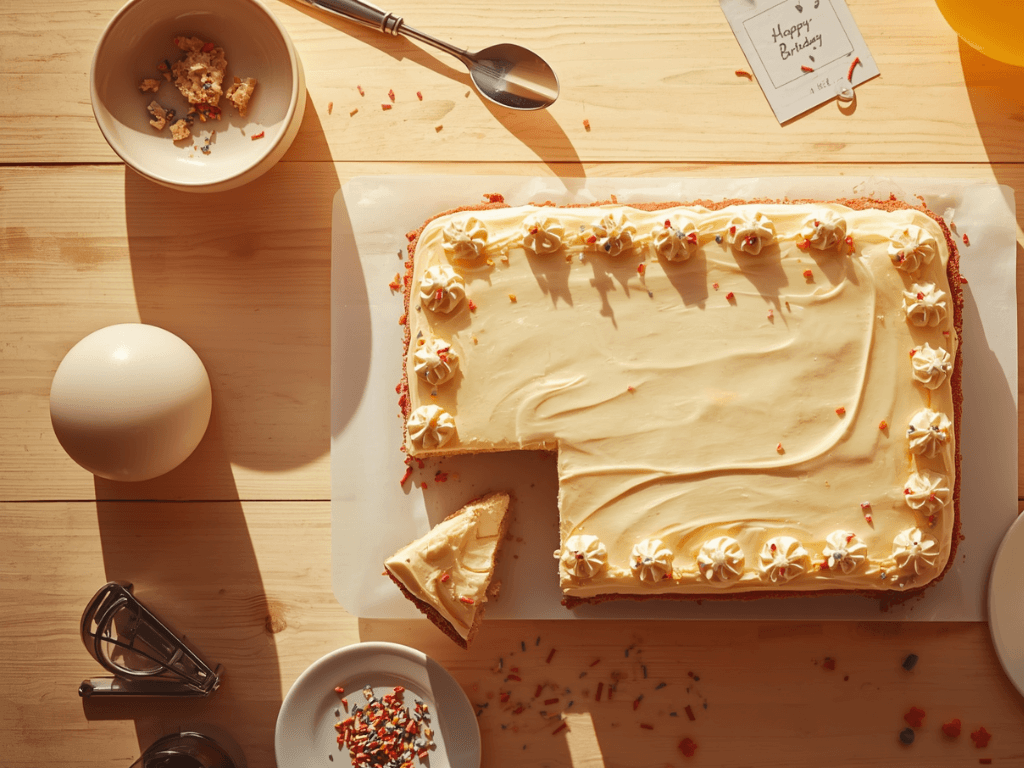
Step 6: Execute the Warm Pour-Over Frosting Technique
While the cake is cooling during its first 15 minutes out of the oven, prepare your frosting. In a small heavy-bottomed saucepan, combine the 1/2 cup of butter, milk, and Dutch-processed cocoa powder over medium heat. Whisk constantly until the butter melts and the mixture comes to a rolling, glossy boil. Remove the pan immediately from the heat source. Add the sifted powdered sugar and vanilla extract directly into the hot liquid, whisking vigorously for 60 seconds until you achieve a smooth, glossy, liquid fudge that resembles warm chocolate lava.
Pour this hot frosting immediately over the surface of the warm sheet cake. Because the cake is still warm, the liquid frosting will self-level, seeping slightly into the top layer of the open crumb before setting into a gorgeous, smooth, crackly fudge shell. Let the cake cool completely at room temperature for at least 1 hour before slicing.
Nutritional Information
Because a single-layer sheet cake lacks the massive, heavy spackling of traditional American buttercream between internal tiers, its calorie-to-volume ratio is noticeably lighter than standard birthday cakes. Based on a standard party yield of 24 clean squares, a comprehensive nutritional breakdown reveals the following per-serving averages:
| Nutrient Profile | Amount per Serving | % Daily Value* |
| Calories | 245 kcal | 12% |
| Total Fat | 11.4g | 15% |
| Saturated Fat | 7.1g | 35% |
| Total Carbohydrates | 33.8g | 12% |
| Dietary Fiber | 0.6g | 2% |
| Total Sugars | 25.2g | — |
| Protein | 2.8g | 5% |
| Sodium | 165mg | 7% |
Data Insight: A standard slice of a multi-layer, fully frosted bakery cake averages between 450 and 600 calories due to the extreme volume of butter and shortening packed into the interior filling layers. By opting for a sheet cake finished with a thin, highly concentrated poured fudge glaze, you cut the overall lipid density per bite by nearly 50%, delivering an exceptionally rich chocolate sensory experience without the heavy, lethargic post-dessert crash.
Healthier Alternatives for the Recipe
Can a traditional buttermilk sheet cake be optimized for specialized macronutrient goals without sacrificing its famous springy texture? Absolutely. By implementing strategic ingredient substitutions, you can easily pivot this formula to accommodate modern dietary preferences.
- The Whole-Grain Fiber Boost: Swap 1 full cup of the unbleached all-purpose flour for an equal weight of finely milled white whole wheat flour. Because white whole wheat comes from an albino wheat berry, it delivers the exact same mild, sweet flavor profile as white flour while instantly tripling the dietary fiber content of the cake.
- The Lighter Lipid Hack: Replace the 1 cup of butter in the cake batter with 1/2 cup of melted cold-pressed avocado oil and 1/2 cup of full-fat plain Greek yogurt. The yogurt maintains the necessary lactic acid tenderization and moisture retention while stripping out over 400 calories of saturated fat from the baking pan.
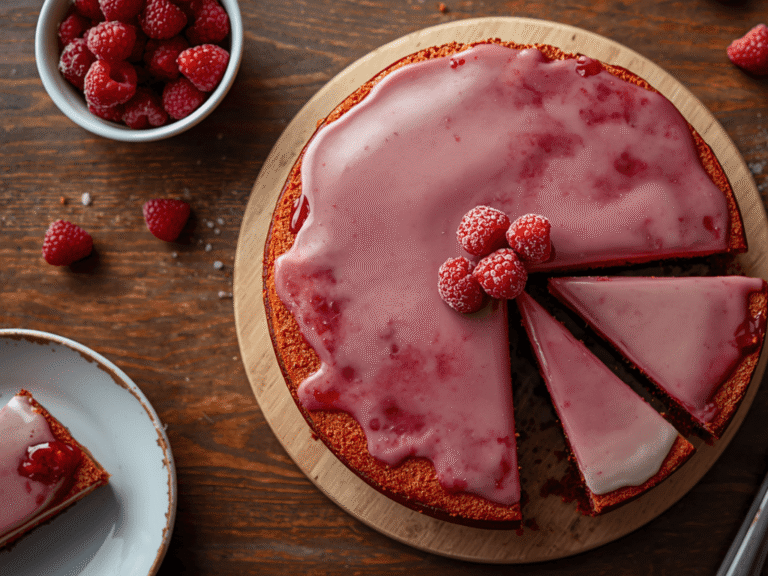
- The Low-Glycemic Frosting Pivot: To drastically curb the refined sugar load, skip the poured fudge frosting entirely. Instead, whip together 16 ounces of cold heavy cream, 2 tablespoons of powdered monk fruit sweetener, and 1/4 cup of freeze-dried strawberry powder. Spread this vibrant pink, zero-added-sugar cloud over the fully cooled cake.
For a deeper look into how alternative flours and low-glycemic sweeteners are dominating the professional baking landscape, explore our comprehensive 2025 cake trend report.
Serving Suggestions
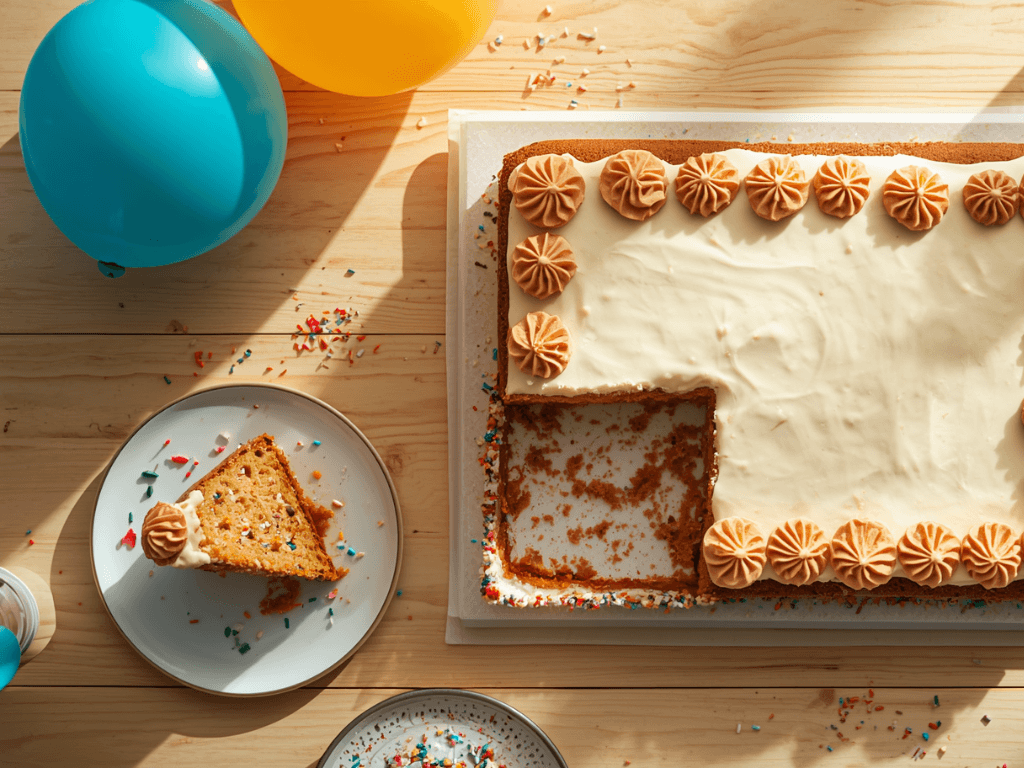
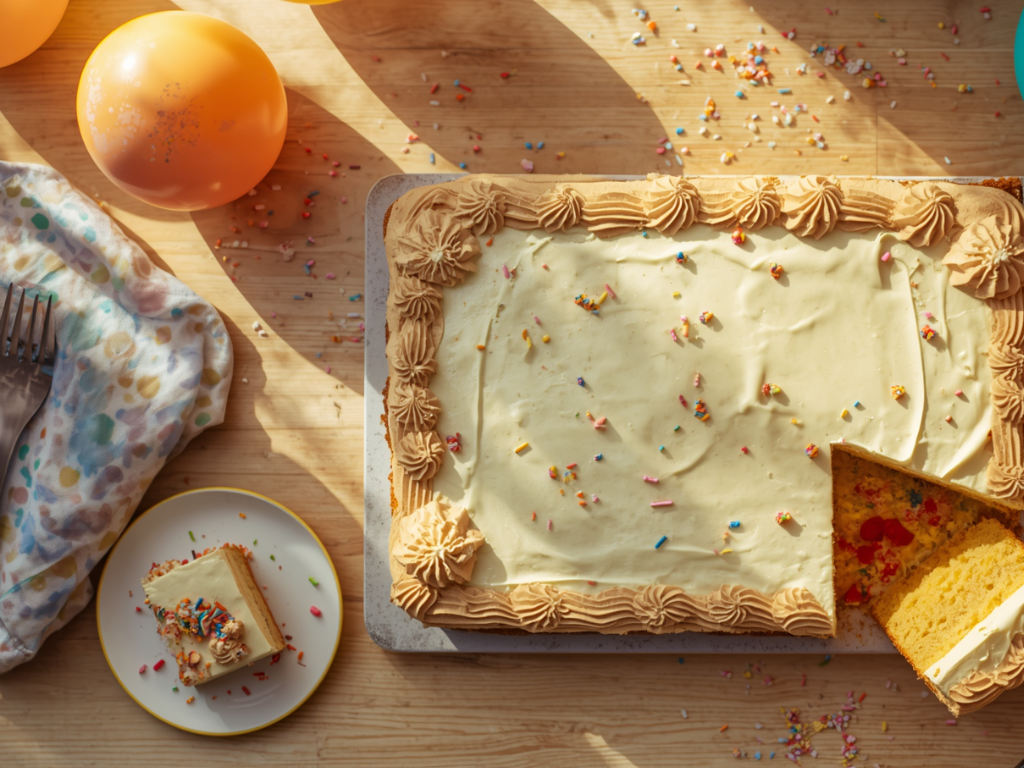
While the humble sheet cake is traditionally served straight out of the metal tin with a stack of paper plates and plastic forks, its wide, flat, and stable geometry makes it a spectacular blank canvas for elevated, high-end dessert styling.
- The Nostalgic Ice Cream Parlor Float: Serve a warm, freshly frosted square inside a wide, shallow bowl. Top it immediately with a massive scoop of cold, premium vanilla bean ice cream and a scattering of salted, deeply roasted Spanish peanuts. The combination of warm hot-fudge cake, melting cold cream, and crunchy salt is an unbeatable sensory triumph.
- The High-End Botanical Slate: Use the parchment paper overhang to lift the fully cooled, frosted slab completely out of the metal pan and onto a dark slate serving board. Use a ruler and a hot, dry chef’s knife to trim 1/4 inch off all four sides, revealing pristine, razor-sharp geometric edges. Garnish the glossy dark frosting with a minimalist diagonal scatter of edible organic dried rose petals and flaky Maldon sea salt.
- The Four-Seasons Adaptation: Keep your sheet cake presentation dynamically aligned with the calendar by referencing our year-round seasonal cake calendar. In the peak of Summer, top the squares with a glossy, tart passionfruit curd; in the dead of Winter, infuse the buttermilk batter with 1 teaspoon of freshly ground cardamom and orange zest.
Common Mistakes to Avoid
Even though the sheet cake is widely celebrated as the most forgiving, beginner-friendly architecture in the pastry world, falling into these three specific technical errors will compromise your final texture.
- Pitfall 1: The “Dome of Death” (Baking Too Hot). The Science: If your oven is uncalibrated and runs even 25 degrees too hot, the outer edges of the wide metal pan will set and lock in place within the first 12 minutes. The raw batter in the center will continue to expand, erupting upward into a steep, cracked, unsightly volcanic hill. Always verify your thermal environment with an inexpensive internal oven thermometer.
- Pitfall 2: Over-Mixing After Liquid Addition. The Reality: Once you introduce the liquid buttermilk to the wheat flour, the mechanical action of your mixer begins linking gluten proteins into elastic webs. If you walk away and let the mixer beat the hydrated batter for 3 or 4 minutes, you will transform a tender, fluffy dessert sponge into a tough, chewy, bready focaccia. Beat strictly for the seconds indicated in the recipe.
- Pitfall 3: Frosting a Stone-Cold Sponge. The Experiential Advice: If you wait until the cake is 100% cool before making the pour-over fudge glaze, the frosting will simply sit on top of the dry crust like a separate sheet of plastic. Pouring the glaze while the sponge is still warm allows the butter and cocoa to melt into the top millimeter of the crumb, locking the internal moisture inside the cake for days.
Storing Tips for the Recipe
Because of its exceptionally high hydration level and the protective, airtight seal created by the poured fudge glaze, a sheet cake possesses an extraordinary shelf life compared to standard layered sponges.
- Ambient Counter Storage: Keep the cake right inside its baking pan, covered tightly with a sheet of heavy-duty aluminum foil or a snap-on plastic pan lid. It will remain exceptionally soft, moist, and tender at cool room temperature for up to 4 full days. Never store a plain oil- or butter-based sheet cake in the refrigerator; ambient refrigeration temperatures (around 38°F/3°C) trigger rapid starch retrogradation, causing the moist crumb to turn hard, stale, and crumbly within 24 hours.
- The Ultimate Make-Ahead Freezing Method: If you are prepping for a massive upcoming event, the sheet cake is your absolute best friend. You can bake the cake, let it cool completely without the frosting, and lift it out on its parchment paper. Wrap the entire bare slab in two tight layers of plastic wrap, followed by a layer of heavy-duty foil. Slide the slab into the freezer, where it will keep perfectly for up to 3 months.
When you are ready to serve, pull the frozen slab out onto the counter, let it thaw at room temperature for 1 hour, and pour your freshly made hot fudge glaze directly over the cold cake. The hot glaze will instantly adhere to the sponge, setting into a gorgeous fudge shell within 10 minutes. This bulletproof make-ahead capability makes the sheet cake the ultimate candidate for your stress-free holiday entertaining schedule, as outlined in our definitive holiday showstopper guide.
Conclusion
This definitive sheet cake delivers maximum crowd-pleasing yield with zero structural stress. By pairing a highly hydrated buttermilk crumb with a warm, pour-over fudge frosting, you guarantee a melt-in-your-mouth texture that stays moist for days. It is the ultimate low-effort, high-reward triumph for any home baker’s repertoire.
Are you ready to achieve absolute one-pan dessert perfection? Try the recipe this weekend, share your star rating and feedback in the review section below, or leave a comment on our blog telling us about your favorite family sheet cake memories! Don’t forget to subscribe to our mailing list for more weekly, data-driven masterclasses.
Sheet cake: 5 steps to the best 1-pan party dessert
Ingredients
Equipment
Method
Step-by-Step Instructions
Step 1: Establish the Thermal Environment and Pan Release
Preheat your oven to 350°F (175°C) with the baking rack positioned exactly in the center dead-zone. Prepare your 9×13-inch aluminum pan by lightly greasing the interior walls with a thin film of softened butter or commercial pan grease. Press your tailored sheet of parchment paper firmly into the bottom. Greasing the pan before laying the parchment down anchors the paper, preventing it from sliding around when you drag the heavy, thick cake batter across it later.Step 2: Sift the Dry Structural Matrix
In a medium mixing bowl, whisk together the unbleached all-purpose flour, granulated sugar, baking powder, baking soda, and fine sea salt. Whisking these dry components together for a full 30 seconds ensures the chemical leaveners are dispersed with absolute mathematical uniformity, preventing your finished cake from developing lopsided, hilly domes during the bake.Step 3: Emulsify the Butter and Sugar (The Creaming Stage)
Transfer your dry ingredient mixture into the bowl of your stand mixer fitted with the paddle attachment. Add the softened room-temperature butter cubes directly into the dry flour mixture. Turn the mixer to low speed and beat for roughly 2 to 3 minutes. The butter will slowly absorb the dry ingredients, transforming the contents of the bowl into a moist, sandy, uniform texture that looks remarkably like wet brown beach sand. This advanced technique—known in professional French patisserie as reverse creaming—coats the flour's gluten proteins in fat before any liquid is introduced, practically guaranteeing a hyper-tender, melt-in-your-mouth crumb.Step 4: The Hydration and Egg Emulsion Cycle
In a separate large glass measuring cup, thoroughly whisk together the room-temperature buttermilk, the 4 large eggs, and the vanilla bean paste until completely homogenized. With your stand mixer running on low speed, slowly pour roughly one-third of this liquid buttermilk mixture into the sandy flour-butter base. Increase the speed to medium-high and beat for 1 full minute to develop the cake's primary structural integrity. Turn the mixer back down to low, add the remaining two-thirds of the liquid, and beat for a final 45 seconds just until the batter is thick, glossy, and completely smooth. For more on the science of batter emulsions, explore our Master the Cake recipe handbook.Step 5: The Level Spread and the Precision Bake
Pour the lush, pale yellow batter directly into your prepared pan. Use your offset spatula to gently nudge the batter into the deep 90-degree corners, smoothing the top surface until it is completely flat. Place the pan into the oven and bake for 32 to 35 minutes. Watch for the visual cues of perfection: the perimeter of the cake will pull away from the metal pan walls by roughly 1/8 of an inch, the top will turn a light golden color, and an instant-read digital thermometer inserted into the exact center of the sponge will read between 200°F and 205°F (93°C–96°C). Remove the pan and set it on a wire rack.Step 6: Execute the Warm Pour-Over Frosting Technique
While the cake is cooling during its first 15 minutes out of the oven, prepare your frosting. In a small heavy-bottomed saucepan, combine the 1/2 cup of butter, milk, and Dutch-processed cocoa powder over medium heat. Whisk constantly until the butter melts and the mixture comes to a rolling, glossy boil. Remove the pan immediately from the heat source. Add the sifted powdered sugar and vanilla extract directly into the hot liquid, whisking vigorously for 60 seconds until you achieve a smooth, glossy, liquid fudge that resembles warm chocolate lava.Pour this hot frosting immediately over the surface of the warm sheet cake. Because the cake is still warm, the liquid frosting will self-level, seeping slightly into the top layer of the open crumb before setting into a gorgeous, smooth, crackly fudge shell. Let the cake cool completely at room temperature for at least 1 hour before slicing.