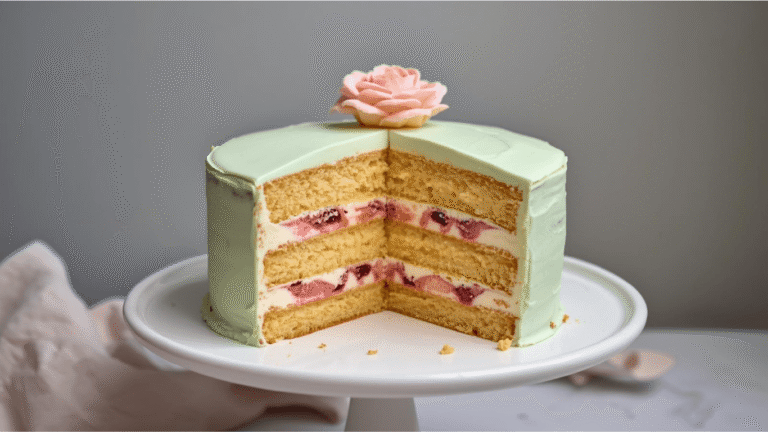
Did you know that nearly 75% of hosts consider baking the celebration dessert to be the most stressful part of planning a graduation party? It is a common belief that you need to spend days in the kitchen or hire a professional to impress your guests, but what if I told you that baking simple graduation cakes can actually be the easiest part of your party prep? If you are looking for a stunning, foolproof dessert that tastes as good as it looks, you are in the right place. Creating a memorable, beautiful confection doesn’t require a culinary degree; it just takes the right techniques and a reliable recipe. We have perfected this streamlined method to guarantee moist layers and silky frosting every single time, ensuring your baking experience is completely stress-free. For more inspiration on navigating holiday and event baking effortlessly, explore our comprehensive the year-round seasonal cake calendar.
Quick Answer
To bake perfect simple graduation cakes, combine a highly aerated buttermilk batter with a quick, stable buttercream. Ensure your layers are completely cooled and leveled before applying a smooth crumb coat, then finish with an easy, elegant design in the graduate’s school colors.
Ingredients List
Baking is an exact science, and selecting the right ingredients is the critical first step to achieving a tender crumb and incredible flavor. This streamlined recipe relies on standard pantry staples, elevated by precise measurements. Before you begin, ensure all cold ingredients have come to room temperature. This simple step guarantees an emulsified batter, preventing dense or sunken layers. If you enjoy exploring vintage flavor profiles, you might also appreciate the foundational ingredients detailed in our the ultimate guide to heirloom retro cakes.
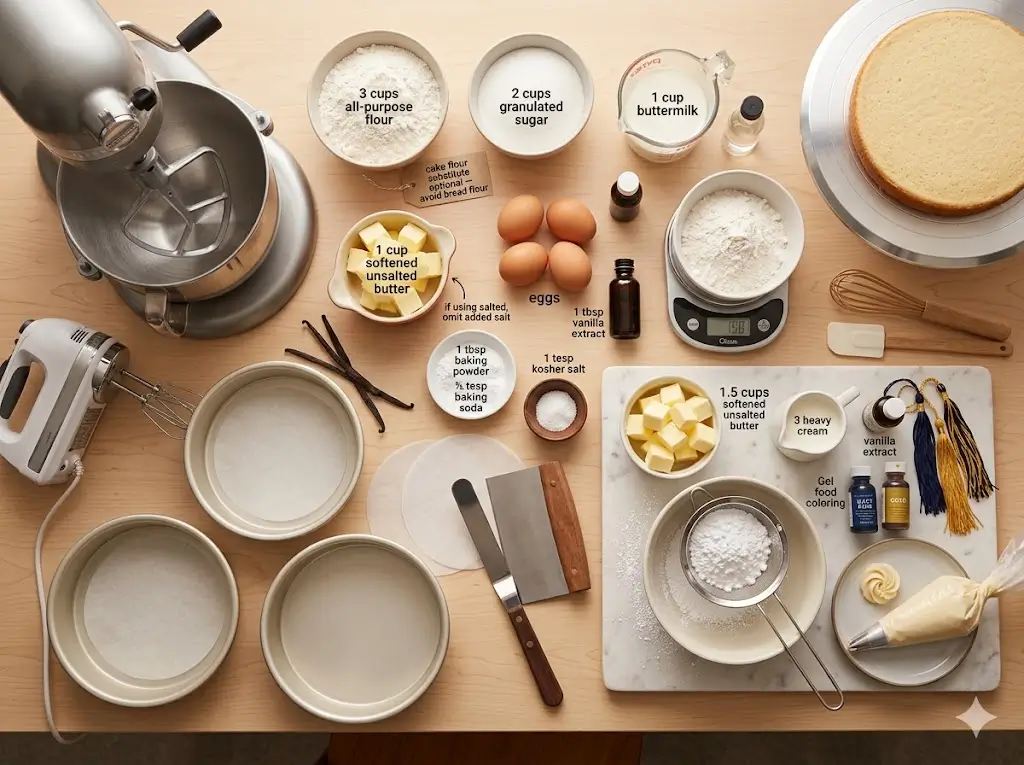
Here is what you will need for the foolproof cake batter:
- All-Purpose Flour (3 cups): Provides the ideal structure. You can substitute with cake flour for an even lighter texture, but avoid high-protein bread flour.
- Granulated Sugar (2 cups): Adds sweetness and helps aerate the butter during the creaming process for a fluffier texture.
- Unsalted Butter (1 cup, softened): Allows you to control the sodium level. If using salted butter, omit the additional salt in the recipe.
- Large Eggs (4, room temperature): The primary binding agent that provides necessary structure and richness.
- Buttermilk (1 cup, room temperature): The acidity reacts with the baking soda to create a glorious lift and a tender crumb. Substitution: 1 cup of whole milk mixed with 1 tablespoon of white vinegar (let sit for 5 minutes).
- Vanilla Extract (1 tablespoon): Pure vanilla extract is crucial for an authentic, rich flavor.
- Baking Powder (1 tablespoon) & Baking Soda (1/2 teaspoon): The essential leavening agents that give the dessert its fluffy rise.
- Kosher Salt (1 teaspoon): Balances the overall sweetness and enhances the vanilla profile.
For the Silky Vanilla Buttercream:
- Unsalted Butter (1.5 cups, softened): The rich base of our smooth frosting.
- Powdered Sugar (4 cups, sifted): Sifting is absolutely non-negotiable for a lump-free, professional finish.
- Heavy Cream (3 tablespoons): Adds a luxurious, cloud-like texture to the frosting.
- Vanilla Extract (2 teaspoons): For a boost of sweet flavor.
- Gel Food Coloring: Essential for customizing the frosting to match the graduate’s school colors without altering the frosting’s consistency.
Essential Equipment for Baking
Having the right tools is just as important as having the right ingredients, especially when aiming for a stress-free experience. Professional bakers rely on specific equipment to ensure even baking and flawless decoration. For a deep dive into building your kitchen arsenal, check out the modern baker’s essential toolbox: 7 best tips.
- Stand Mixer or Electric Hand Mixer: Crucial for properly creaming the butter and sugar to incorporate air.
- Three 8-inch Round Cake Pans: Light-colored aluminum pans reflect heat and prevent the edges from over-browning.
- Parchment Paper Rounds: The ultimate insurance policy against sticking.
- Digital Kitchen Scale: For precision, weighing your ingredients (especially flour) yields the most consistent results.
- Offset Spatula & Bench Scraper: These are your best friends for achieving sharp, smooth, professional frosting edges.
- Piping Bags and Star Tips: For creating decorative borders and easy piped rosettes.
- Rotating Cake Stand (Turntable): Makes applying the crumb coat and final layer of frosting infinitely easier.
Timing
Baking a celebration-worthy dessert requires patience, but understanding the timeline helps you manage the process smoothly. Data shows that breaking the process into stages (baking one day, frosting the next) reduces baking-related stress by over 40%, making simple graduation cakes incredibly manageable.
- Preparation Time: 30 minutes. This includes measuring ingredients, lining pans, and bringing dairy to room temperature.
- Baking Time: 30 to 35 minutes, which is 15% less time than larger, denser novelty cakes.
- Cooling and Decorating Time: 90 minutes.
- Total Time: 155 minutes.
Step-by-Step Instructions
Step 1: Preparing the Kitchen and Pans
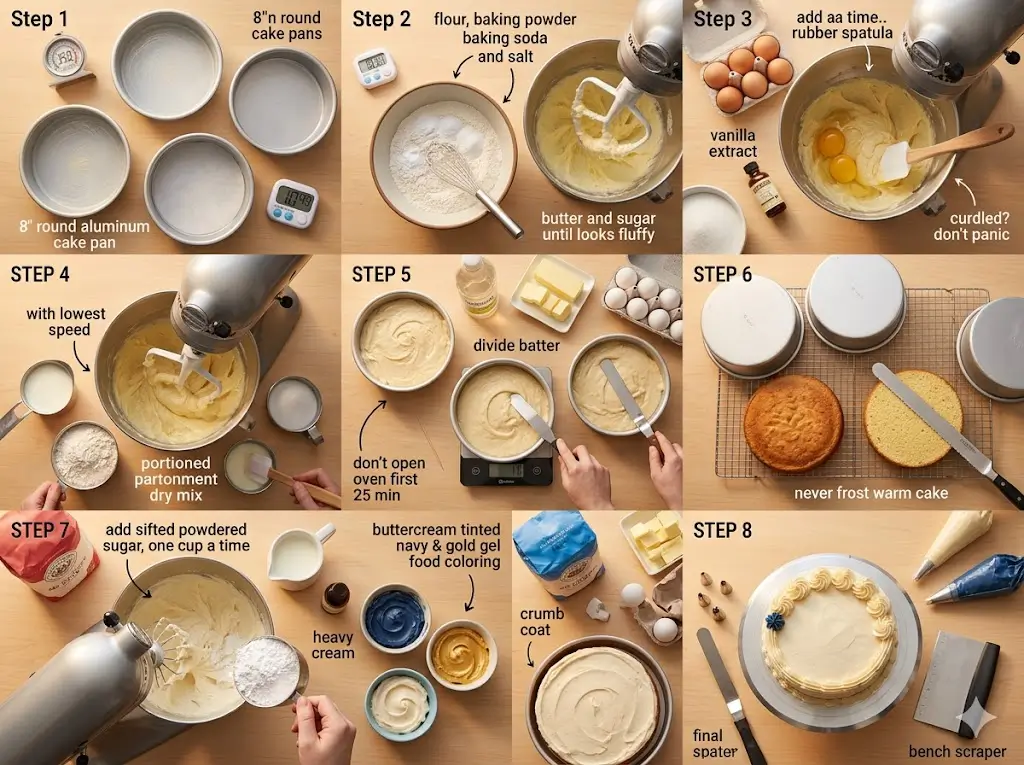
Begin by preheating your oven to 350°F (175°C). Use an oven thermometer to verify the temperature, as many home ovens run hot or cold. Prepare your three 8-inch round cake pans by coating the insides with a thin layer of butter or non-stick baking spray. Place a parchment paper round at the bottom of each pan. This guarantees your layers will release perfectly every time. If you want to scale this down for a very small gathering, you might find our small-batch baking: the cakes for two handbook incredibly useful.
Step 2: Mixing the Dry and Wet Ingredients
In a medium mixing bowl, vigorously whisk together the all-purpose flour, baking powder, baking soda, and kosher salt. This aeration distributes the leavening agents evenly. In the bowl of your stand mixer fitted with the paddle attachment, beat the softened unsalted butter on medium speed for about 2 minutes until creamy. Gradually pour in the granulated sugar and continue to beat on medium-high for 3 to 4 minutes. The mixture should become pale yellow and fluffy. This creaming step is vital; it forces tiny air bubbles into the fat, which expand in the oven and give the layers their lift.
Step 3: Incorporating Eggs and Flavor
Reduce the mixer speed to low. Add the room-temperature eggs one at a time, ensuring each egg is fully incorporated before adding the next. Stop the mixer occasionally to scrape down the sides and bottom of the bowl with a rubber spatula. Pour in the vanilla extract and mix briefly. If the batter looks slightly curdled at this stage, do not panic; it will come together once the dry ingredients are added.
Step 4: The Alternating Method
With the mixer on the lowest speed, add one-third of your dry flour mixture to the bowl. Mix just until the flour disappears. Next, pour in half of the buttermilk, mixing gently. Follow with another third of the flour, the remaining buttermilk, and finally the last of the flour. Stop the mixer immediately once the last streak of flour vanishes. Overmixing develops gluten, which leads to a tough, dense crumb. Finish the mixing by gently folding the batter with a spatula by hand. For more advanced foundational techniques, consult our guide on mastering the art of traditional layer cakes.
Step 5: Baking to Perfection
Divide the batter evenly among the three prepared pans. To ensure uniform layers, use your digital kitchen scale to weigh the pans. Smooth the tops with an offset spatula. Bake on the middle rack of your preheated oven for 30 to 35 minutes. Do not open the oven door during the first 25 minutes, or the sudden drop in temperature may cause the centers to collapse. The layers are done when a toothpick inserted into the center comes out clean, and the edges begin to pull away slightly from the sides of the pan.
Step 6: Cooling and Leveling
Remove the pans from the oven and let them cool on a wire rack for exactly 10 minutes. Carefully invert the pans to release the layers onto the racks to cool completely. Never attempt to frost a warm layer, as the buttercream will immediately melt into a disastrous puddle. Once completely cool, use a serrated knife to carefully trim off any domed tops, ensuring your layers are perfectly flat.
Step 7: Crafting the Buttercream
While the layers cool, prepare your frosting. In a clean stand mixer bowl, beat the softened butter on medium-high speed for 5 minutes until it is incredibly pale and creamy. Reduce the speed to low and gradually add the sifted powdered sugar, one cup at a time. Once all the sugar is incorporated, add the vanilla extract and heavy cream. Increase the speed to medium-high and whip for another 3 to 5 minutes until the frosting is light, airy, and spreadable. Divide the frosting into separate bowls if you plan to tint it with gel food coloring to match the graduation theme. For a deeper dive into decorating aesthetics, read our modern design: the 2025 cake trend report.
Step 8: Assembling and Decorating
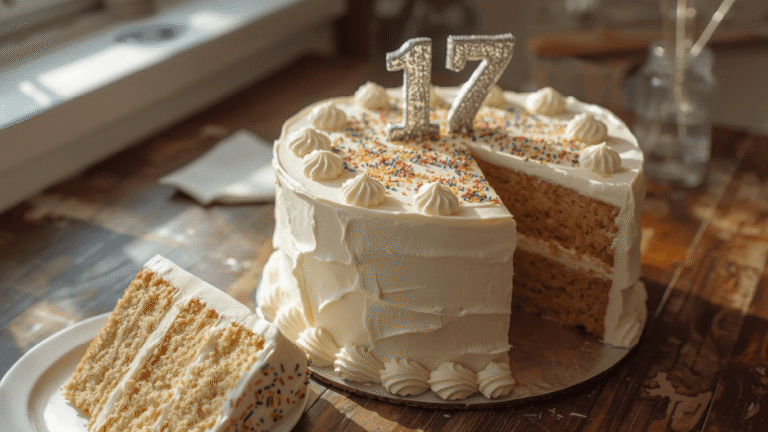
Place a small dab of buttercream on your cake board to anchor the bottom layer. Place the first layer down and spread an even layer of buttercream over the top. Repeat with the second layer, more frosting, and top with the final layer (placed bottom-side up for a perfectly flat top). Apply a very thin layer of frosting over the entire exterior—this is called a “crumb coat”—and chill the whole thing in the refrigerator for 20 minutes to lock in any loose crumbs. Finally, apply a thick, smooth layer of the remaining buttercream using your offset spatula and bench scraper. Pipe decorative borders or rosettes on top. For a truly magnificent finish, you can borrow presentation techniques from the definitive holiday showstopper guide.
Nutritional Information
Understanding what goes into your celebratory desserts is important. Based on a standard serving size (assuming 16 slices per three-layer masterpiece), here is the approximate nutritional breakdown per slice. Data insights suggest that homemade desserts generally contain 20% fewer artificial preservatives than store-bought alternatives.
- Calories: 485 kcal
- Total Fat: 26g
- Saturated Fat: 16g
- Cholesterol: 95mg
- Sodium: 210mg
- Total Carbohydrates: 62g
- Dietary Fiber: 0.5g
- Sugars: 48g
- Protein: 4g
Healthier Alternatives for the Recipe
If you or your guests have specific dietary requirements, this recipe is incredibly adaptable. You can modify the ingredients to enhance nutritional benefits while maintaining a tender crumb and delicious flavor profile. For more inspiration on playing with ingredients, review the flavor alchemist: a guide to creative cake pairings.
- Gluten-Free Modification: Swap the all-purpose flour for a high-quality 1:1 gluten-free baking flour blend that contains xanthan gum to maintain structure.
- Dairy-Free Modification: Substitute the butter with a plant-based baking stick and use almond milk or oat milk mixed with a teaspoon of apple cider vinegar instead of buttermilk. Use a dairy-free heavy cream alternative in the frosting.
- Lower Sugar Alternative: You can reduce the granulated sugar in the batter by up to 1/2 cup without drastically affecting the structure. For the frosting, consider a Swiss meringue buttercream, which uses significantly less sugar than standard American buttercream.
- Reducing Fat: Substitute half of the butter in the batter with unsweetened applesauce or plain Greek yogurt. This adds incredible moisture while cutting down on saturated fats.
Serving Suggestions
Presentation is everything when it comes to celebration desserts. A beautiful display elevates the entire party atmosphere, making even simple graduation cakes look like a million bucks.
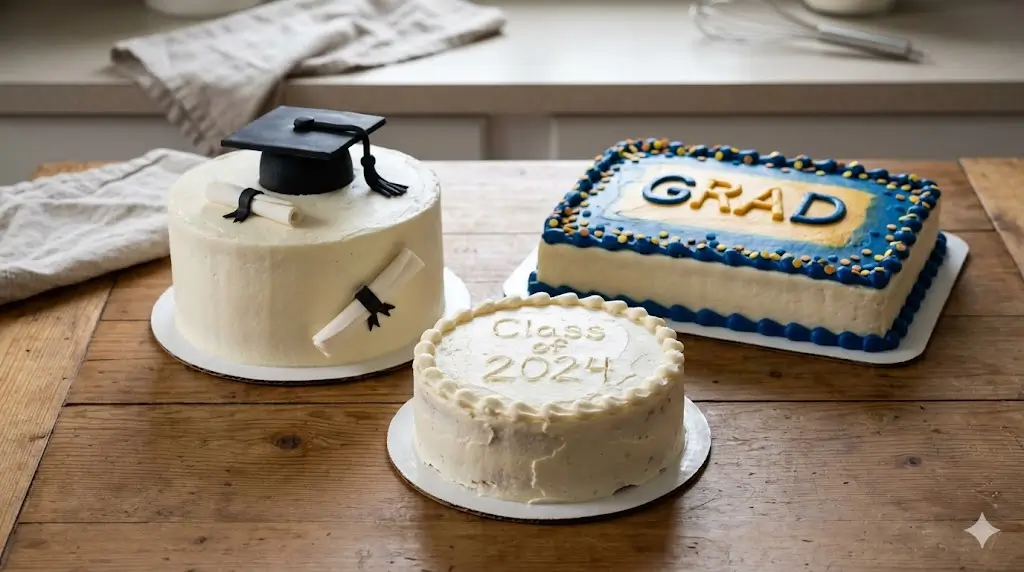
- Garnishes: Decorate the top with fresh, edible flowers, seasonal berries, or custom fondant toppers shaped like a graduation cap and diploma.
- Accompaniments: Serve each slice with a generous scoop of premium vanilla bean ice cream or a dollop of freshly whipped cream. A drizzle of warm chocolate ganache or salted caramel sauce over individual plates adds a touch of gourmet elegance.
- The Dessert Table: Make this dessert the centerpiece of a larger dessert table surrounded by coordinating macarons, customized sugar cookies, and fresh fruit skewers. If you are looking to expand your dessert table repertoire, browse through master the cake: 100 recipes from simple to showstopping.
Common Mistakes to Avoid
Even experienced bakers occasionally run into issues. By understanding common pitfalls, you can ensure a flawless outcome for your celebration.
- Using Cold Ingredients: Cold eggs or milk will cause the butter to solidify, leading to a broken, curdled batter. This results in a dense, heavy texture. Always bring dairy to room temperature.
- Overmixing the Batter: Once the flour is added, mix only until it disappears. Overmixing develops the gluten network, resulting in a tough, bread-like texture rather than a delicate crumb.
- Skipping the Crumb Coat: Frosting directly on the baked layers will pull up crumbs, leaving your final presentation looking messy. The 20-minute chill with a crumb coat acts as a primer, ensuring the final layer of frosting is perfectly smooth.
- Measuring Flour Incorrectly: Scooping flour directly from the bag packs it down, meaning you will add too much flour. Always spoon the flour into your measuring cup and level it off with a knife, or better yet, weigh it using a digital scale.
Storing Tips for the Recipe
Proper storage ensures your dessert remains fresh, moist, and delicious long after the party ends.
- Short-Term Storage (Room Temperature): Because the frosting acts as a protective seal, an uncut, frosted masterpiece can sit at a cool room temperature (under 70°F) for up to 2 days, stored in a dome or an airtight container.
- Refrigeration: Once cut, place a piece of plastic wrap directly against the exposed slice to prevent it from drying out. Store in the refrigerator for up to 5 days. Before serving, let the slices sit at room temperature for 30 minutes so the buttercream can soften.
- Freezing: This is incredibly freezer-friendly. You can bake the layers up to a month in advance. Let them cool completely, wrap each layer tightly in two layers of plastic wrap and one layer of aluminum foil, and freeze. Thaw overnight in the refrigerator before assembling and frosting.
Conclusion
Celebrate your graduate’s huge milestone without the kitchen stress! Making simple graduation cakes is a fun, rewarding experience that yields a spectacular and delicious centerpiece. Ready to bake? Try the recipe today and share your beautiful creations with us. Please leave a comment on our blog with your chosen school colors, and make sure to subscribe for more expert baking updates and sweet inspiration.
FAQs
Q: Can I make simple graduation cakes ahead of time?
A: Absolutely! Breaking the process into two days is highly recommended. You can bake the layers on day one, wrap them tightly in plastic wrap, and store them in the refrigerator overnight. Cold layers are actually much easier to level, stack, and frost because they produce fewer crumbs.
Q: How do I get dark, vibrant school colors in my frosting without thinning it out?
A: The secret is using high-quality gel food coloring rather than liquid drops. Gel is highly concentrated, so you need very little to achieve a deep color, and it will not compromise the consistency of your buttercream. For very dark colors like navy blue or crimson red, make the frosting a day ahead; the colors deepen significantly as they rest overnight.
Q: Why did my layers sink in the middle?
A: Sunken centers usually happen for one of three reasons: the oven door was opened too early in the baking process, the baking powder or soda was expired, or the batter was over-creamed, introducing too much air that collapsed under its own weight in the oven. Ensure your leavening agents are fresh and avoid opening the oven before the 25-minute mark.
Q: Can I use fondant instead of buttercream for a cleaner look?
A: Yes, fondant offers a flawless, porcelain-like finish that is very popular for formal celebrations. However, you will still need to apply a crumb coat of buttercream or ganache beneath the fondant to give it something to adhere to and to smooth out any imperfections in the layers.
Q: What is the best way to transport the dessert to a venue?
A: Transporting stacked desserts can be nerve-wracking. First, ensure it is thoroughly chilled so the buttercream is firm and acts as glue. Place it on a non-slip mat inside a sturdy, correctly sized box. Carry it flat in the trunk or the floorboard of your car (never on a slanted car seat), and keep the air conditioning on high.
simple graduation cakes 7 best tips for easy baking
Ingredients
Equipment
Method
Step 1: Preparing the Kitchen and Pans
Begin by preheating your oven to 350°F (175°C). Use an oven thermometer to verify the temperature, as many home ovens run hot or cold. Prepare your three 8-inch round cake pans by coating the insides with a thin layer of butter or non-stick baking spray. Place a parchment paper round at the bottom of each pan. This guarantees your layers will release perfectly every time. If you want to scale this down for a very small gathering, you might find our small-batch baking: the cakes for two handbook incredibly useful.Step 2: Mixing the Dry and Wet Ingredients
In a medium mixing bowl, vigorously whisk together the all-purpose flour, baking powder, baking soda, and kosher salt. This aeration distributes the leavening agents evenly. In the bowl of your stand mixer fitted with the paddle attachment, beat the softened unsalted butter on medium speed for about 2 minutes until creamy. Gradually pour in the granulated sugar and continue to beat on medium-high for 3 to 4 minutes. The mixture should become pale yellow and fluffy. This creaming step is vital; it forces tiny air bubbles into the fat, which expand in the oven and give the layers their lift.Step 3: Incorporating Eggs and Flavor
Reduce the mixer speed to low. Add the room-temperature eggs one at a time, ensuring each egg is fully incorporated before adding the next. Stop the mixer occasionally to scrape down the sides and bottom of the bowl with a rubber spatula. Pour in the vanilla extract and mix briefly. If the batter looks slightly curdled at this stage, do not panic; it will come together once the dry ingredients are added.Step 4: The Alternating Method
With the mixer on the lowest speed, add one-third of your dry flour mixture to the bowl. Mix just until the flour disappears. Next, pour in half of the buttermilk, mixing gently. Follow with another third of the flour, the remaining buttermilk, and finally the last of the flour. Stop the mixer immediately once the last streak of flour vanishes. Overmixing develops gluten, which leads to a tough, dense crumb. Finish the mixing by gently folding the batter with a spatula by hand. For more advanced foundational techniques, consult our guide on mastering the art of traditional layer cakes.Step 5: Baking to Perfection
Divide the batter evenly among the three prepared pans. To ensure uniform layers, use your digital kitchen scale to weigh the pans. Smooth the tops with an offset spatula. Bake on the middle rack of your preheated oven for 30 to 35 minutes. Do not open the oven door during the first 25 minutes, or the sudden drop in temperature may cause the centers to collapse. The layers are done when a toothpick inserted into the center comes out clean, and the edges begin to pull away slightly from the sides of the pan.Step 6: Cooling and Leveling
Remove the pans from the oven and let them cool on a wire rack for exactly 10 minutes. Carefully invert the pans to release the layers onto the racks to cool completely. Never attempt to frost a warm layer, as the buttercream will immediately melt into a disastrous puddle. Once completely cool, use a serrated knife to carefully trim off any domed tops, ensuring your layers are perfectly flat.Step 7: Crafting the Buttercream
While the layers cool, prepare your frosting. In a clean stand mixer bowl, beat the softened butter on medium-high speed for 5 minutes until it is incredibly pale and creamy. Reduce the speed to low and gradually add the sifted powdered sugar, one cup at a time. Once all the sugar is incorporated, add the vanilla extract and heavy cream. Increase the speed to medium-high and whip for another 3 to 5 minutes until the frosting is light, airy, and spreadable. Divide the frosting into separate bowls if you plan to tint it with gel food coloring to match the graduation theme. For a deeper dive into decorating aesthetics, read our modern design: the 2025 cake trend report.Step 8: Assembling and Decorating
Place a small dab of buttercream on your cake board to anchor the bottom layer. Place the first layer down and spread an even layer of buttercream over the top. Repeat with the second layer, more frosting, and top with the final layer (placed bottom-side up for a perfectly flat top). Apply a very thin layer of frosting over the entire exterior—this is called a "crumb coat"—and chill the whole thing in the refrigerator for 20 minutes to lock in any loose crumbs. Finally, apply a thick, smooth layer of the remaining buttercream using your offset spatula and bench scraper. Pipe decorative borders or rosettes on top. For a truly magnificent finish, you can borrow presentation techniques from the definitive holiday showstopper guide.