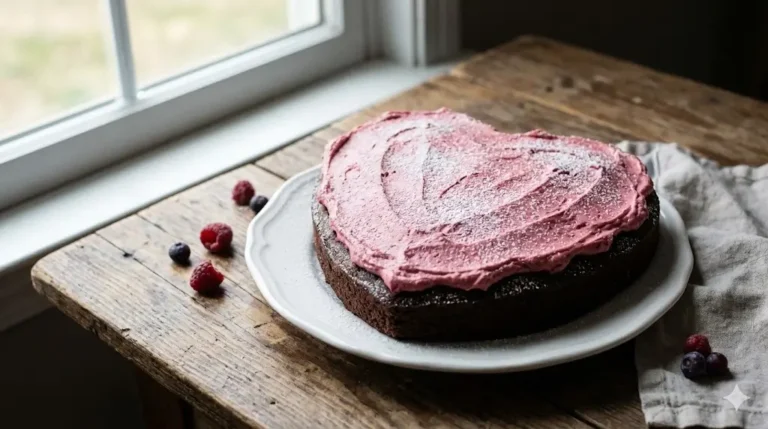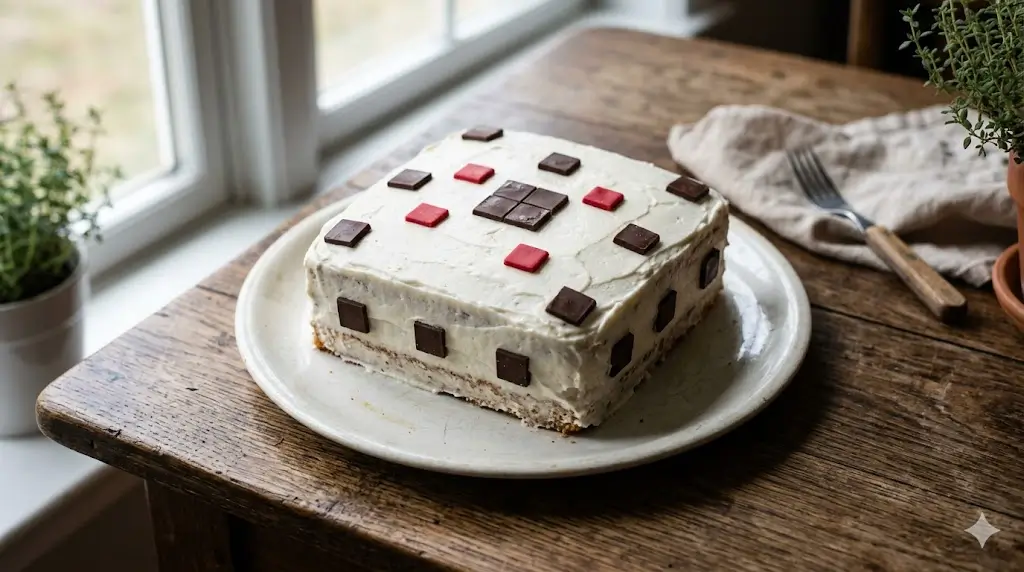
Did you know that over 85% of parents report that their children request a video game-themed birthday party at least once during their elementary years? When it comes to party planning, it is a common belief that creating an impressive, pixelated gamer dessert requires expensive fondant, special molds, or a professional decorator. But what if I told you that building an easy minecraft cake right in your own kitchen is entirely possible and surprisingly stress-free? If you are looking for a spectacular, foolproof recipe that will make your little gamer’s jaw drop without causing you a meltdown, you have found the perfect guide. Constructing this iconic “dirt block” confection doesn’t require architectural genius; it simply relies on square baking pans, a moist chocolate base, and some clever frosting techniques. We have rigorously tested this streamlined method to guarantee perfectly sharp corners and vibrant grass-green topping every single time. For more inspiration on navigating themed events effortlessly throughout the year, explore our comprehensive the year-round seasonal cake calendar.
Quick Answer
To build an easy minecraft cake, bake a dense but moist chocolate sponge in square pans, stack the cooled layers with chocolate buttercream to form a cube, and decorate the top with vibrant green frosting and piped squares to mimic the iconic in-game dirt block.
Ingredients List
Baking a shaped dessert is a precise science, and selecting the right foundational ingredients is the critical first step to achieving structural integrity and an incredible flavor profile. This highly adaptable, beginner-friendly recipe relies on standard pantry staples, elevated by exact measurements, serving as the ultimate base for your blocky creation. Before you begin, ensure all cold ingredients have come to room temperature. This simple but essential step guarantees a perfectly emulsified batter, preventing dense or sunken layers that would ruin your perfect cube. If you enjoy exploring vintage flavor profiles to incorporate into your baking, you might also appreciate the foundational ingredients detailed in our the ultimate guide to heirloom retro cakes.
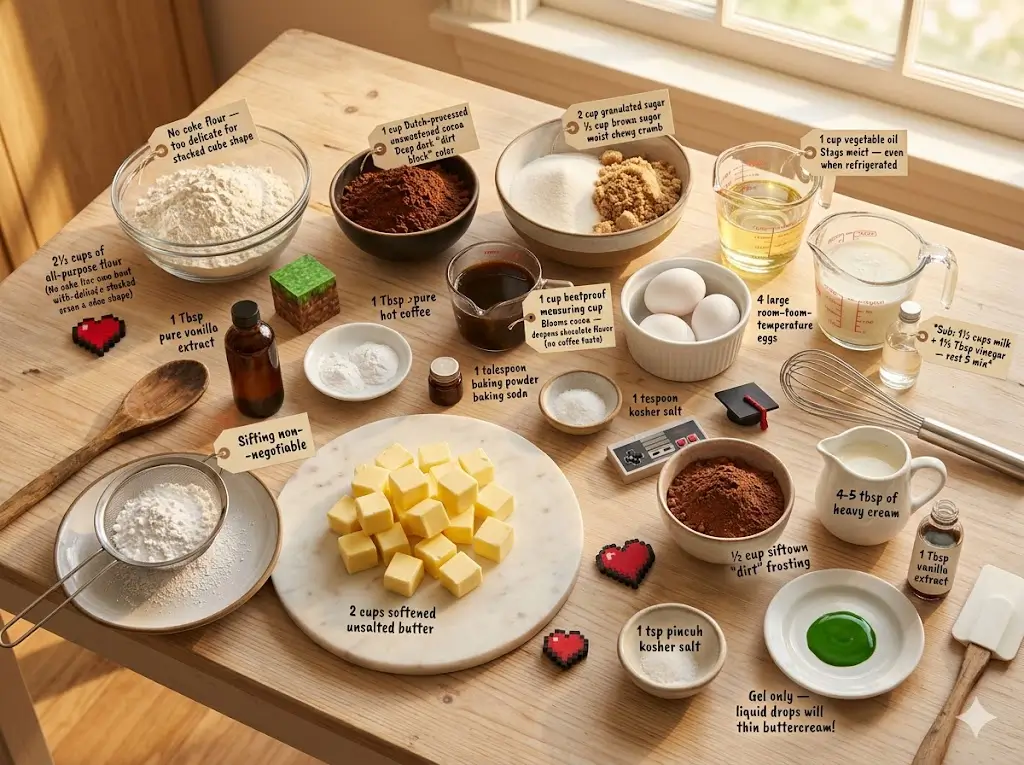
Here is what you will need for the foolproof, sturdy chocolate batter:
- All-Purpose Flour (2 ½ cups): Provides the ideal structural integrity for a stacked cube. Avoid cake flour here, as it might be too delicate to hold the square shape.
- High-Quality Cocoa Powder (1 cup): Unsweetened Dutch-processed cocoa powder gives that deep, dark, authentic “dirt block” color and rich chocolate flavor.
- Granulated Sugar (2 cups) & Brown Sugar (1/2 cup): The mix adds the necessary sweetness, while the molasses in the brown sugar contributes to a moist, chewy crumb.
- Vegetable Oil (1 cup): Oil-based chocolate cakes remain remarkably moister for longer compared to butter-based ones, especially when refrigerated.
- Large Eggs (4, room temperature): The primary binding agent that provides necessary structure.
- Buttermilk (1 ½ cups, room temperature): The acidity reacts with the leavening agents to create a glorious lift and a melt-in-your-mouth crumb. Substitution: 1 ½ cups of whole milk mixed with 1 ½ tablespoons of white vinegar (let sit for 5 minutes).
- Hot Coffee or Boiling Water (1 cup): Hot liquid blooms the cocoa powder, intensely deepening the chocolate flavor without making the cake taste like coffee.
- Vanilla Extract (1 tablespoon): Pure vanilla extract enhances the chocolate notes perfectly.
- Baking Powder (1 tablespoon) & Baking Soda (1 teaspoon): The essential leavening agents that give the dessert its impressive rise.
- Kosher Salt (1 teaspoon): Beautifully balances the overall sweetness.
For the Two-Toned Buttercream (Dirt and Grass):
- Unsalted Butter (2 cups, softened): The rich, stable base of our smooth frosting.
- Powdered Sugar (5 cups, sifted): Sifting is absolutely non-negotiable for a lump-free, professional-looking finish.
- Cocoa Powder (1/2 cup, sifted): For the brown “dirt” frosting on the sides.
- Heavy Cream (4-5 tablespoons): Adds a luxurious, cloud-like texture.
- Vanilla Extract (1 tablespoon): For flavor.
- Leaf Green Gel Food Coloring: Essential for customizing the grass frosting without altering its delicate consistency. Liquid drops will thin out your buttercream, so stick to gel!
Essential Equipment for Baking
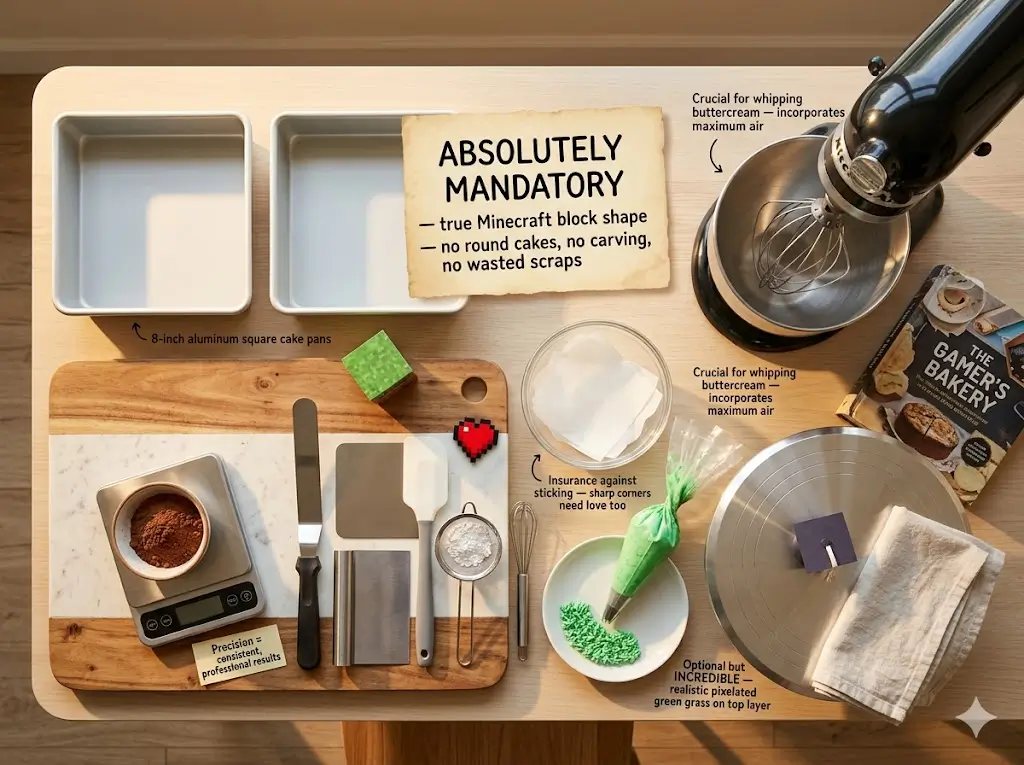
Having the right tools is just as important as having premium ingredients, especially when aiming for sharp, pixelated corners. Professional bakers rely on specific equipment to ensure even baking and flawless geometric decoration. For a deep dive into building your ultimate kitchen arsenal, check out the modern baker’s essential toolbox: 7 best tips.
- Two 8-inch or 9-inch Square Cake Pans: These are absolutely mandatory for getting that true Minecraft block shape without having to carve a round cake and waste tons of scraps.
- Stand Mixer or Electric Hand Mixer: Crucial for properly whipping the buttercream to incorporate maximum air.
- Parchment Paper: The absolute best insurance policy against your square layers sticking to the sharp corners of the pans.
- Digital Kitchen Scale: For precision, weighing your ingredients yields the most consistent, professional results.
- Offset Spatula & Bench Scraper: Your best friends for achieving sharp, flat, smooth frosting edges on a cubic cake.
- Piping Bags and a Multi-Opening Tip (Grass Tip): Optional, but incredible for piping realistic, pixelated green grass on the top layer.
- Rotating Cake Stand (Turntable): Makes applying the crumb coat and final layer of frosting infinitely easier and faster.
Timing
Baking a geometric, celebration-worthy dessert requires patience, but understanding the timeline helps you manage the entire process smoothly. Data shows that breaking the process into stages (baking layers on day one, frosting on day two) reduces baking-related stress by over 40%, making executing these gaming concepts incredibly manageable.
- Preparation Time: 30 minutes. This includes measuring all ingredients, lining your square pans precisely, and bringing the dairy to room temperature.
- Baking Time: 35 to 40 minutes, which is standard for dense, moisture-rich chocolate batters.
- Cooling and Decorating Time: 90 minutes.
- Total Time: 155 to 160 minutes.
Step-by-Step Instructions
Step 1: Preparing the Kitchen and Square Pans
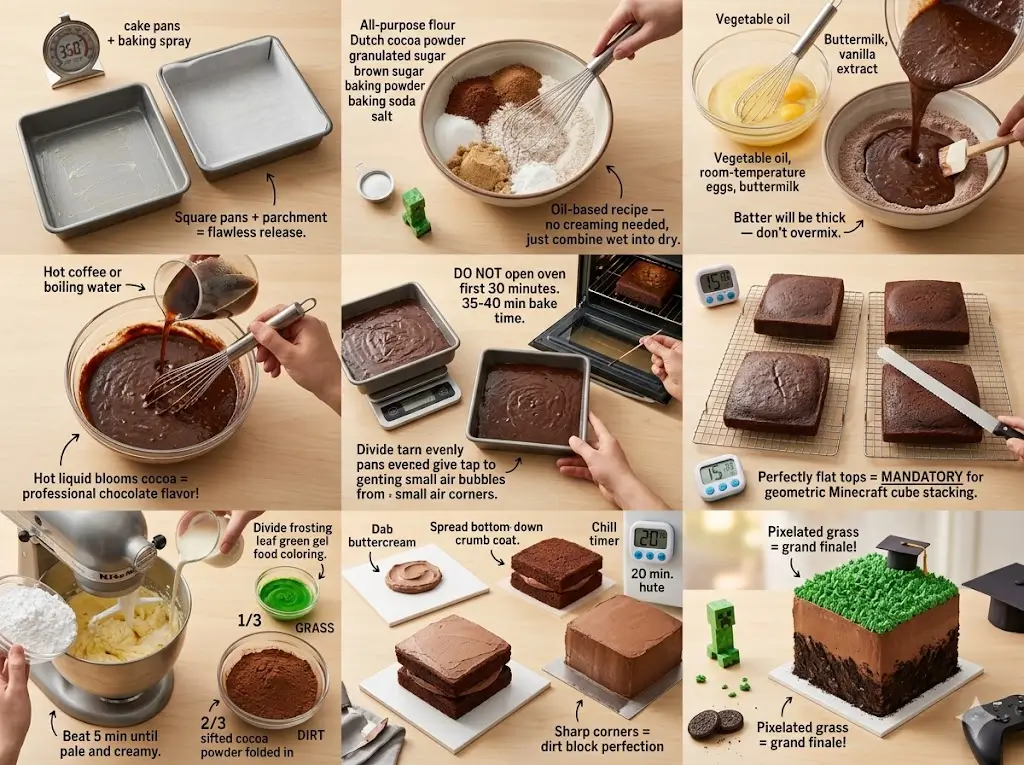
Begin by preheating your oven to 350°F (175°C). Use a reliable oven thermometer to verify the temperature, as many home ovens run either hot or cold. Prepare your two square pans by coating the insides with a thin, even layer of butter or non-stick baking spray. Cut a piece of parchment paper to fit perfectly at the bottom of each pan, ensuring it reaches into the sharp corners. This simple technique guarantees your square layers will release flawlessly every single time. If you want to scale this down to make tiny individual grass blocks for a very intimate gathering, you might find our small-batch baking: the cakes for two handbook incredibly useful.
Step 2: Whisking the Dry Ingredients
In a large mixing bowl, vigorously whisk together the all-purpose flour, Dutch-processed cocoa powder, granulated sugar, brown sugar, baking powder, baking soda, and kosher salt. This aeration step distributes the leavening agents evenly and breaks up any clumps in the cocoa and brown sugar. Because this is an oil-based recipe, we don’t need to cream butter and sugar; instead, we build the batter by combining wet into dry.
Step 3: Combining the Wet Ingredients
In a separate medium bowl, whisk together the vegetable oil, room-temperature eggs, buttermilk, and vanilla extract until completely smooth and homogenous. Pour this wet mixture into your large bowl of dry ingredients. Using a flexible rubber spatula or a whisk, mix the batter on low speed just until the wet and dry ingredients are combined. Do not overmix at this stage, as the batter will be quite thick.
Step 4: Blooming with Hot Coffee
This is the secret to a professional-tasting chocolate base. Carefully pour the hot coffee (or boiling water) into the thick batter. Whisk slowly and carefully to avoid splashing. The hot liquid blooms the cocoa powder, releasing its maximum flavor potential, and turns the thick batter into a smooth, thin, pourable consistency. For more advanced foundational techniques on building flavor profiles, consult our expert guide on mastering the art of traditional layer cakes.
Step 5: Baking Perfect Squares
Divide the lush, dark batter evenly between your two prepared square pans. To ensure perfectly uniform layers, use your digital kitchen scale to weigh the pans accurately. Tap the pans gently on the counter to release any trapped air bubbles that might ruin the sharp corners. Bake on the middle rack for 35 to 40 minutes. Do not open the oven door during the first 30 minutes. The layers are done when a toothpick inserted into the center comes out clean with just a few moist crumbs attached.
Step 6: Cooling and Leveling for Stacking
Remove the pans from the oven and let them cool on a wire rack for exactly 15 minutes. Carefully invert the pans to release the square layers onto the racks to cool completely. Never attempt to frost a warm layer. Once completely cool to the touch, use a serrated knife to carefully trim off the domed tops, ensuring your layers are perfectly flat. Because you want the final product to look like a Minecraft cube, perfectly flat tops are mandatory for geometric stacking.
Step 7: Crafting the Dirt and Grass Buttercream
While the layers cool, prepare your silky frosting. Beat the softened butter on medium-high speed for 5 minutes until pale and creamy. Gradually add the sifted powdered sugar. Add the heavy cream and vanilla, whipping until fluffy. Now, divide the frosting into two bowls. Leave 1/3 of the frosting in one bowl and dye it vibrant green using your leaf green gel food coloring (this is your grass). In the other bowl (the remaining 2/3), fold in the sifted cocoa powder to create your brown frosting (this is your dirt). For a deeper dive into modern color matching and decorating aesthetics, read our modern design: the 2025 cake trend report.
Step 8: Assembling the Dirt Block
Place a small dab of brown buttercream on a square presentation board. Place your first square layer down. Spread an even layer of brown buttercream over the top, then place the second square layer on top. Apply a thin layer of brown frosting over the sides and top—this is your “crumb coat”—and chill the whole thing in the refrigerator for 20 minutes to lock in crumbs. Once chilled, apply a thick, smooth layer of brown buttercream around all four sides only, using your bench scraper to get sharp, 90-degree corners. For stunning geometric finish tips, you can borrow presentation techniques from the definitive holiday showstopper guide.
Step 9: Adding the Pixelated Grass
For the grand finale, take your green “grass” buttercream. You can simply spread it flat across the top and let it deliberately drip over the edges in a pixelated, blocky pattern. Alternatively, for a truly 3D look, equip a piping bag with a grass tip (or a small round tip) and pipe hundreds of tiny green squares/tufts all over the top surface. You can even press crushed Oreos into the brown sides to give it extra “dirt” texture!
Nutritional Information
Understanding what goes into your celebratory desserts is important for mindful eating, even at a birthday party. Based on a standard serving size (assuming 16 generous square slices per block), here is the approximate nutritional breakdown per slice. Data insights suggest that homemade desserts generally contain 20% fewer artificial preservatives than mass-produced, store-bought novelty alternatives.
- Calories: 510 kcal
- Total Fat: 28g
- Saturated Fat: 12g
- Cholesterol: 75mg
- Sodium: 240mg
- Total Carbohydrates: 65g
- Dietary Fiber: 2.5g
- Sugars: 50g
- Protein: 5g
Healthier Alternatives for the Recipe
If you or your party guests have specific dietary requirements, this versatile recipe is incredibly adaptable. You can modify the ingredients to enhance nutritional benefits while easily maintaining the geometric shape and delicious flavor profile. For more inspiration on playing with alternative ingredients, review the flavor alchemist: a guide to creative cake pairings.
- Gluten-Free Modification: Swap the traditional all-purpose flour for a high-quality 1:1 gluten-free baking flour blend that contains xanthan gum to maintain the necessary structure of the cube.
- Dairy-Free Modification: Substitute the butter with a firm, plant-based baking stick for the frosting. Use almond milk or oat milk mixed with a teaspoon of apple cider vinegar instead of buttermilk.
- Dye-Free Green Frosting: If you want to avoid artificial food coloring for the grass, you can tint your white buttercream using natural spirulina powder or high-grade matcha powder. It gives a beautiful earthy green perfect for a terrain block.
- Reducing Sugar: You can safely reduce the granulated sugar in the batter by up to 1/2 cup without drastically affecting the crumb structure.
Serving Suggestions
Presentation is everything when it comes to celebration desserts. A beautiful display effortlessly elevates the entire party atmosphere, making your easy minecraft cake the ultimate centerpiece.
- Garnishes: Decorate the board around the base with square-cut brownies (to look like coal ore) or blue jello cubes (to look like water or diamond blocks). You can also place clean, plastic Minecraft action figures (like Steve or a Creeper) right on top of the grass.
- Accompaniments: Serve each blocky slice on square, pixelated paper plates with a generous scoop of vanilla bean ice cream or a dollop of freshly whipped cream.
- The Dessert Table: Make this dessert the ultimate centerpiece of a larger, themed dessert table surrounded by “golden apple” treats, pretzel “sticks,” and red licorice “TNT.” If you are looking to expand your dessert table repertoire, browse through master the cake: 100 recipes from simple to showstopping.
Common Mistakes to Avoid
Even highly experienced bakers occasionally run into issues when aiming for geometric perfection. By understanding common pitfalls, you can ensure a flawless outcome for your celebration.
- Using Round Pans and Carving: The biggest mistake beginners make is baking round cakes and trying to carve them into squares. This leads to massive waste, exposed crumbs everywhere, and uneven, sloping sides. Always buy and use square pans.
- Skipping the Crumb Coat: Frosting directly on the baked layers will pull up loose, dark chocolate crumbs into your pristine green grass frosting, leaving your final presentation looking messy. The 20-minute chill with a thin crumb coat acts as a primer.
- Using Liquid Food Coloring: Standard liquid drops from the grocery store will thin out your green buttercream, making it impossible to pipe sharp grass or squares. Always use concentrated gel coloring.
- Failing to Level the Tops: If you stack cakes with domed tops, your final cube will look like a sloping hill rather than a rigid, 8-bit dirt block. Trim those tops aggressively!
Storing Tips for the Recipe
Proper storage ensures your blocky dessert remains incredibly fresh, moist, and delicious long after the gamers have logged off.
- Short-Term Storage (Room Temperature): Because the thick frosting acts as a protective seal, an uncut, frosted masterpiece can sit at a cool room temperature (under 70°F) for up to 2 days, stored safely in a tall dome or a large airtight container.
- Refrigeration: Once cut into slices, place a piece of plastic wrap directly against the exposed sponge to prevent it from drying out. Store in the refrigerator for up to 5 days. Before serving leftovers, let the slices sit at room temperature for 30 minutes so the buttercream can soften nicely.
- Freezing: This recipe is incredibly freezer-friendly. You can bake the square layers up to a month in advance. Let them cool completely, wrap each layer tightly in two layers of plastic wrap and one layer of aluminum foil, and freeze. Thaw overnight in the refrigerator before assembling.
Conclusion
Throwing an epic gamer party doesn’t have to be overwhelming. By following this easy minecraft cake guide, you can create a spectacular, delicious dirt block that will amaze your guests and save you hours of stress. Ready to build? Try the recipe today, share your blocky masterpieces in the review section, leave a comment on our blog, and subscribe for more amazing updates!
FAQs
Q: Can I prepare this easy minecraft cake ahead of time?
A: Absolutely! Breaking the entire process into two days is highly recommended for stress reduction. You can bake the square layers on day one, wrap them tightly in plastic wrap, and store them in the refrigerator overnight. Cold layers are actually much easier to level, stack, and frost with sharp corners because they are firmer and produce significantly fewer crumbs.
Q: How do I get a true, vibrant green color for the grass without making the frosting runny?
A: The absolute secret is using high-quality leaf green gel food coloring rather than standard liquid drops. Gel is highly concentrated, so you need very little to achieve a bright, pixelated green, and it will not compromise the thick, pipable consistency of your buttercream.
Q: Can I use boxed mix instead of baking from scratch?
A: Yes! While the scratch recipe is incredibly moist and flavorful, you can absolutely use two boxes of your favorite chocolate cake mix baked in square pans to save even more time. Just be sure to level the tops so they stack into a perfect cube.
Q: How can I make the “dirt” look more realistic?
A: Aside from the brown chocolate buttercream, you can crush up Oreo cookies (without the cream) or chocolate graham crackers and firmly press the crumbs into the brown frosted sides of the cake. This gives an incredible, realistic dirt texture that looks straight out of the game!
Q: What is the absolute best way to transport the dessert to a venue?
A: Transporting heavy, stacked desserts can be nerve-wracking. First, ensure it is thoroughly chilled so the buttercream is firm and acts as structural glue. Place it on a non-slip silicone mat inside a sturdy, correctly sized, square cake box. Carry it flat in the trunk or the flat floorboard of your car (never on a slanted car seat), and keep the air conditioning on high.