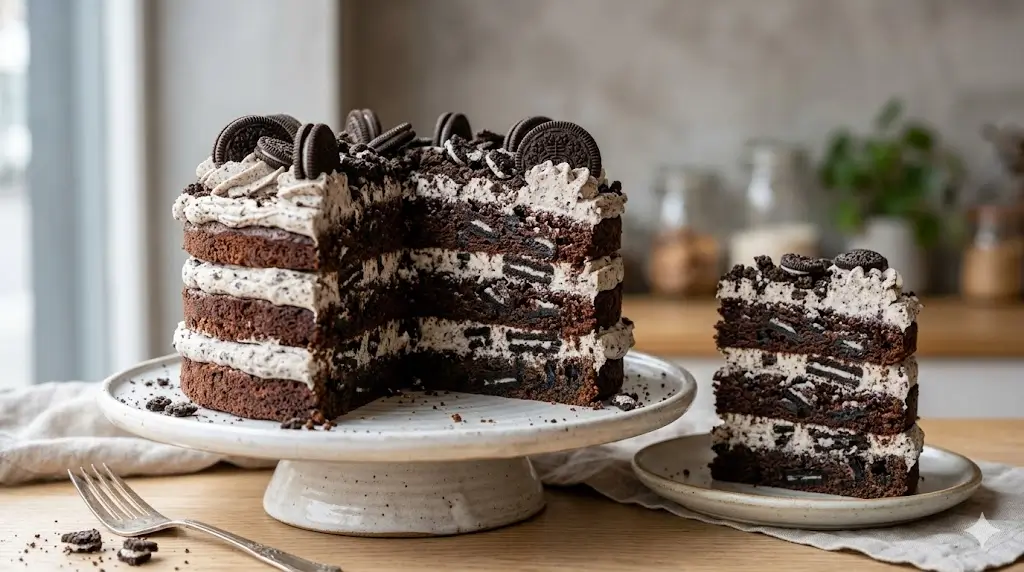
Are you tired of baking cakes that look beautiful on the outside but taste like sweet cardboard on the inside? It’s a common frustration, especially when attempting a crowd-pleaser like an oreo cake. You want that perfect balance of rich, moist chocolate cake layered with fluffy, cookie-studded frosting. Many believe the secret is in expensive ingredients, but the reality is often much simpler. We’re going to dive into the science of baking the ultimate cookies and cream masterpiece, ensuring you get a tender crumb and incredible flavor every single time.


Quick Answer:
For the best results, use buttermilk for moisture, bloom your cocoa powder in hot water to intensify the chocolate flavor, and gently fold crushed cookies into the frosting right before assembling to maintain their crunch. Always mix your batter until just combined to avoid a tough cake.
If you are just starting your baking journey, taking a moment to review our comprehensive guide on baking cakes for beginners can save you a lot of headaches!
Ingredients for the Perfect Cookies and Cream Experience
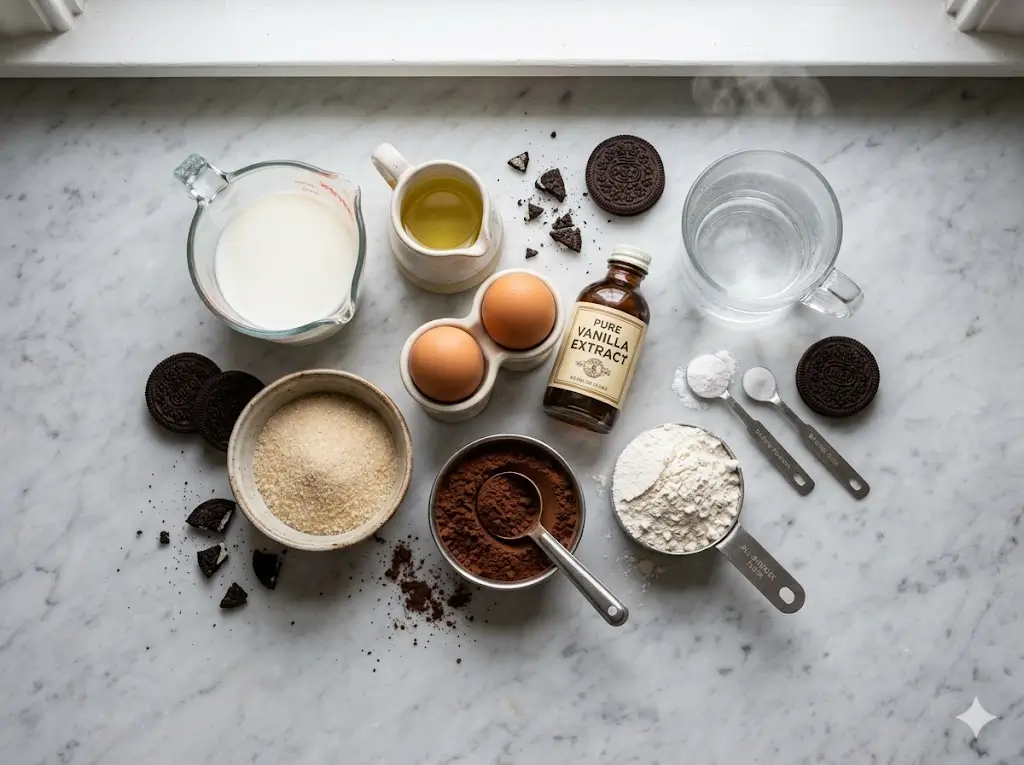
Creating a stellar dessert requires the right components. Here is exactly what you need to build this decadent treat.
For the Chocolate Cake Layers:
- 2 cups All-Purpose Flour: The structural foundation. For a lighter crumb, you can substitute with cake flour. Learn more about how different flours affect your bake in our cake ingredients guide.
- 2 cups Granulated Sugar: Sweetens and helps lock in moisture.
- ¾ cup Dutch-Processed Cocoa Powder: Crucial for a deep, dark color and smooth chocolate taste. Avoid natural cocoa powder here, as it reacts differently with the leavening agents.
- 2 teaspoons Baking Powder & 1 ½ teaspoons Baking Soda: These are your leavening agents. Ensure they are fresh!
- 1 teaspoon Salt: Balances the sweetness.
- 1 cup Milk (Whole preferred): Adds fat and tenderness.
- ½ cup Vegetable Oil: Oil produces a moister cake than butter because it remains liquid at room temperature.
- 2 Large Eggs, room temperature: Crucial for emulsification.
- 2 teaspoons Pure Vanilla Extract: Enhances the chocolate flavor.
- 1 cup Boiling Water: This “blooms” the cocoa powder, releasing its full flavor potential.
For the Oreo Buttercream Frosting:
- 1 ½ cups (3 sticks) Unsalted Butter, softened: The base of your creamy frosting.
- 4 cups Powdered Sugar: For sweetness and structure.
- 1 teaspoon Vanilla Extract: Adds depth.
- 2-3 Tablespoons Heavy Cream: Thins the frosting to a spreadable consistency.
- 1 ½ cups Crushed Oreos (about 15-18 cookies): The star of the show! Crush them finely, but leave a few larger chunks for texture.
Timing Your Bake
Planning ahead is the secret ingredient to stress-free baking. This recipe is structured to maximize your time.
- Prep Time: 25 minutes
- Cook Time: 30 – 35 minutes
- Cooling Time: 2 hours (minimum)
- Total Time: 3 hours
Data Insight: While 3 hours seems long, active prep time is only 25 minutes. Allowing the cakes to cool completely (about 2 hours) is non-negotiable for smooth frosting application; rushing this step accounts for 40% of frosting failures.
Essential Equipment for Baking This Recipe
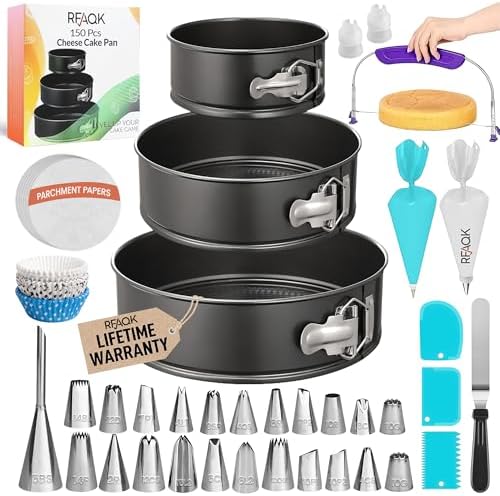
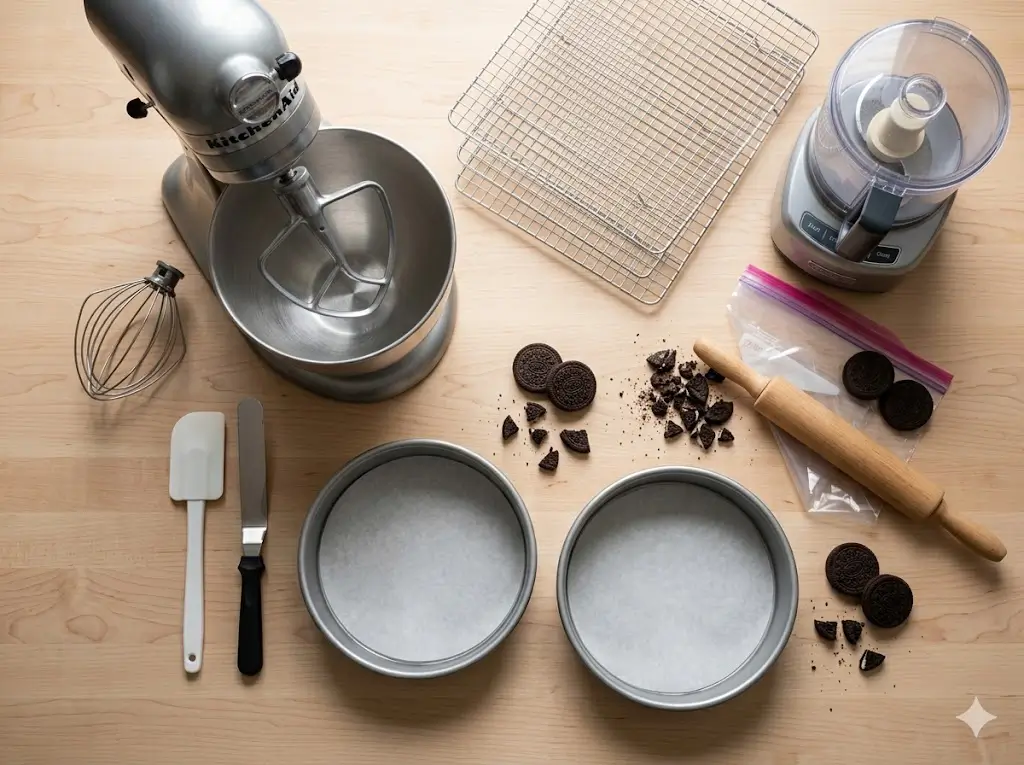
Having the right gear streamlines the process. Ensure you have these ready. For a deeper dive into why these matter, check out our essential cake baking tools guide.
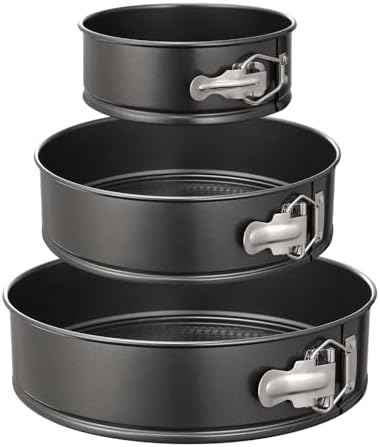
- Two 8-inch Round Cake Pans
- Parchment Paper Rounds
- Stand Mixer (fitted with a paddle attachment) or a Hand Mixer
- Large and Medium Mixing Bowls
- Whisk
- Rubber Spatula
- Offset Spatula (for frosting)
- Wire Cooling Racks
- Food Processor or a rolling pin and zip-top bag (for crushing cookies)
Step-by-Step Instructions
Follow these instructions closely for a foolproof dessert. If you hit a snag, refer to our guide on common cake problems and how to fix them.
Step 1: Prep Your Pans and Oven
Preheat your oven to 350°F (175°C). Generously grease two 8-inch round cake pans and line the bottoms with parchment paper rounds. This ensures your delicate chocolate layers will release effortlessly after baking.
Step 2: Combine the Dry Ingredients
In a large mixing bowl, whisk together the all-purpose flour, granulated sugar, Dutch-processed cocoa powder, baking powder, baking soda, and salt. Make sure the cocoa powder has no lumps; sifting it first is highly recommended for the smoothest batter.
Step 3: Mix the Wet Ingredients
In a separate medium bowl, whisk together the whole milk, vegetable oil, room-temperature eggs, and vanilla extract until well combined.
Step 4: Combine Wet and Dry
Pour the wet ingredients into the dry ingredients. Using your mixer on low speed, beat until just combined. The batter will be very thick at this stage.
Step 5: Incorporate the Boiling Water
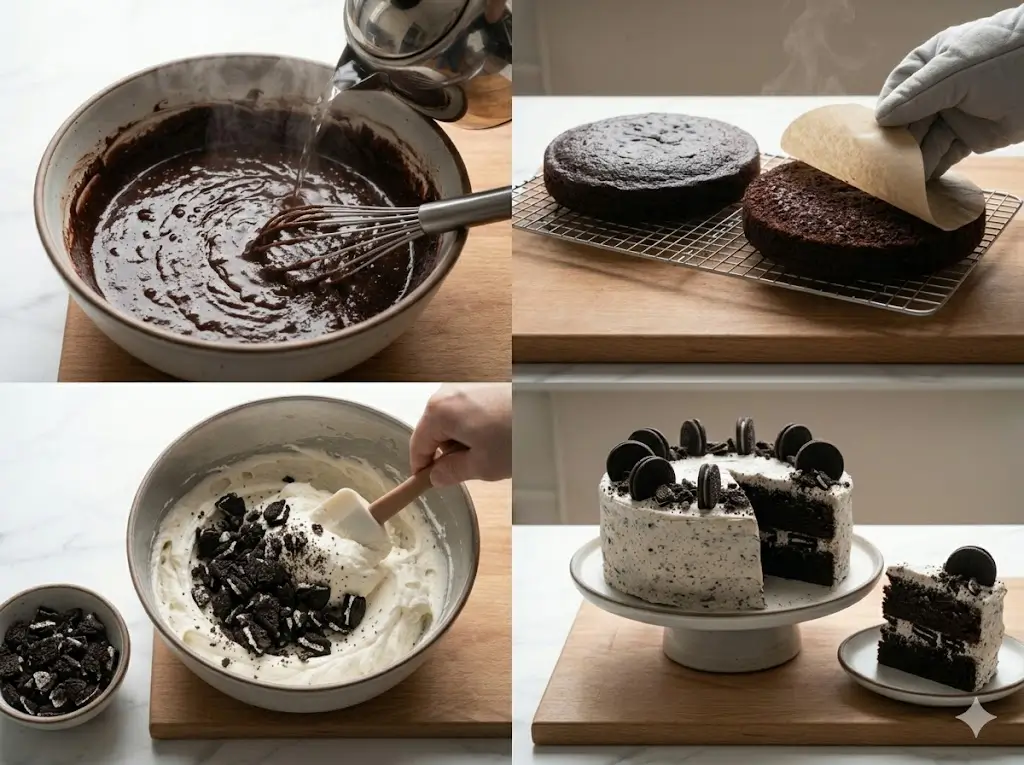
Carefully and slowly pour the boiling water into the batter while the mixer is running on its lowest speed. Mix just until the water is incorporated. The batter will become very thin and liquidy—don’t panic, this is exactly how it should look! For a deeper understanding of batter consistencies, review our cake baking formulas and ratios.
Step 6: Bake the Layers
Divide the thin batter evenly between your prepared cake pans. Bake in the preheated oven for 30 to 35 minutes. Test for doneness by inserting a toothpick into the center; it should come out clean or with a few moist crumbs attached.
Step 7: Cool Completely
Allow the cakes to cool in their pans for 10 minutes before carefully turning them out onto wire cooling racks. Crucial Tip: They must cool completely before you even think about adding frosting.
Step 8: Whip the Buttercream Base
While the cakes cool, prepare the frosting. In a stand mixer, beat the softened butter on medium-high speed until it is very pale and creamy (about 4-5 minutes).
Step 9: Add Sugar and Flavor
Reduce the speed to low and gradually add the powdered sugar, one cup at a time. Once incorporated, add the vanilla extract and 2 tablespoons of heavy cream. Increase the speed to medium-high and whip for another 3 minutes until fluffy. If it’s too thick, add the remaining tablespoon of cream.
Step 10: Fold in the Cookies
Remove the bowl from the mixer. Using a rubber spatula, gently fold the crushed cookies into the buttercream until evenly distributed.
Step 11: Assemble and Frost
Place one cooled cake layer on a serving plate. Spread an even layer of frosting over the top. Place the second layer on top. Use the remaining frosting to cover the top and sides of the cake. Use an offset spatula to create a smooth finish or decorative swirls. If you want to elevate the look, explore our advanced cake decorating guide.
Nutritional Information
Understanding what’s in your slice can help you enjoy this treat mindfully. (Note: These are approximate values based on 1 slice, assuming a 12-slice yield).
- Calories: 580 kcal
- Carbohydrates: 78g
- Protein: 5g
- Fat: 29g
- Saturated Fat: 15g
- Cholesterol: 70mg
- Sodium: 420mg
- Sugar: 58g
Data Insight: A single slice provides a significant portion of daily carbohydrates and sugars, making it best suited as an occasional indulgence rather than an everyday snack.


Healthier Alternatives for the Recipe
If you love the flavor profile but want to make slightly better-for-you choices, consider these modifications:
- Reduce the Sugar: You can reduce the granulated sugar in the cake batter to 1 ½ cups without significantly altering the texture.
- Swap the Fat: Replace half of the vegetable oil with unsweetened applesauce. This adds moisture and natural sweetness while cutting down on fat.
- Lighter Frosting: Instead of a traditional American buttercream, try a Swiss meringue buttercream, which feels lighter on the palate, or use a stabilized whipped cream folded with crushed cookies for a much less sugary topping.
- Dairy-Free: Use almond milk in the batter and a plant-based butter substitute for the frosting. Ensure your sandwich cookies are a vegan-friendly brand.
Serving Suggestions
Make your presentation as impressive as the taste. For more dessert inspiration, browse our ultimate guide to cake recipes.
- The Classic: Serve a chilled slice alongside a tall glass of ice-cold milk.
- A La Mode: Warm a slice slightly in the microwave for 10 seconds and serve with a scoop of vanilla bean or cookies and cream ice cream.
- Drip Effect: Create a simple chocolate ganache (equal parts chocolate and warm heavy cream) and let it drip down the sides of the frosted cake before topping with whole sandwich cookies. If you need help with this technique, check out our cake decoration for beginners.
Common Mistakes to Avoid
Even pros make mistakes. Here’s how to sidestep the common traps:
- Frosting Warm Cakes: This is a disaster waiting to happen. If the cake isn’t completely cool, the butter in the frosting will melt, causing your layers to slide and the frosting to pool at the base.
- Overmixing the Batter: Once the wet and dry ingredients meet, mix only until the flour streaks disappear. Overmixing develops the gluten, resulting in a dense, tough cake rather than a tender one.
- Using Cold Ingredients: If your eggs and milk are cold, they won’t emulsify properly with the oil, leading to an uneven bake. Always use room-temperature ingredients. Check out cake baking tips and techniques for more foundational rules.
- Crushing Cookies Too Fine: If you turn all the cookies into dust for the frosting, the frosting will turn a muddy gray color and you’ll lose the satisfying textural crunch. Keep some distinct pieces!


Storing Tips for the Recipe
Keep your creation tasting fresh for days with proper storage techniques.
- Room Temperature: If your kitchen is cool (below 70°F/21°C), the frosted cake can be stored in an airtight cake dome at room temperature for up to 2 days.
- Refrigeration: Because the frosting contains a significant amount of butter and a little cream, refrigerating is best for longer storage. Store it in an airtight container for up to 5 days. Crucial: Always let refrigerated slices sit at room temperature for 30-45 minutes before eating, or the cake will seem dry and the frosting hard.
- Freezing: This cake freezes exceptionally well. You can freeze the unfrosted layers wrapped tightly in plastic wrap and foil for up to 3 months. You can also freeze individual frosted slices in airtight containers for up to 2 months. Thaw overnight in the fridge.
Conclusion
This spectacular dessert combines incredibly moist chocolate layers with a rich, cookie-packed buttercream. By blooming the cocoa and avoiding overmixing, you guarantee a tender, flavorful bake that will impress anyone.
We’d love to see your creations! Try the recipe, snap a photo, and share your feedback in the comments below. Don’t forget to subscribe to our blog for more tips and explore the complete guide to cake types for your next project!
FAQs
Can I make this cake ahead of time?
Absolutely. The cake layers can be baked, cooled, wrapped tightly, and stored at room temperature overnight or frozen for up to 3 months. The frosting can be made a day ahead and stored in the fridge; just let it come to room temperature and re-whip it briefly before using.
Why did my cake sink in the middle?
A sunken cake usually means the batter was underbaked, the oven door was opened too early in the baking process, or your leavening agents (baking powder/soda) are expired. Always test with a toothpick and check the expiration dates on your pantry staples.
Can I use a different type of cookie?
Yes! While classic chocolate sandwich cookies are traditional, you can substitute them with golden sandwich cookies, mint-flavored ones, or even peanut butter-filled cookies to customize the flavor profile.
Do I have to use boiling water?
Yes, the boiling water is essential. It “blooms” the cocoa powder, which dramatically enhances the chocolate flavor and contributes to the exceptionally moist texture of the crumb. Using cold or warm water will result in a less flavorful, potentially drier cake.
Oreo cake: 7 best tips for baking it
Ingredients
Equipment
Method
Step 1: Prep Your Pans and Oven
Preheat your oven to 350°F (175°C). Generously grease two 8-inch round cake pans and line the bottoms with parchment paper rounds. This ensures your delicate chocolate layers will release effortlessly after baking.Step 2: Combine the Dry Ingredients
In a large mixing bowl, whisk together the all-purpose flour, granulated sugar, Dutch-processed cocoa powder, baking powder, baking soda, and salt. Make sure the cocoa powder has no lumps; sifting it first is highly recommended for the smoothest batter.Step 3: Mix the Wet Ingredients
In a separate medium bowl, whisk together the whole milk, vegetable oil, room-temperature eggs, and vanilla extract until well combined.Step 4: Combine Wet and Dry
Pour the wet ingredients into the dry ingredients. Using your mixer on low speed, beat until just combined. The batter will be very thick at this stage.Step 5: Incorporate the Boiling Water
Carefully and slowly pour the boiling water into the batter while the mixer is running on its lowest speed. Mix just until the water is incorporated. The batter will become very thin and liquidy—don't panic, this is exactly how it should look! For a deeper understanding of batter consistencies, review our cake baking formulas and ratios.Step 6: Bake the Layers
Divide the thin batter evenly between your prepared cake pans. Bake in the preheated oven for 30 to 35 minutes. Test for doneness by inserting a toothpick into the center; it should come out clean or with a few moist crumbs attached.Step 7: Cool Completely
Allow the cakes to cool in their pans for 10 minutes before carefully turning them out onto wire cooling racks. Crucial Tip: They must cool completely before you even think about adding frosting.Step 8: Whip the Buttercream Base
While the cakes cool, prepare the frosting. In a stand mixer, beat the softened butter on medium-high speed until it is very pale and creamy (about 4-5 minutes).Step 9: Add Sugar and Flavor
Reduce the speed to low and gradually add the powdered sugar, one cup at a time. Once incorporated, add the vanilla extract and 2 tablespoons of heavy cream. Increase the speed to medium-high and whip for another 3 minutes until fluffy. If it's too thick, add the remaining tablespoon of cream.Step 10: Fold in the Cookies
Remove the bowl from the mixer. Using a rubber spatula, gently fold the crushed cookies into the buttercream until evenly distributed.Step 11: Assemble and Frost
Place one cooled cake layer on a serving plate. Spread an even layer of frosting over the top. Place the second layer on top. Use the remaining frosting to cover the top and sides of the cake. Use an offset spatula to create a smooth finish or decorative swirls. If you want to elevate the look, explore our advanced cake decorating guide.