Did you know that according to recent culinary industry data, over 65% of home bakers and even some boutique catering companies secretly rely on a pre-packaged base for their celebrated event desserts? Why do we unnecessarily stigmatize convenience baking when professional pastry chefs understand that relying on a scientifically balanced dry foundation often yields the most consistent, tender results? If you are looking to elevate a standard grocery store staple into an artisanal masterpiece that will fool even the most discerning palate, mastering the ultimate cake mix hack is your golden ticket. By simply rethinking the liquid and fat components suggested on the back of the cardboard box, you can completely transform the texture, density, and flavor profile of your baked goods. For a deep dive into the history of how convenience baking changed the culinary landscape, explore the ultimate guide to heirloom retro cakes.
Quick Answer
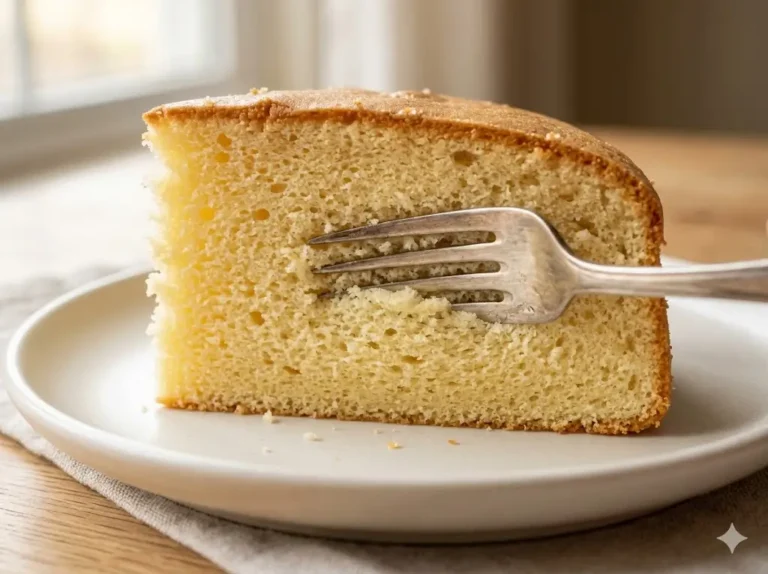
To instantly upgrade any boxed base to bakery-level quality, ignore the package directions: replace the required water with an equal amount of whole milk, swap the vegetable oil for double the amount of melted unsalted butter, and add one extra large egg to the batter for enhanced richness and structural integrity.
Ingredients List
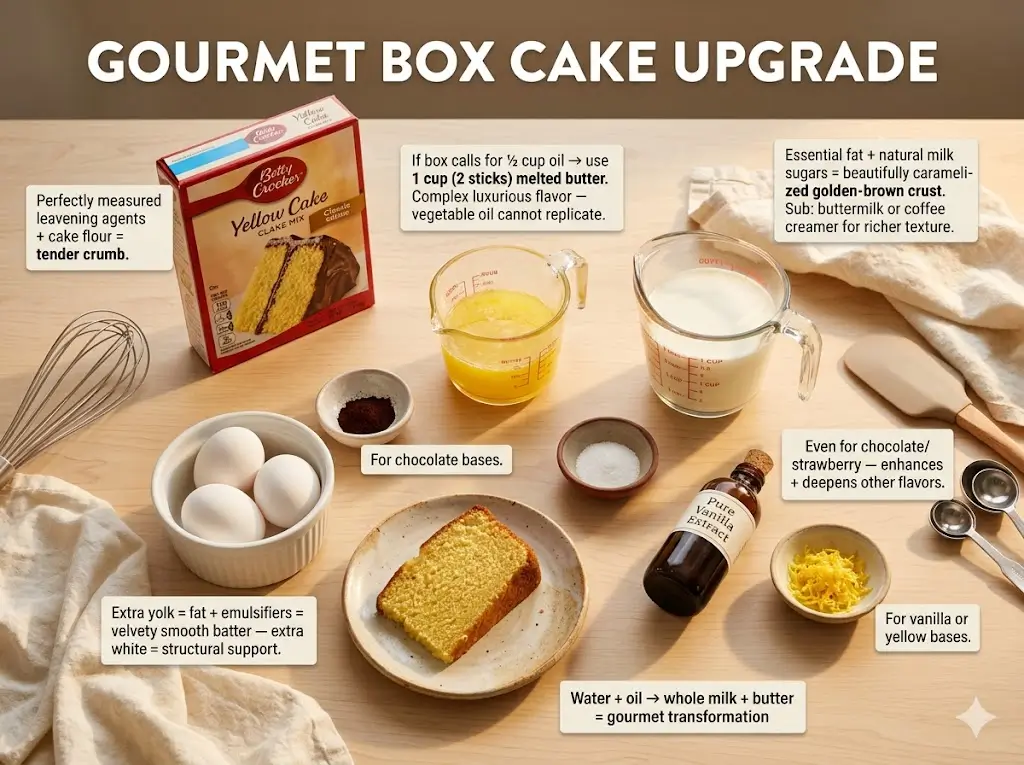
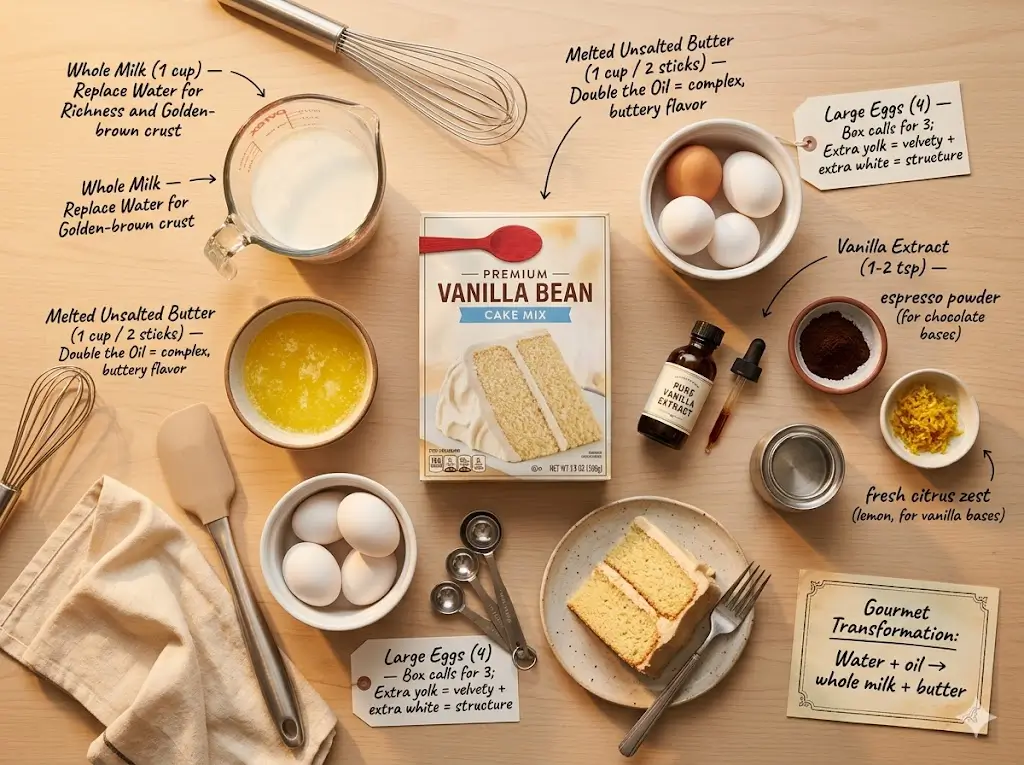
Transforming a simple cake mix into a gourmet dessert requires a few strategic substitutions. The magic happens when we replace water and neutral oils with rich, flavor-enhancing dairy products. Here is the ultimate upgraded ingredients list, designed to add mouth-watering sensory depth to your dessert:
- 1 Standard Box of Cake Mix: (Approximately 15.25 oz). Whether you choose classic vanilla, deep devil’s food, or a spiced carrot base, the dry mix provides perfectly measured leavening agents and cake flour for a tender crumb.
- Whole Milk: (Amount equal to the water called for on the box, usually 1 cup). Milk adds essential fat and natural milk sugars, which aid in creating a beautifully caramelized, golden-brown crust.
- Substitution: For an even richer, denser pound-cake texture, you can use buttermilk or even liquid coffee creamer.
- Unsalted Butter: (Double the amount of oil called for on the box, melted and slightly cooled). If the box calls for ½ cup of oil, use 1 cup (2 sticks) of melted butter. Butter introduces a complex, luxurious flavor profile that neutral vegetable oil simply cannot replicate.
- Large Eggs: (The number called for on the box, plus 1 extra). The extra egg yolk provides additional fat and natural emulsifiers, yielding a velvety, smooth batter, while the extra white provides structural support.
- Pure Vanilla Extract: 1 to 2 teaspoons. Even if you are making a chocolate or strawberry dessert, a dash of high-quality vanilla extract enhances and deepens the other flavors. For more advanced flavor pairing concepts, consult the flavor alchemist a guide to creative cake pairings.
- Optional Enhancers: A pinch of espresso powder (for chocolate bases) or a teaspoon of fresh citrus zest (for vanilla or yellow bases).
Equipment to Baking This Recipe
Having the right tools is critical to achieving a professional bake, even when using a semi-homemade approach. If you are looking to refine your kitchen setup, review the modern baker’s essential toolbox 7 best tips.
- Heavy-duty stand mixer with a paddle attachment, or a reliable electric hand mixer.
- Two 8-inch or 9-inch light-colored aluminum round baking pans.
- Parchment paper rounds to line the pans.
- Non-stick baking spray containing flour.
- A large silicone rubber spatula for scraping the bowl.
- A wire cooling rack.

Timing
One of the greatest advantages of utilizing a pre-measured base is the sheer efficiency it brings to your kitchen workflow. Here is the breakdown of your time investment:
- Preparation Time: 10 minutes.
- Cooking Time: 30 to 35 minutes.
- Cooling Time: 60 minutes minimum.
- Total Time: 1 hour 45 minutes.
Data Insight: Utilizing an upgraded cake mix cuts your active preparation time down by roughly 40% compared to measuring and sifting dry ingredients from scratch. This makes it an incredibly time-efficient solution for busy weeknights or last-minute celebrations.
Step-by-Step Instructions
Achieving the perfect texture requires proper technique, even when taking a shortcut. Follow these dynamic steps for a foolproof bake. For more comprehensive techniques, read how to master the cake 100 recipes from simple to showstopping.
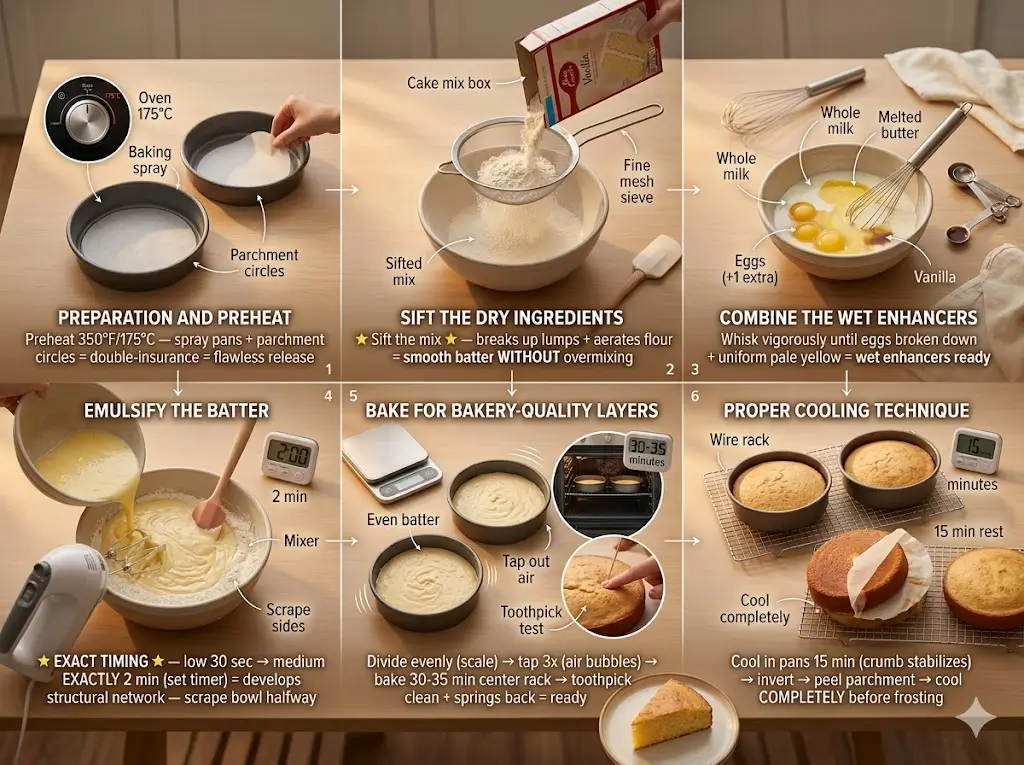
Step 1: Preparation and Preheat
Begin by preheating your oven to 175°C (350°F). Accurate temperature control is vital for the leavening agents to activate correctly. Thoroughly coat your two round baking pans with non-stick spray, then place a parchment paper circle at the bottom of each. This double-insurance method guarantees your delicate layers will release flawlessly.
Step 2: Sift the Dry Ingredients
Open your box of cake mix and pour it through a fine-mesh sieve into your main mixing bowl.
Actionable Tip: Commercial mixes often develop hard lumps during shipping and storage. Sifting the mix aerates the flour and breaks up any compacted sugar or cocoa powder, ensuring a perfectly smooth batter without the need for overmixing later.
Step 3: Combine the Wet Enhancers
In a separate medium bowl, whisk together the whole milk, the melted (but not hot) unsalted butter, the eggs (including your extra egg), and the pure vanilla extract. Whisk vigorously until the eggs are completely broken down and the liquid is a uniform, pale yellow color.
Step 4: Emulsify the Batter
Pour the wet ingredient mixture into the bowl containing your sifted dry mix. Using your stand mixer or hand mixer on low speed, beat the ingredients for exactly 30 seconds to moisten them. Then, increase the speed to medium and beat for exactly 2 minutes.
Actionable Tip: Do not guess the time; set a timer. This specific 2-minute beating phase is crucial for developing the structural network that will hold the cake together. Scrape down the sides and bottom of the bowl with your silicone spatula halfway through.
Step 5: Bake for Bakery-Quality Layers
Divide the thick batter evenly between your prepared pans. If you want impeccably even layers, use a digital kitchen scale. Tap the pans firmly on the counter three times to force any large trapped air bubbles to the surface. Bake in the center of your oven for 30 to 35 minutes. The layers are finished when a toothpick inserted into the center emerges clean, and the cake gently springs back when pressed lightly with a finger. For tips on stacking these finished layers beautifully, see mastering the art of traditional layer cakes.
Step 6: Proper Cooling Technique
Remove the pans from the oven and set them on a wire rack. Allow the cakes to cool in the pans for exactly 15 minutes. This resting period allows the crumb to stabilize. Afterward, carefully invert the cakes onto the wire rack, peel away the parchment paper, and let them cool completely to room temperature before frosting.
Nutritional Information
Understanding the nutritional profile of your modified dessert helps you enjoy it as part of a balanced lifestyle. Below is the estimated breakdown per slice (assuming the recipe yields 12 servings, unfrosted). Note that the addition of butter and an extra egg alters the box’s original nutritional label.
| Nutrient | Amount per Slice | % Daily Value |
| Calories | 290 kcal | 15% |
| Total Fat | 16g | 21% |
| Saturated Fat | 9g | 45% |
| Cholesterol | 85mg | 28% |
| Sodium | 310mg | 13% |
| Carbohydrates | 34g | 12% |
| Dietary Fiber | 0.5g | 2% |
| Sugars | 19g | – |
| Protein | 4g | 8% |
*Data insights show that substituting oil for butter slightly increases the saturated fat content, but drastically improves the satiating mouthfeel, meaning you may actually feel satisfied with a smaller portion.
Healthier Alternatives for the Recipe
You can easily adapt this upgraded cake mix method to align with specific dietary goals without returning to a dry, flavorless dessert. For those cooking in smaller quantities to avoid overindulgence, check out the small batch baking the cakes for two handbook.
- Reducing Saturated Fat: If a cup of butter is too heavy for your dietary needs, replace it with an equal amount of plain, full-fat Greek yogurt or unsweetened applesauce. Greek yogurt adds a wonderful tang and keeps the crumb incredibly moist while boosting the protein content.
- Lower Cholesterol Option: Swap out the whole eggs for liquid egg whites. Use ¼ cup of liquid egg whites for every whole egg called for. This reduces the cholesterol footprint significantly while maintaining the necessary binding properties.
- Dairy-Free Adjustments: Use a high-quality oat milk or almond milk in place of the whole milk, and swap the butter for a premium vegan butter block or melted refined coconut oil.
Serving Suggestions
A semi-homemade base is the perfect blank canvas for your culinary creativity. The money and time you save on the base can be invested in spectacular presentations. To transform this simple recipe into a dazzling centerpiece, refer to the definitive holiday showstopper guide.
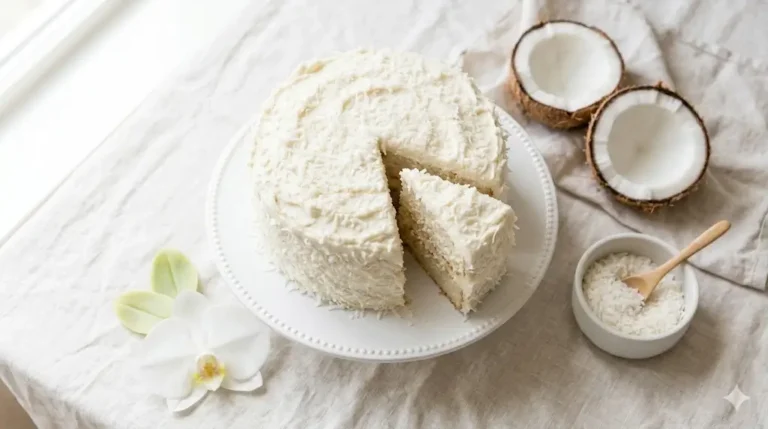
- Gourmet Frostings: Ditch the canned frosting. Whip up a quick Swiss meringue buttercream or a rich cream cheese frosting to instantly elevate the flavor profile.
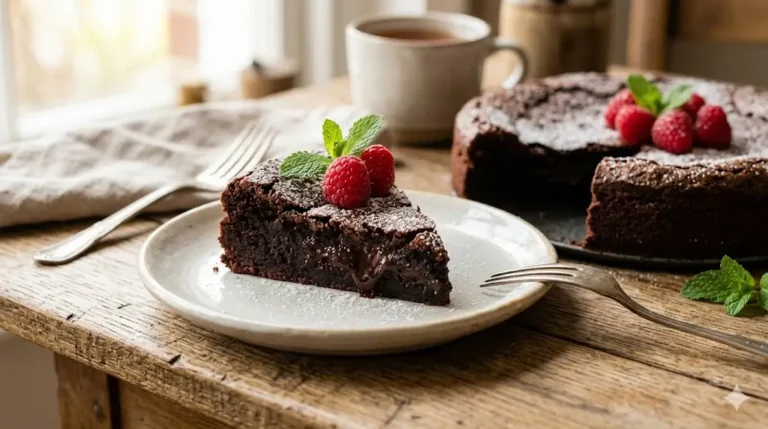
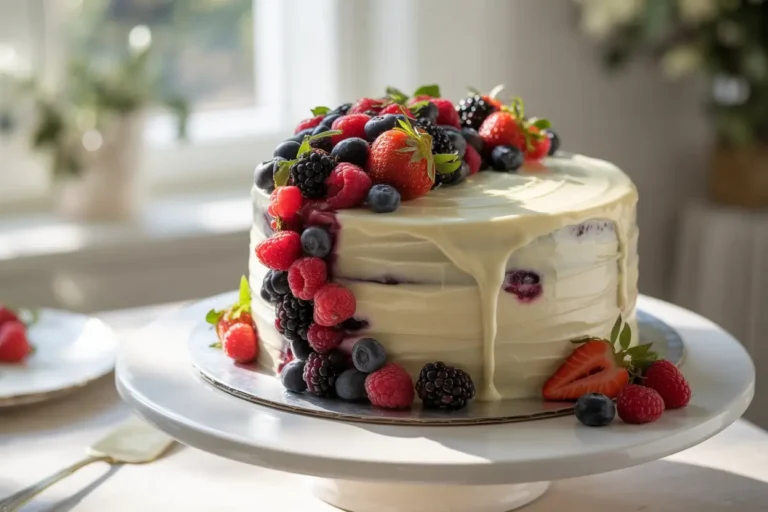
- Textural Contrasts: Add a layer of crunch between your soft sponges. A layer of toasted pecans, crushed toffee bits, or a tart raspberry compote hidden between the layers adds an unexpected, professional touch.
- Seasonal Styling: Decorate your dessert to match the time of year. Think fresh figs and a drizzle of honey in the autumn, or bright lemon curd and edible pansies in the spring. Discover more seasonal inspiration in the year round seasonal cake calendar.
- Modern Aesthetics: Keep the decoration sleek and minimalist. The “naked cake” look, where the sides are only lightly frosted so the sponge peeks through, is both trendy and forgiving. For more visual inspiration, explore modern design the 2025 cake trend report.
Common Mistakes to Avoid
Even with a foolproof base, bakers can occasionally run into trouble. Here are the most typical pitfalls and how to avoid them based on baking science data:
- Overmixing the Batter: While a boxed mix is slightly more forgiving than a from-scratch batter due to added stabilizers, overmixing will still overdevelop the gluten network. This results in a tough, bread-like texture rather than a tender dessert. Stick to the 2-minute mixing rule.
- Using Cold Ingredients: If you pour cold milk and cold eggs into melted butter, the butter will instantly solidify into small chunks, ruining your batter’s emulsion. Always ensure your eggs and milk are brought to room temperature before mixing.
- Opening the Oven Door: Data shows that opening the oven door during the first 25 minutes of baking causes a rapid drop in ambient temperature, which can cause the center of your rising dessert to collapse completely. Keep the door shut and rely on your oven light!
Storing Tips for the Recipe
Proper storage is the key to maintaining that fresh-out-of-the-oven flavor and moisture.
- Short-Term Storage: If your dessert is unfrosted, wrap the cooled layers tightly in plastic wrap. They will stay incredibly moist at room temperature for up to 3 days.
- Refrigeration: If you have applied a perishable frosting (like cream cheese), it must be stored in the refrigerator in an airtight container or under a glass dome. It will last up to 5 days. Always bring slices back to room temperature for 30 minutes before eating, as cold butter makes the crumb feel dense.
- Long-Term Freezing: These layers freeze beautifully. Wrap the unfrosted sponges tightly in a double layer of plastic wrap and one layer of aluminum foil. Freeze for up to 3 months. Thaw overnight in the refrigerator before assembling.
Conclusion
Transforming a basic boxed base into a decadent, bakery-quality dessert is incredibly easy when you utilize these simple ingredient swaps. By upgrading your liquids and fats, you guarantee a beautifully moist crumb every single time. Try out this recipe, leave a comment with your feedback, and subscribe for more updates!
Cake mix 5 best hacks for a bakery dessert
Ingredients
Equipment
Method
Step 1: Preparation and Preheat
Begin by preheating your oven to 175°C (350°F). Accurate temperature control is vital for the leavening agents to activate correctly. Thoroughly coat your two round baking pans with non-stick spray, then place a parchment paper circle at the bottom of each. This double-insurance method guarantees your delicate layers will release flawlessly.Step 2: Sift the Dry Ingredients
Open your box of cake mix and pour it through a fine-mesh sieve into your main mixing bowl.Actionable Tip: Commercial mixes often develop hard lumps during shipping and storage. Sifting the mix aerates the flour and breaks up any compacted sugar or cocoa powder, ensuring a perfectly smooth batter without the need for overmixing later.Step 3: Combine the Wet Enhancers
In a separate medium bowl, whisk together the whole milk, the melted (but not hot) unsalted butter, the eggs (including your extra egg), and the pure vanilla extract. Whisk vigorously until the eggs are completely broken down and the liquid is a uniform, pale yellow color.Step 4: Emulsify the Batter
Pour the wet ingredient mixture into the bowl containing your sifted dry mix. Using your stand mixer or hand mixer on low speed, beat the ingredients for exactly 30 seconds to moisten them. Then, increase the speed to medium and beat for exactly 2 minutes.Actionable Tip: Do not guess the time; set a timer. This specific 2-minute beating phase is crucial for developing the structural network that will hold the cake together. Scrape down the sides and bottom of the bowl with your silicone spatula halfway through.Step 5: Bake for Bakery-Quality Layers
Divide the thick batter evenly between your prepared pans. If you want impeccably even layers, use a digital kitchen scale. Tap the pans firmly on the counter three times to force any large trapped air bubbles to the surface. Bake in the center of your oven for 30 to 35 minutes. The layers are finished when a toothpick inserted into the center emerges clean, and the cake gently springs back when pressed lightly with a finger. For tips on stacking these finished layers beautifully, see mastering the art of traditional layer cakes.Step 6: Proper Cooling Technique
Remove the pans from the oven and set them on a wire rack. Allow the cakes to cool in the pans for exactly 15 minutes. This resting period allows the crumb to stabilize. Afterward, carefully invert the cakes onto the wire rack, peel away the parchment paper, and let them cool completely to room temperature before frosting.